
A DSLR is a very versatile general-purpose camera and can perform a wide range of detailed tasks and is the camera people most likely use. The type of lunar image you require depends on the imaging train you want to employ to frame the target. The imaging train denotes the type of lens, telescope, optics and camera used for the capture. I will discuss various imaging train options which show the field of view and the degree of lunar details expected. This will give you some idea of the equipment you will need to purchase for the type of image you want to capture.
You also need to decide which brand of DSLR camera to purchase, i.e. a Nikon or Canon? A question you may ask when purchasing a DSLR. In my experience, I have seen excellent images from both brands of camera, but ultimately you will have to decide how a camera feels to you. I use a Canon and, in my experience, it has all the features required for astrophotography work. Whichever brand you decide on, ensure it has the ‘live’ view and remote shutter release functions, as these features will help you with astrophotography. The ‘live’ view function shows a live image on the screen and is very useful for focusing the camera.
I used a Canon 6D DSLR for the examples discussed in this section. This camera has a full frame sensor with the dimensions 35.8 x 23.9mm. You should be aware that other DSLR cameras may have slightly different sensor sizes which will slightly affect the field of view as compared with the examples shown: This is especially noticeable if the camera has a crop sensor, as this smaller sensor will provide an image of 1.5x the focal length of a full frame sensor. This is known as the crop factor but all the general concepts remain the same.
As the Moon is so bright in the sky, it is very easy to overexpose the image. Therefore, when imaging with a DSLR, the camera settings only require a low ISO setting in the region of 100-200 and a high shutter speed within the ranges of 1/800 – 1/250 sec. I have annotated each of my lunar photos with the capture settings to give you an idea of where to start. There will be options on the camera to shoot images in JPEG or RAW file format. RAW uses a lossless compression which means that all the data and information of the picture is retained, JPEG on the other hand uses a ‘lossy’ compression that loses data to compress the file into a smaller file size. You should shoot in RAW format to produce the best resolution image. The only downside is that each raw image creates a large file size. However, JPEG does have its place as these files can easily be uploaded onto the Internet and the file size is much smaller if storage is an issue.
The DSLR camera not only allows you to capture single pictures but you can also use the DSLR in video mode to collect a high number of frames to create a stacked image. We will discuss both capturing options in this section.
2.1 Capturing Lunar Images Using Lenses
When considering which lens to use for imaging the Moon, you need to understand how the Moon will look at varying focal lengths. This section will show you the image which you can expect using different lenses from 24mm to 600mm and you will soon learn that focal length is key when taking detailed pictures of the Moon. There are so many lenses available, which differ considerably in price, that it can be difficult to choose the lens which best suits your purpose. Camera lenses generally specify a focal length and a number called a focal ratio (f) which are a guide to how well a camera will perform. The focal ratio is a calculation of the focal length divided by the aperture and indicates how much light a lens will allow in.

When comparing two lenses with the same focal length but different focal ratios, the lower f-ratio calculates a larger aperture. For example, a 400mm lens f/2.8 will have a 143mm aperture, and a 400mm lens f/4 will have a 100mm aperture, so you can see that the f/2.8 has a larger diameter lens and will let in more light than the f/4, in fact, it lets in more than double the amount!
The smaller f-ratio number is known as a quicker lens due to its increased light gathering capacity and this allows you to set a lower ISO and achieve a faster shutter speed compared with the f/4. The clarity is usually better and distortion is less evident in the faster lenses as the glass is better quality. Does this mean you should buy the most expensive lens? In my experience you can successfully use the slower lenses as the Moon is so bright, i.e. the lower light gathering capacity is not too much of a hindrance as you can still use the low ISO settings. Even zoom lenses, which are generally slower than fixed focal length lenses, can give reasonable results. The images in the following examples were captured using zoom lenses at different focal lengths.
A 24-105mm zoom lens generally comes as a standard kit lens with many DSLRs and I will start with this focal range. A lens with this focal range is an excellent versatile lens and is generally used for everyday photography and, when considering imaging the Moon using this lens and DSLR combination, you can expect a widefield image of the Moon. This widefield lunar image works well in a landscape-type shot, i.e. by having the Moon and a landmark in the same picture, especially if the Moon is visible during the day or at dusk. However, the lunar details will be minimal.
If you focus the camera using the autofocus, this will work well on the lower focal length lenses but will become less reliable when you start reaching focal lengths >150mm and it is advisable to use manual focus. You can achieve excellent manual focus by using the live view screen and zooming in on the Moon or another bright point, such as a distant star. You may have to significantly increase the ISO for the image to appear in the live view before focusing, especially if you are using a star. Remember to change the ISO back when you are ready to image.
24mm Focal length
The image below shows the field of view you would expect using a full frame sensor with the lens at 24mm and, as you can see, the image is a landscape shot. A moon captured in a landscape can produce a tremendous scenic image, especially if you use landmarks or landscapes to set the scene of the picture. Very little detail can be seen regarding lunar features although you can usually make out the phase of the Moon. As you can see, this type of image is not about capturing lunar detail but about capturing a scenic landscape view which can be just as captivating. Due to the lack of lunar detail, you do not need to worry too much about overexposing the Moon; rather concentrate on exposing the rest of the image correctly. The wide field of view allows scenic shots to be taken easily with a handheld camera with no further equipment necessary. You just need to ensure that the Moon is in the right place at the right time thereby allowing you to frame the shot correctly.

Canon 6D DSLR with 24-105mm lens.

Canon 6D 24mm, ISO800, 1/800sec.
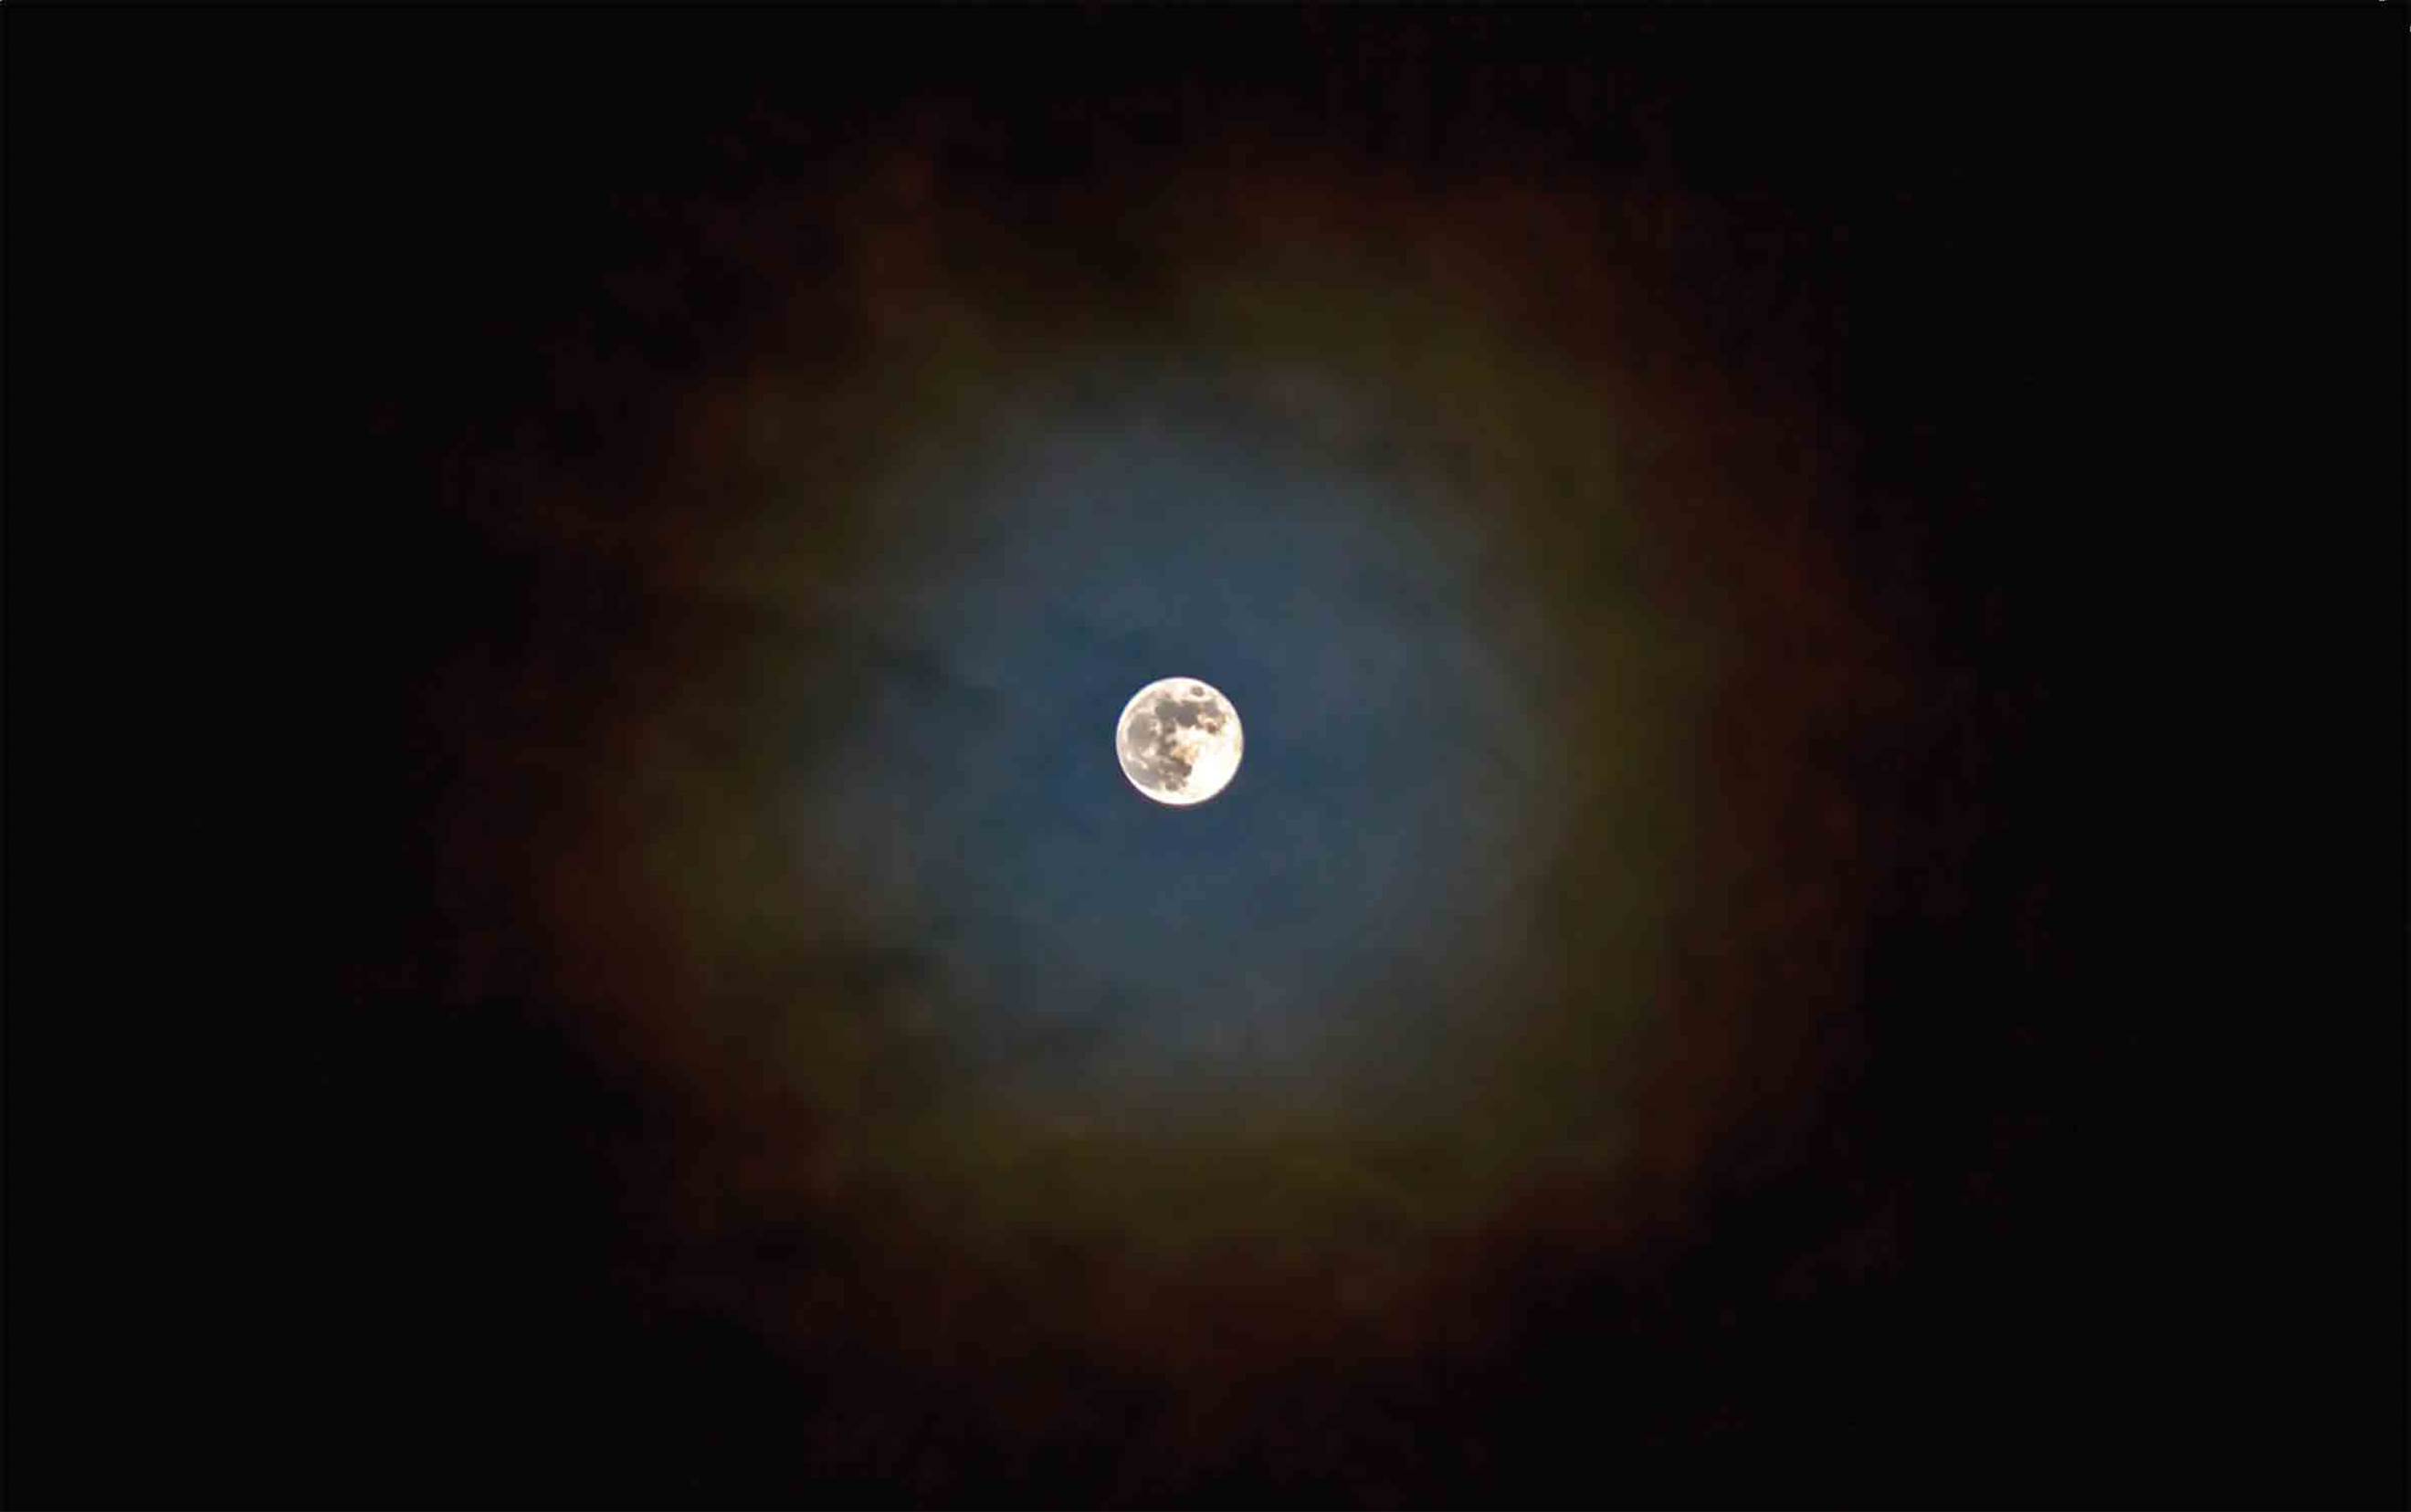
Canon 6D, 105mm, ISO800, 1/100sec, cropped.
105mm Focal length
If the focal length is increased to 105mm, the magnification will be enough to show the ‘maria’ or lunar seas. The image above shows a picture of a lunar corona taken through thin cloud. The image is slightly cropped to frame the feature better, but it shows you the level of lunar detail you can expect from the setup. When taking pictures at this focal length, they still have a relatively wide field of view and the Moon is still comparatively small in the frame, but you can pick out a sharper moon phase and some surface detail.
Like the 24mm setting, the images are generally landscape or scenic shots with slightly clearer lunar features. The lunar corona is a stunning target when conditions allow, and you can see it when the Moon is visible through thin clouds; the haloed Moon looks quite surreal. Taking shots at this focal length is still less sensitive to movement and images can be taken handheld without too much trouble.
Increasing the focal length further
The larger lenses have a focal length within the range of 150-600mm and are standard lenses which many photographers may already have in their collection; they are especially popular with wildlife photographers. Imaging within this focal length range can provide quite detailed views of the Moon, and some of the more exciting surface features will begin to show. You can probably manually hold the camera at the 150mm setting, but the camera will certainly need to be tripod-mounted for the higher 600mm focal length setting. These long focal lengths are so sensitive to vibration that you cannot hold the camera steady enough to produce a clear image as all your movements are amplified, resulting in excessive blurring on the image. Even the image stabilisation will not be enough to counteract these handheld movements. At the higher focal lengths, the autofocus has its limitations and can refocus without you realising it and blur the image. Therefore, to be on the safe side, use manual focus at these high focal lengths.
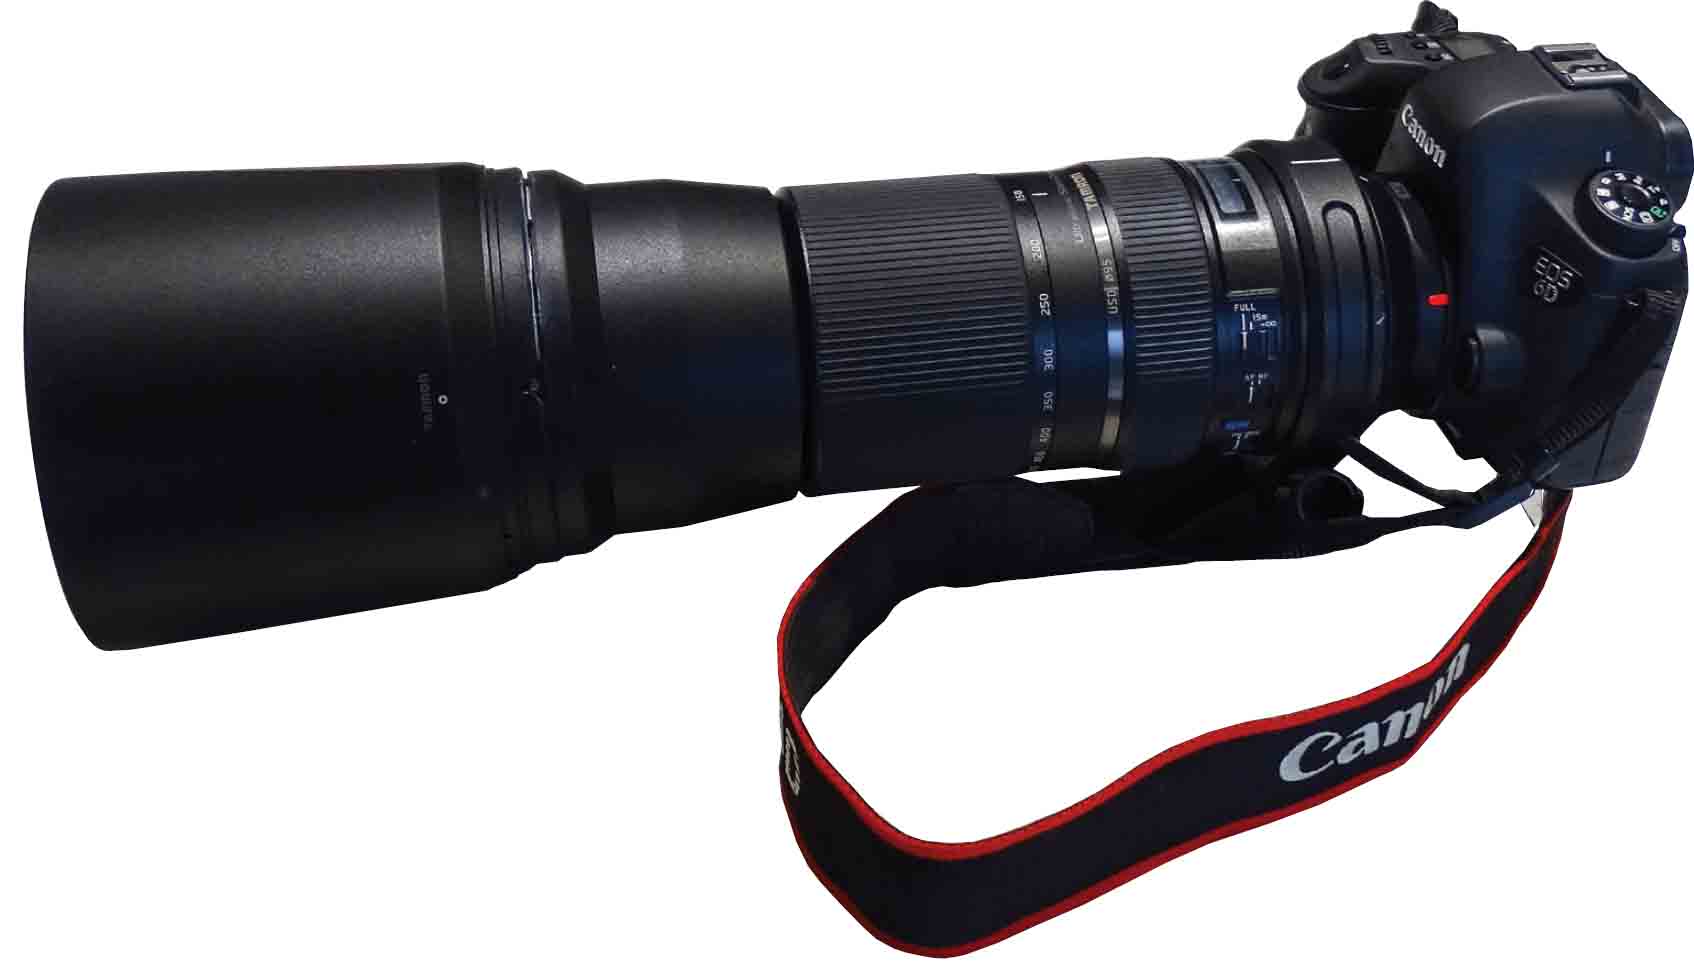
150-600mm high focal length lens attached to DSLR
150mm Focal length
At 150mm focal length, the lunar target remains relatively small in the field of view; however, some of the more extensive crater details are starting to emerge. Cropping and enlarging will enhance these details. The picture below is an uncropped image showing the size of the full moon in respect of the focal length.

Canon 6D, 150mm, ISO 200, 1/400 sec, uncropped

Canon 6D, 600mm, ISO 200, 1/500 sec, uncropped
600mm Focal length
At this focal length, the lunar image is a satisfying size on the sensor and finer crater detail is starting to emerge. At this focal length we can start producing quality full moon images in exquisite detail. In the image above you can see the larger impact rays from Copernicus, Kepler and Tycho, mountainous regions and different terrain features. To increase the clarity of the image, you should consider stacking multiple images together to produce a higher quality final image. I will discuss the technique in more detail in a later section. A limiting factor is the large sensor size and if you want to show just the Moon and its defining features, the images need to be cropped to enlarge the Moon. This will produce a better framed shot and, as you can see, there is still a lot of space around the Moon. A cropped image at 600mm creates a well-defined full moon shot as the image is large enough on the sensor to maintain detail. You can also use this lens for lunar landscapes or earthshine shots, earthshine is a visual effect produced by the reflected sunlight from Earth, an example is shown in the lunar features section.
Capturing images at these higher focal lengths requires the camera to be tripodmounted as any minor movements caused by manually holding the camera will be amplified enough to cause motion blur. There are also other additional techniques to consider when you start shooting at these higher focal lengths. As I have said, it is better to use the manual focus; however, you can attempt to use autofocus but ensure that you set the camera setting for the focus to the spot metering. This setting will ensure that the camera focuses on a specific point, i.e. the Moon. Also, it would be worth investing in a shutter release cable to allow external control of the camera, as any hand movement of the camera, such as pressing the shutter button, can easily cause motion blur.
Image quality
The images below show a comparison of the previous images taken at 600mm and 150mm respectively. They have been cropped and made the same size to show how the quality of the picture varies just by changing the focal length. You can see that the sharpness and clarity of the Moon in the 600mm image is far better than that of the 150mm image. The reason for this is that there are far fewer pixels in the 150mm image than in the 600mm image. Look at the original uncropped version and see how small the lunar image is on the sensor at 150mm compared to the image at 600mm. As the 600mm image below has sharper detail, you can see how important it is to frame the image correctly and use as many pixels as possible on the target in question. Otherwise, you will lose the resolution, especially if you intend cropping the image. The increased focal length helps with the framing, as it magnifies the target to utilise more sensor space and therefore more pixels. The difference in quality shows the importance of framing and how using the increased focal length helps to capture finer surface features. Bad framing is one of the reasons that cropping leads to the loss of resolution and this loss should be considered if you are cropping and enlarging images.

You can increase the clarity and reduce the graininess of an image by using a process called stacking whereby you have multiple photos of the same feature and stack them together using software to increase the resolution of a final image. Stacking works extremely well, and you can learn more about the process in the image stacking section.
If you want to gain more focal length without attaching the DSLR to a telescope, there is the option of using a teleconverter which is generally much cheaper than a new lens or telescope. Adding a teleconverter to the imaging train can multiply the focal length of your lens from 1.4x to 2x. The downside of this is that it will reduce your lens speed, i.e. you will have to compensate by increasing the exposure time or ISO setting which may also affect image quality. The camera shake will be more pronounced due to the much higher focal length and a tripod would be required. Another downside is that teleconverters not only multiply the focal length but also any aberrations of the lens which is coupled with the teleconverter. As a result, you will notice on many lenses that image quality, i.e. sharpness and contrast, may be impaired, particularly with longer teleconverters (x2). However, the teleconverter should not be disregarded as an option, especially if you have one to hand, as some lens combinations may not perform too poorly, but as a rule in astrophotography, the addition of more glass to an optical system will always result in a loss of quality.
2.2 Capturing Images Using a Telescope
If you use a telephoto lens to capture the Moon, the results will be excellent and may be enough to produce the quality image you want; another option is to attach the camera directly to a telescope. The benefit of doing this is that you will open a vast array of imaging train options which have larger apertures and longer focal lengths compared with lenses. The best way to capture the highest resolution of the Moon is through a long focal length telescope. One of the telescopes I use is a Skymax PRO 180 which has a 180mm aperture and a focal length of 2700mm, f/15. As already mentioned, high-resolution imaging requires longer focal lengths. The downside of increasing the focal length is that the image will become dimmer, especially if you add a Barlow lens; this is where the aperture can help. The larger aperture will increase the light gathering power and will usually perform better than a lower aperture telescope with the same focal length. The effect will become most apparent when performing extremely high-resolution photography at very high focal lengths.

Canon 6D, 150-600mm lens, tripodmounted.
There is a wide range of telescopes on the market covering a variety of different focal lengths and, each telescope will offer a different view of the Moon. Many refractor telescopes have relatively small focal lengths which are even shorter than the 600mm zoom lens mentioned above, you may find that these refractors do not offer a significant benefit over camera lenses for imaging the Moon. These lower focal length refractors are more suited for dimmer deeper sky objects as they are more straightforward in design and generally have better optics and a smaller focal ratio than a camera lens, but for brighter targets such as the Moon, the benefits may be minimal when used directly. However, there is one benefit of using telescopes, as they are very versatile pieces of equipment and the focal length can be easily manipulated and increased. The easiest and most common way of increasing the focal length is to add a Barlow lens; typical Barlow lenses boost the focal length by two or three times. This will increase the focal ratio and make the imaging train ‘slower’ resulting in a dimmer image. Another beneficial feature of using a telescope is that you can use the eyepiece for additional magnification and take pictures directly through the eyepiece using a technique called eyepiece projection. However, a sturdy telescope mount will be needed as the equipment is now becoming quite heavy.
When attaching the DSLR to an imaging train which has a focal length higher than a 1000mm, the resolution of the image will be increased to such an extent that you will be able to identify larger craters and mountainous detail. This is an excellent way of learning how to navigate the lunar terrain. Although some lunar features and details will begin to emerge, the sensor on the DSLR is quite large and therefore the camera will still only capture a relatively wide field of view of the Moon, and you will not be able to view surface features in close detail. The high-resolution images are achieved using a high frame rate camera and discussed later in the book.
I will now discuss various ways of attaching a DSLR camera to a telescope. The examples below show two different designs of telescopes so, you can compare the connection techniques. The methods of connection can easily be interchanged between other designs of telescopes.
2.3 Capturing Images Using an 80mm Refractor Telescope
The examples use the following equipment:
• Skywatcher Esprit 80mm Refractor, 400mm focal length, f/5 focal ratio
• Skywatcher HEQ5 – Tracking mount
• Canon 6D DSLR
You may find minor differences between other telescope and accessory manufacturers, but the general concepts remain the same.
You can combine a DSLR camera easily with a telescope and there are different ways to attach the camera; however, each method of attachment will affect the desired magnification and field of view of the image. Even if you use the same telescope, the field of view may change significantly depending on the technique employed.
Prime focus
Prime focus is a term which denotes attaching the camera directly to the telescope like a huge lens. The benefits of prime focus are to minimise any other glass in the image train to maintain the optics at the ‘as designed’ specification. In the case of the Skywatcher Esprit 80mm, this is equivalent to using a very high-quality 400mm, f/5 lens. The downside of astronomical refractor telescopes is that they are prone to distortion around the edges of the field of view. However, you can remove this distortion by adding a special type of lens called a field flattener to the imaging train. A field flattener optically corrects this distortion and will allow you to use the full field of view without any issue. The distortion will be more noticeable if you are using a large sensor such as the one in a full frame camera where the projected image on the sensor is large. The distortion is greatly reduced if smaller sensors are used, as the field of view is narrower, and the light gathered to produce the image passes through the centre of the lens where the curvature and distortion is less. However, it is unlikely you will need a field flattener when imaging the Moon as the lunar image is small on a DSLR sensor. As refractor kits occasionally include a field flattener it is worthwhile understanding how it works. I have therefore included one in the set up for information purposes.

Expanded view of fixtures.
The image below shows a typical set up for attaching the DSLR to the telescope with a field flattener; it is essential to consult the manufacturer or supplier about compatible field flatteners, as specific distances are required to correct distortion. The Canon camera requires a standard M48 ring adapter which then attaches to one side the field flattener. The connecting ring of the field flattener is then attached to the telescope’s Optical Tube Assembly (OTA). Without the field flattener, the camera connects directly to the telescope, but you will need to check that the back-focus distance to the camera sensor is within range as sometimes the camera connection is too close and out of the focus range. An extension tube is required in this situation.
When the telescope and camera have been assembled, attach them to a sturdy tripod or dedicated telescope mount in preparation for lunar imaging. At this focal length tracking is not required, as the shutter speeds are fast enough not to be affected too severely by the motion of the Moon/Earth.
The image below shows how the image looks when taken through the Skywatcher Esprit 80mm refracting telescope with a 400mm focal length. The image is small and only occupies the centre of the sensor; however, the definition and sharpness of the features are excellent.

Assembled view.

Canon 6D, SW Esprit 80mm refractor, ISO100, 1/400sec, uncropped.

Canon 6D, SW Esprit 80mm refractor, ISO100, 1/400sec, cropped.
It is very important to focus accurately; this can be achieved using the telescopes own focuser or a separate dual speed focuser. It is preferable to use dual speed focusers, as they generally have a more sensitive mechanism for finding the focus point than some of the standard telescope focusers. A useful method of finding the focus point is to use the live view on the camera and focus on the Moon or a distant star. If you are focusing on a star, you may need to zoom in on the live view image to see the star properly, you can find the focus by adjusting the focusing wheel back and forth until you find the sharpest point. Out of focus stars are large and blurry but as you approach the focus point, the star will become smaller and sharper; the sharpest point is when the star looks the smallest.
The image above is the same image cropped. The quality of the optics is very good and chromatic aberration is negligible as the telescope is an ED Apochromatic (APO) triplet telescope, i.e. the telescope has extra-low dispersion glass and three apochromatic lenses which are designed to bring all the colours into focus in the same place. Chromatic aberration occurs when different colours come into focus at different distances from the lens. You need to consider these optical effects when choosing a telescope for imaging. Also bear in mind that higher quality glass will be more expensive. If your images have chromatic aberration, you can remove some of these colour defects during postprocessing.
2.4 Eyepiece Projection
As you have seen, the size of the lunar image on the sensor of a DSLR is quite small at prime focus, but you can use the eyepiece projection technique to further magnify the image by attaching the camera to the eyepiece. The additional magnification will allow you to select the image size to satisfy your framing requirements. You can either attach the eyepiece directly to the telescope’s OTA or use it with the diagonal as shown; the diagonal deflects the light 90 degrees to help you position the camera to allow easy viewing. Bear in mind that you will need to be able to see the live view screen on the DSLR to check your focus and field of view. Using the diagonal can make the imaging train quite heavy and will put a strain on the connections; therefore ensure the connections are tight, otherwise they could slip during your imaging session. The eyepieces used in the images are Baader Hyperion; these have a screwed thread underneath the eyepiece rubber for attachment of the camera connection piece. Due to the weight and sensitivity of the additional magnification, a very sturdy telescope mount or tripod is required, and a shutter release cable is recommended to prevent any movement or camera shake.

Expanded view of equipment.

Assembled view.
The extra magnification gained depends on the focal length of the eyepiece and can be calculated using the following formula:
Magnification = focal length of telescope / focal length of eyepiece.
Example: A 10mm eyepiece is used in the 80mm refractor telescope with a focal length of 400mm resulting in a magnification of 40x (400 / 10 = 40).
The smaller the focal length of the eyepiece, the larger the magnification. It is advisable to try a variety of eyepieces with different focal lengths which will allow you to determine the correct one for the image size you want.

Canon 6D, SW Esprit 80mm refractor with 13mm eyepiece, uncropped.

Canon 6D, SW Esprit 80mm refractor with 10mm eyepiece, uncropped.
What to expect with different eyepieces?
These examples show the difference in the field of views between 10mm and 13mm eyepieces attached to the refractor. As you would expect, the 10mm eyepiece has a higher magnification. The downside of eyepiece projection is that images are more susceptible to optical dispersion or chromatic aberration effects, as the light must pass through more glass. You can see the impact of this around the edge of the Moon, although you can correct this chromatic aberration to some extent during post-processing.
Post-processing can enhance the details. The image right has been subject only to some minor processing in Adobe Photoshop and you can see the difference. The optics reverse the image, so the picture has been horizontally flipped to correct the orientation, a little sharpening, slight contrast adjustment, and the chromatic aberration has been removed.
If you compare these eyepiece projection images with the one taken at prime focus using the same camera, you can see how the increased magnification from the eyepiece has affected the view. Although the image is larger, there is some compromise on clarity. The chromatic aberration is very much noticeable to the point that it was quite challenging to remove it during post-processing. The optical properties of the eyepieces negated the benefit of using the apochromatic (APO) triplet and it is therefore preferable to use the telescope at prime focus and limit the glass in the system. An APO triplet is a telescope design that has three lenses that bring all colours into focus at the same point to correct chromatic aberration.
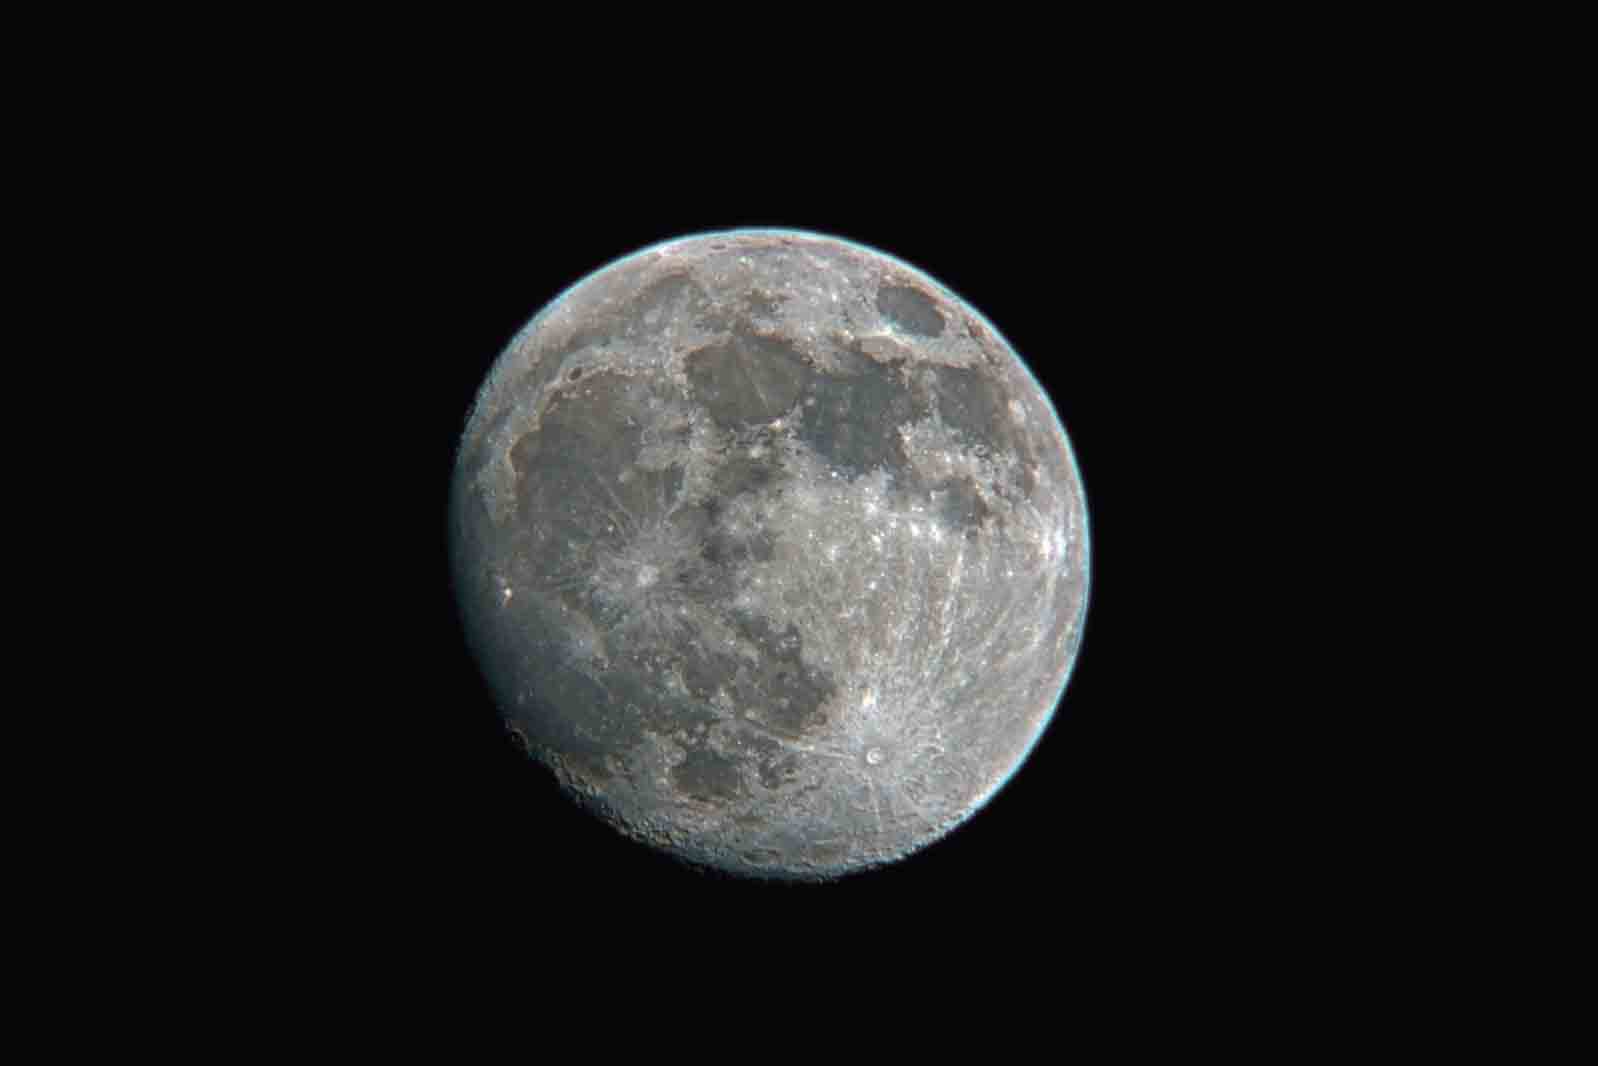
Canon 6D, SW Esprit 80mm refractor with 10mm eyepiece, uncropped.
Using a Barlow lens
Insert the Barlow lens before the eyepiece or camera and this will produce a larger image by doubling or tripling the focal length of the imaging train. The camera can be attached to the Barlow lens using a nosepiece adapter/T-mount; these connectors are tube-shaped that attach to the front of the camera. The potential issue to consider when attaching the Barlow lens to a refractor is that the optical image will become dimmer. Therefore, you will have to compensate for this effect with longer exposures or higher ISO settings.
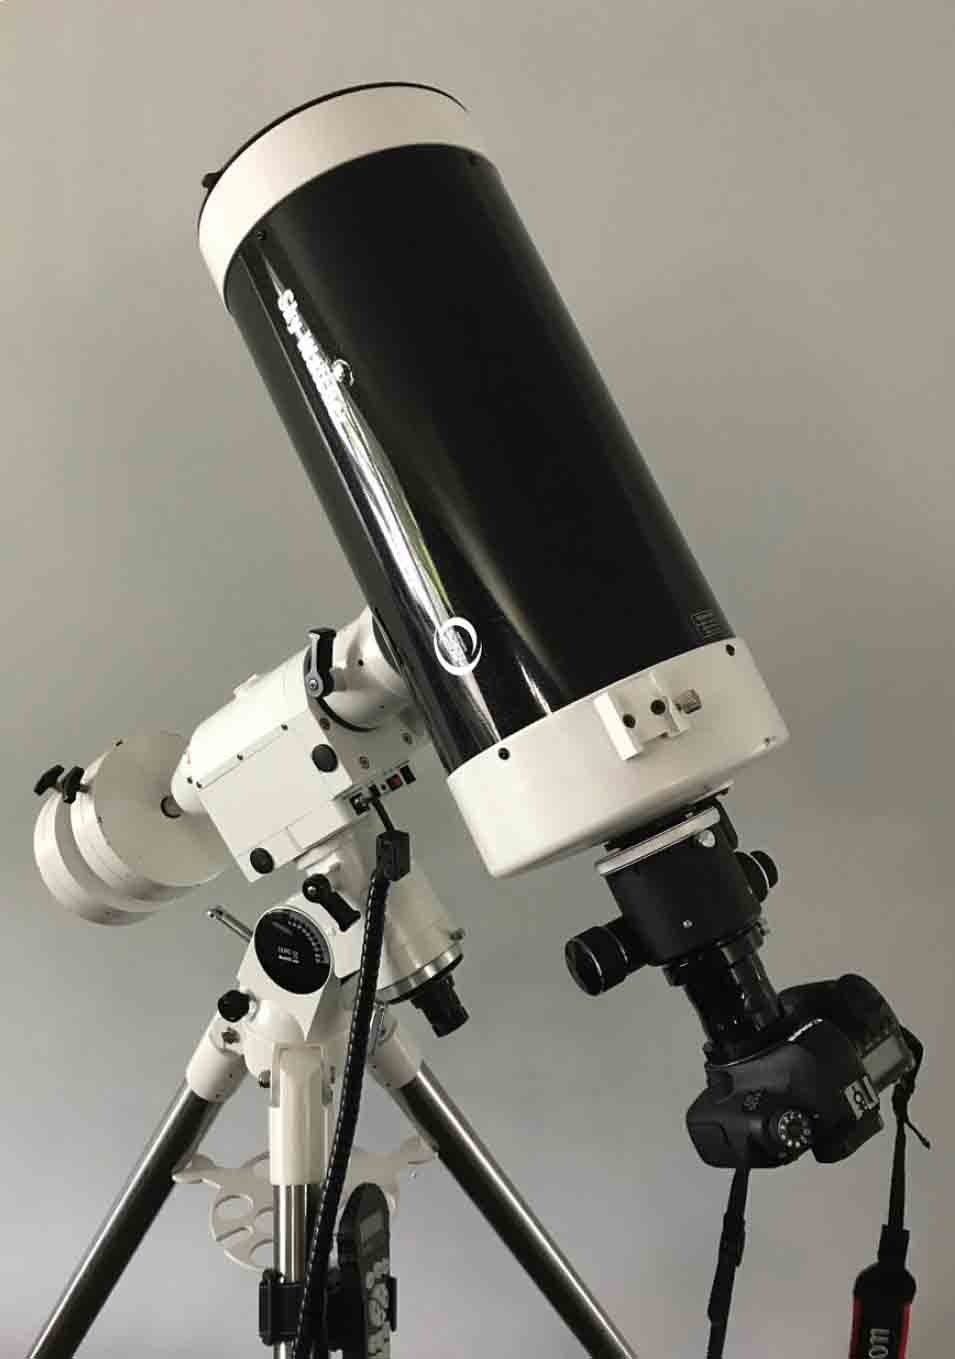
Skymax Pro180 with DSLR attached.

Expanded view.
2.5 Capturing Images Using an 180mm Maksutov-Cassegrain Telescope
The examples use the following equipment:
Skywatcher Skymax PRO 180mm, Maksutov-Cassegrain, 2700mm focal length, f/15 focal ratio
Skywatcher HEQ5 – Tracking mount
Canon 6D DSLR
The DSLR is attached to the Skymax Pro180 in a very similar way it is attached to the refractor except that a field flattener is not required. This telescope has an impressive focal length of 2700mm and can provide exceptional detail of the lunar surface although the telescope and camera are heavy, and you will need to attach them to a very sturdy mount as the high focal length amplifies any small movement significantly. The picture on the left shows the setup.
Attachment of the camera to the telescope requires an adapter which has the camera mount fitting on one side and a screwed thread on the other side. This adapter will allow you to attach the camera to a threaded nosepiece adapter which can then be inserted into the eyepiece holder or directly into the focuser. The image below shows a 2” nosepiece adapter which will give the most extensive field of view and utilise as much of the large full frame sensor as possible.
Image drift becomes very much apparent at these longer focal lengths, especially if you are taking multiple images for stacking over an extended period. Therefore be careful not to let the image drift out of view. If the image is drifting, it may be beneficial to switch to the lunar tracking mode on your mount, as this will provide excellent stability for a few minutes, allowing you to capture plenty of high-quality images.
You can see from the following images that the long 2700mm focal length of the Skymax Pro180 has created an image which is too large to capture the whole of the moon on the DSLR sensor. These are the raw images from the camera and you can already make out surface texture and small crater details. To complete the picture and make it much more pleasing to the eye, we need to create one single full moon image out of both photos by stitching them together.

Canon 6D, Skymax Pro180, ISO200, 1/200sec, uncropped
I have purposely taken two images which extensively overlap so that the software used for stitching the photographs together can identify these overlap points and align the pictures correctly. Weak overlap points will prevent the image from being aligned properly. The software of choice for stitching images together is called Image Composite Editor (ICE) from Microsoft. The software is free to download and details on how to use this software are covered in the image processing section later in the book. It is preferable to stitch images together before enhancing or post-processing the image to ensure consistent contrast and colour gradients on the final image.
The stitched image should show no misaligned features or gaps if executed correctly. The image below shows the two raw images stitched together and this combined image is now ready for post-processing if you want to enhance the image further. The image should always be post-processed to bring out the finer details hidden within the image.
This processed image shows the mineral colouration of the lunar seas, many crater features and impact rays from Tycho, Copernicus and Kepler.

Canon 6D, Skymax Pro180, ISO200, 1/200sec – stitched with ICE.

Canon 6D, Skymax Pro180, ISO200, 1/200sec – processed using Adobe Photoshop.
2.6 DSLR Video
The DSLR can not only be used for single images but for also taking videos when movie mode is selected. The benefit of movie mode is that you can capture many frames per second and end up with thousands of images to stack.
The telescope needs to be set up and the mount polar aligned to allow stable tracking for approximately 1-2 minutes, polar alignment is the standard method that equatorial mounts use to track celestial objects. Attach the camera to the telescope at prime focus or through a Barlow lens if you want an increased focal length. Point the telescope at the Moon, ensuring that you activate the lunar tracking mode and focus the camera before capturing the image. When the camera is in focus, select video mode and check the settings to ensure that video mode is on the highest resolution setting. At this point, carry out a test shot to ensure that you frame the target correctly and that the image looks sharp on the video. When you are happy with the video quality, start recording your footage; initially aim for 1-2 mins or for as long as possible before the Moon drifts out of view. You will find that the frame rate using a DSLR is not as high as some of the dedicated planetary/lunar high frame rate cameras, but the quality of each frame from the DSLR may be better. As a result, you will not get the high numbers of individual images as planetary cameras, but the stack quality can still be quite impressive. Your tracking would need to be extremely accurate to acquire the thousands of frames expected for a high frame rate camera.
DSLR movie mode produces images in. MOV file format which is not usually compatible with the stacking software. You will therefore need to convert the video file to AVI format first; this format allows the images to be sorted and stacked.
There are many video conversion software programs available, but you can use a free software program called Planetary Imaging Pre-processor (PIPP) to do the conversion. There is a section on using the software later in the book. This software is excellent for converting image and video formats. Simply upload the video file and select the output format to AVI.
You can load the converted AVI file into the stacking software; there are many stacking software options available on the market. I will be using Autostakkert as the software of choice for stacking video files and I will discuss this process in more detail in the video stacking section. The following image is taken using a Canon 6D with a Skymax Pro180. The side by side image shows how the stacked, unprocessed image looks compared with the same stacked image after a little processing using Adobe Photoshop. Which picture do you prefer?

Unprocessed Stacked Image.

Processed stacked image.