Chapter 11
The focus of the attack was the Sixth Panzer Army, which would attack toward the Elsenborn ridge and then press on to Antwerp. This army contained the majority of the panzer force, including two entire SS panzer corps. On its left was the Fifth Panzer Army with the rest of the panzer force, including the regular-army panzer divisions. The Seventh Army on the far left near Luxembourg was
primarily an infantry force and had less substantial objectives.
For his attack, Hitler chose a sector of the Ardennes dubbed "the Ghost Front" by the U.S. Army because of its inactivity. It was manned by four American infantry divisions-two newly arrived green divisions and two other divisions battered in the Hiirtgen Forest and recuperating in the Ardennes. The U.S. tank force in the sector was very weak at the start of the campaign, consisting of scattered tank and tank destroyer battalions.
The surprise attack began on 16 December 1944. The initial attacks by the Sixth Panzer Army proceeded poorly, and the infantry failed to make much purchase into American defenses. In desperation, the panzer exploitation force was committed prematurely instead of waiting until the infantry had secured a breakthrough. As a result, the 12th SS Panzer Division became entangled in a brutal series of close-range battles at Krinkelt-Rocherath and then Dom Butgenbach without securing a breakthrough. To its left, the 1st SS Panzer Division launched its main force, Kampfgruppe Peiper, which pushed through a very weak American cavalry screen into the Losheim gap. Initial delays proved very costly, and Kampfgruppe Peiper was quickly bottled up around La Gleize as fresh U.S. infantry divisions arrived on the scene. The failure of the Sixth Panzer Army on the northern wing of the German attack doomed the operation within the first week of fighting
The neighboring Fifth Panzer Army used its infantry divisions more successfully and managed to encircle most of the green 106th Division and to overrun the battered 28th Division. This might have opened a major gap in the center, but the injection of two combat commands from the 7th and 9th Armored Divisions blocked the center around St. Vith for several critical days. As a result, the Fifth Panzer Army shifted its focus to the road junction at Bastogne on the southern side of its advance, which was encircled before Christmas. The St. Vith defense finally gave way on 22 December, suddenly opening up the center. Thrown into the fray, the Sixth Panzer Army's reserve panzer corps raced to the road junctions at the base of the Tailles plateau around Manhay and Hotton. Although the sudden spurt in German advances in the days before Christmas seemed to revive the chances of the German attack, the tide had already turned.
The U.S. 12th Army Group had already massed two counterattack forces in the days before Christmas. "Lightning Joe" Collins'sVII Corps came crashing in from the northeast with the 2nd and 3rd Armored Divisions as well as several infantry divisions. The 3rd Armored Division spilled off the Tailles plateau and plugged up the road approaches around Manhay and Hotton in a series of brutal tank battles around Christmas that prevented any further German advances in the center sector. The 2nd Armored Division moved to the southwest and struck the panzer spearheads of the Fifth Panzer Army around Christmas just as they were approaching the Meuse River beyond Bastogne. Much of the 2nd Panzer Division was encircled at Celles, and relief efforts by the 9th Panzer Division were crushed.
The second counterattack force was a pair of corps from Patton's Third Army. These cut through the German Seventh Army and approached Bastogne from the southwest, finally breaking through and relieving the city in the days after Christmas. While the Battle of Bulge was not yet over at the end of 1944, the outcome had been decided. The second volume of this series details the elimination of the German bulge during the January 1945 fighting.

This German propaganda photo shows a winter tank attack by Panthers from I./SS Panzer Regiment 9, 9th SS Panzer Division during the Ardennes fighting.
Another view of a King Tiger of schwere SS Panzer Abteilung 501 moving through Tondorf. Peiper was not happy to be saddled with these clumsy tanks, and so he stuck them at the tail end of his column. They consumed enormous amounts of fuel and contributed little to the battle.
Some of the best-known images to have emerged from the Battle of the Bulge are the views of the King Tiger tanks of schwere SS Panzer Abteilung 501 (501st SS Heavy Tank Battalion), which served with Kampfgruppe Peiper (Battle Group Peiper). Here, the headquarters company is seen driving through Tondorf at the start of the campaign.
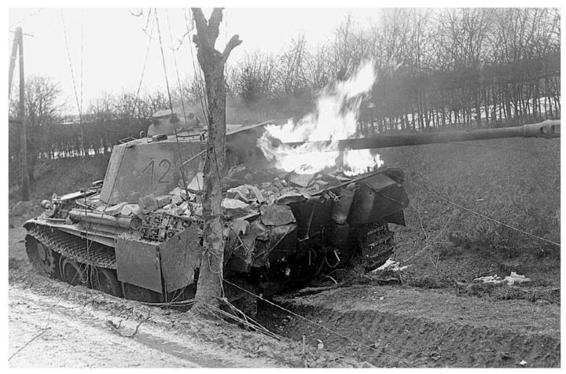
Some of the most savage fighting of the opening phase of the Ardennes campaign took place near the twin villages of KrinkeltRocherath when the 12th SS Panzer Division attempted to secure the northern shoulder of the salient by overwhelming the U.S. 99th Division. This was one of five Panthers of the first company of SS Panzer Regiment 12 which fought their way into Krinkelt around 0730 on 18 December. Four were knocked out by bazooka teams and antitank guns, and this vehicle escaped down the Bullingen road, where it was knocked out by an M10 3-inch gun motor carriage of the 644th Tank Destroyer Battalion around 1100. It had eleven bazooka hits, several 57mm hits, and three 3-inch impacts in the rear.
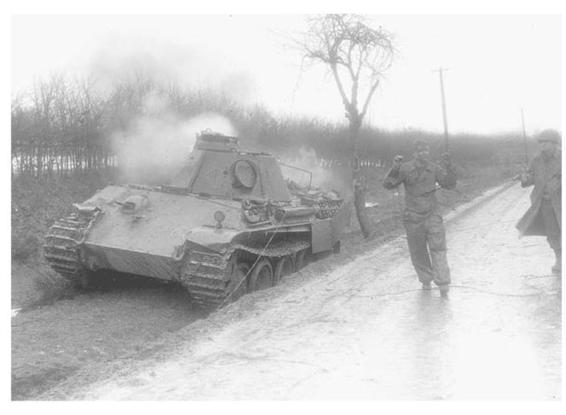
This panzer crewman is led away from his burning Panther Ausf. G, seen from the other side in the previous photo.

Another photo taken during the savage fighting inside Krinkelt after Panthers of the 12th SS had broken into the town. The nearest of these two Panther Ausf. G's, probably that of SS Hauptsturmfuhrer (Captain) Kurt Brodel, has been burned out and its barrel ripped off. They were knocked out in the fighting opposite the village church. Although the 12th SS would eventually push the U.S. 99th Division out of the twin villages, they lost so much time doing so that they failed in their mission to reach the Meuse.
Kampfgruppe Peiper was prevented from moving down the road at Wirtzfeld by some M10 3-inch gun motor carriages of the 1st Platoon, Company C, 644th Tank Destroyer Battalion, which knocked out several Pz.Kpfw. IV tanks on 17 December. This was in the 12th SS Panzer Division's sector, and Peiper moved its forces farther westward.
This Panther belonged to the reconnaissance platoon of the SS Panzer Regiment 12 headquarters and was knocked out in the outskirts of Krinkelt-Rocherath during the fighting there on 19 December.

Trucks of the 372nd Field Artillery Battalion, 99th Infantry Division, withdraw through a junction at Wirtzfeld on 17 December as the 12th SS Panzer Division attacks neighboring Rocherath. The crossroads is covered by an M10 from the 644th Tank Destroyer Battalion. M10's from this unit repulsed a probe by Kampfgruppe Peiper that day along a neighboring road.
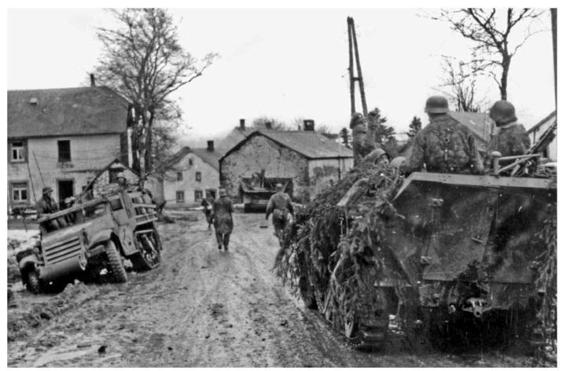
German panzergrenadiers of the 1st SS Panzer Division move through Honsfeld on 17 December after the town was captured by Kampfgruppe Peiper. To the right is an Sd.Kfz. 251 Ausf. D, the standard German infantry half-track, while to the left is a captured example of its American counterpart, the M3 half-track. The vehicle in the background is a Mobelwagen 37mm antiaircraft vehicle, one of two knocked out during the fighting by an American antitank gun.
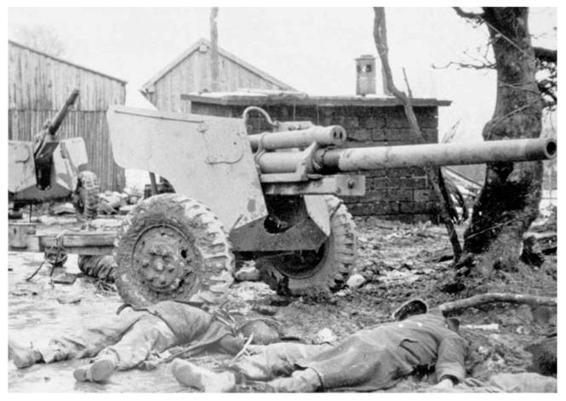
A grim reminder of the human cost of bad doctrine and poor equipment. A knocked-out 3-inch gun in Honsfeld overrun by Kampfgruppe Peiper in the predawn hours of 17 December during the start of the Ardennes offensive. Two companies from 612th and 801st Tank Destroyer Battalions were stationed in the town but were quickly overwhelmed. The poor performance of the towed tankdestroyer battalions in the Ardennes was the last straw, and the 12th Army Group began re-equipping them with selfpropelled guns as quickly as possible in early 1945.
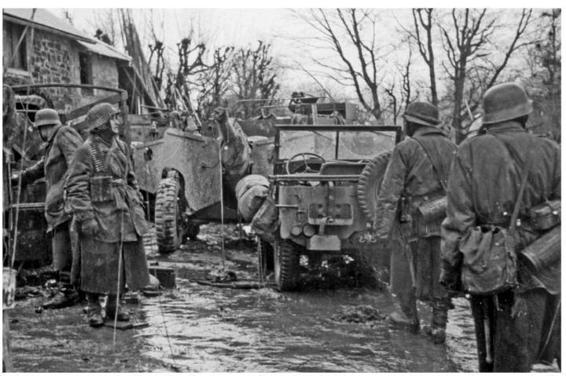
Panzergrenadiers from the 1st SS Panzer Division rummage through abandoned American equipment in Honsfeld.To the right is a jeep and behind it a 3-inch antitank gun.

The commander of Kampfgruppe Peiper was infuriated by the failure of the 3rd Fallschirmjager (Paratroop) Division to seize Honsfeld on 17 December and insisted that the regimental commander turn over a battalion of paratroopers to his column. Some of these troops ended up riding on the engine deck of a King Tiger tank commanded by Oberscharfuhrer (Senior Squad Leader) Sowa near Ligneuville on 18 December, as seen here. The King Tigers belonged to schwere SS Panzer Abteilung 501 (501st SS Heavy Tank Battalion), which made up the tail end of Peiper's column.
Another view of the same group of paratroopers on the engine deck of King Tiger No. 222 during operations south of Malmedy on 18 December. The paratrooper to the left is armed with a British Mk. 2 Sten gun. This tank was lost in Stavelot the following day while supporting Kampfgruppe Sandig.
A King Tiger column from schwere SS Panzer Abteilung 501 passes a line of American prisoners with the town of Merlscheid in the background.
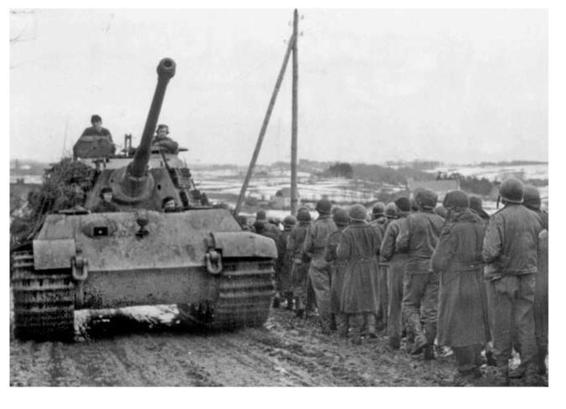
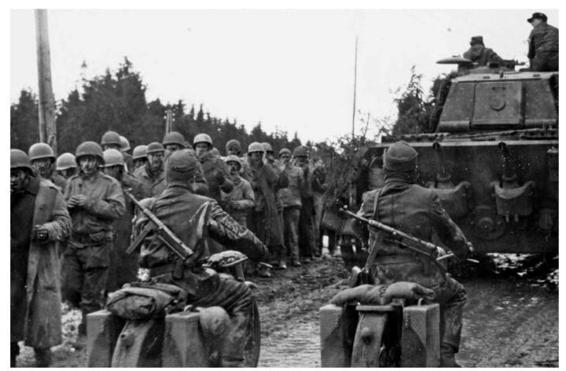
A view of the same column from the other direction as a King Tiger of the battalion passes American prisoners while on the way to Lanzerath.

When Kampfgruppe Peiper reached Ligneuville, one of its Panthers commanded by SS-Untersturmfuhrer (2nd Lieutenant) Arndt Fischer was knocked out by a Sherman, probably from 9th Armored Division, in front of the Hotel des Ardennes. It is still sitting there later in the month after the heavy snowfall around Christmas.
This Pz.Kpfw. IV Ausf. J from the spearhead of Kampfgruppe Peiper was knocked out by U.S. M10 tank destroyers on the road from Bullingen to Wirtzfeld on 17 December.
After finally pushing through KrinkeltRocherath, the 12th SS Panzer Division became tangled up in fierce fighting with the 1st Infantry Division in Dom Butgenbach on 19 December. This Pz.Kpfw. IV was knocked out inside the farm, possibly by this M36 90mm gun motor carriage of 634th Tank Destroyer Battalion, which was supporting the infantry. This would be the farthest advance of the 12th SS-far short of its goal.
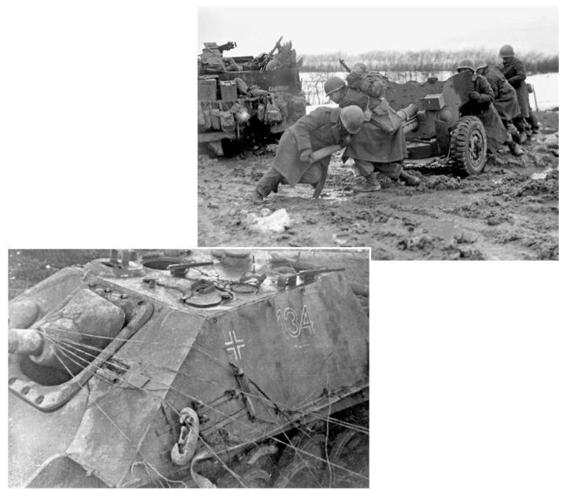
The battle at Dom Butgenbach hinged on the courage of the infantry's 57mm antitank-gun crews to stymie the German panzer attacks. This is a crew of the 1st Battalion, 26th Infantry Regiment, manhandling their gun from its prime mover near Butgenbach on 17 December.
The Jagdpanther was not often encountered by American forces until the Ardennes fighting. This Jagdpanther (No. 134) belonged to schwere Panzerjager Abteilung 560 (560th Heavy Tank Destroyer Battalion), which was knocked out while supporting the 12th SS in the costly fighting against the U.S. 26th Infantry Regiment for Dom Butgenbach manor farm in the opening phase of the Battle of the Bulge. This is from the laterproduction batches with the bolted mantlet.
GIs inspect one of the Jagdpanthers knocked out during the Dom Butgenbach battle. The 12th SS Panzer Division had lost so many tanks in the KrinkeltRocherath fighting that the burden of the Dom Butgenbach attack fell on the tank destroyer elements.


A Pz.Kpfw. IV knocked out during the Dom Butgenbach fighting.
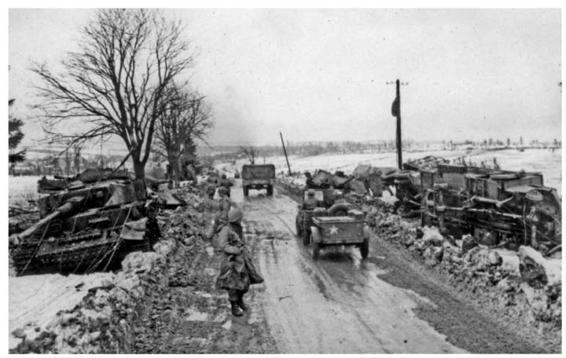
Debris litters the road after the 12th SS failed to capture Dom Butgenbach. In the foreground is a Pz.Kpfw. IV tank of the 12th SS Panzer Regiment, behind it is a Jagdpanther of schwere Panzerjager Abteilung 560, and on the opposite side of the road is a Jagdpanzer IV of SS Panzerjager Abteilung 12-all knocked out during the fighting.
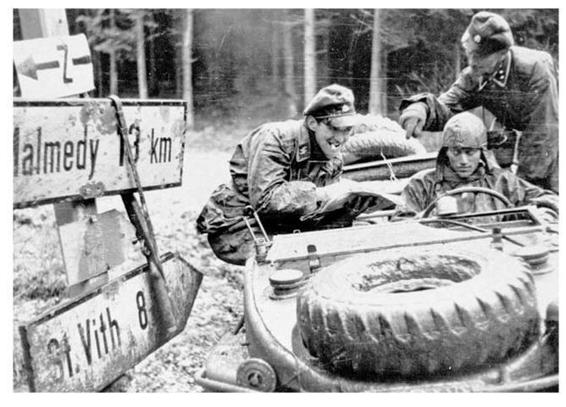
In one of the most famous scenes from the battle, Unterscharfuhrer (Junior Squad Leader) Ochsner chomping on a cigar on the left and his platoon commander, Oberscharfuhrer (Senior Squad Leader) Persin, to the right discuss directions while at a road sign at the Kaiserbaracke crossroads on Rollbahn Eon 18 December. This photo is frequently misidentified as Jochen Peiper, but in fact, it is from the 2nd Company of SS Panzer Aufklarungs Abteilung 1 (1st SS Tank Reconnaissance Battalion), scout elements of Kampfgruppe Knittel.

Persin and Ochsner walk along a column of vehicles from SS Panzer Aufklarungs Abteilung 1 at the Kaiserbaracke crossroads on 18 December. To either side are two Sd.Kfz. 250 half-tracks.
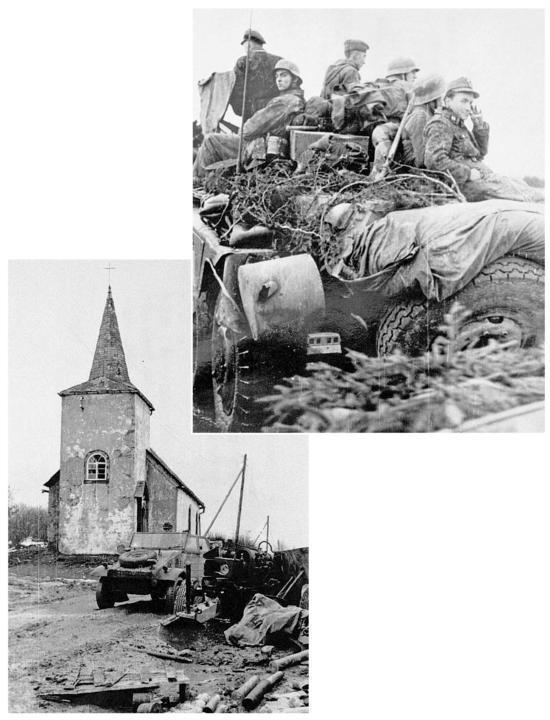
An Sd.Kfz. 234/1 reconnaissance armored car of Kampfgruppe Knittel is seen moving forward with SS paratroops on its rear deck. The deck of the vehicle is covered with pine boughs for camouflage.
A Kubelwagen utility vehicle of the 1st Panzer Division passes a disabled American 3-inch antitank gun of the 820th Tank Destroyer Battalion, knocked out in the fighting for the Losheim gap in the hamlet of Merlscheid on 18 December.

During the fighting on 18 December in the Losheim gap, Kampfgruppe Hansen overwhelmed a column from the 14th Cavalry Group that was moving on the road between Recht and Poteau. This shows two of the M8 armored cars that were abandoned, both from C Troop, 18th Cavalry Squadron.
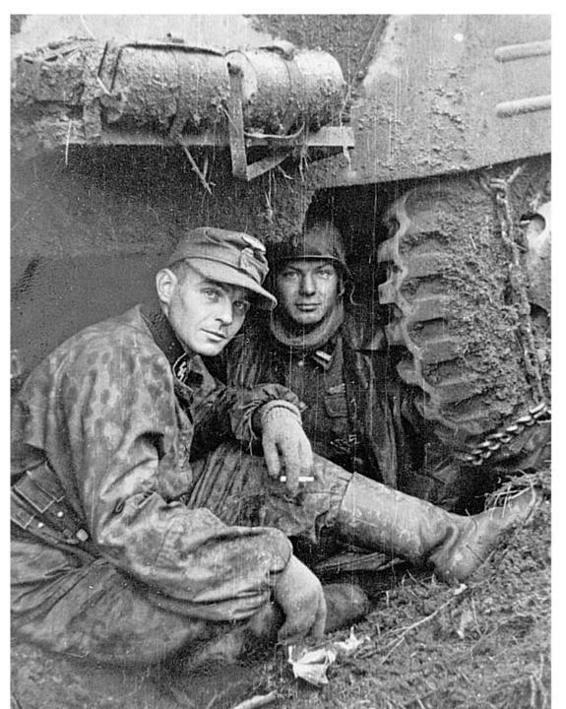
An SS-Untersturmfuhrer (second lieutenant) takes a breather with an SS-Rottenfuhrer (corporal) under one of the disabled M8 armored cars of the overrun column near Poteau. The soldier to the right is decorated with the Close-Combat Clasp, the first and second class of the Iron Cross, the Infantry Assault Badge, and a Russian Service Ribbon. This photo was actually taken before all the "action" photos were staged for the benefit of the German combat cameramen.

The busy young SS corporal poses again for the camera, this time alongside a disabled M2A1 half-track.
A pair of German combat cameramen staged many of the photos along the wreckage on the Poteau road, this one of a panzergrenadier alongside a burning M2 half-track. This is the same SS corporal previously seen under the M8 armored car. Little did the German photographers know that their four rolls of film would be captured several days later by the U.S. 3rd Armored Division and become some of the most enduring images of the battle.
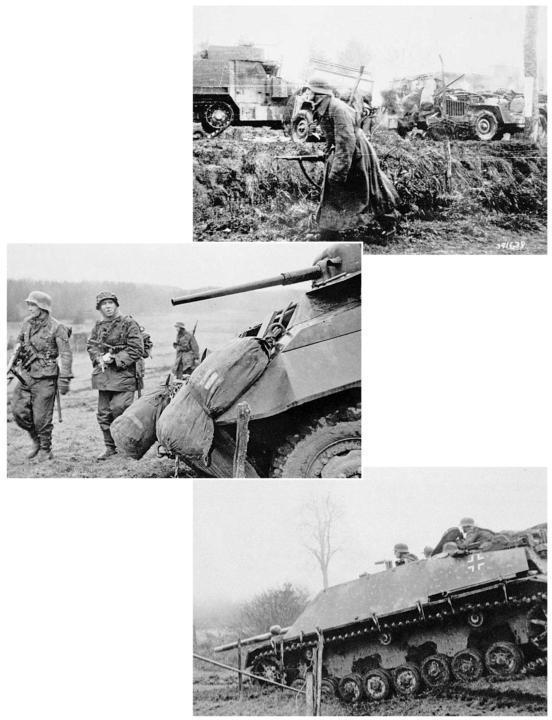
A panzergrenadier from Kampfgruppe Hansen walks along the column of burning American vehicles on the Poteau-Recht road, including several jeeps and half-tracks.
The logjam of burning American vehicles on the Poteau road forced this Jagdpanzer IV/70 tank destroyer of SS Panzerjager Abteilung 1 (1st SS Tank Destroyer Battalion) to move off the road cross-country. This was one of the vehicles assigned to support Kampfgruppe Hansen.
Two young panzergrenadiers of SS Panzer Grenadier Regiment 1 advance past an abandoned M8 armored car from the 14th Cavalry Group.
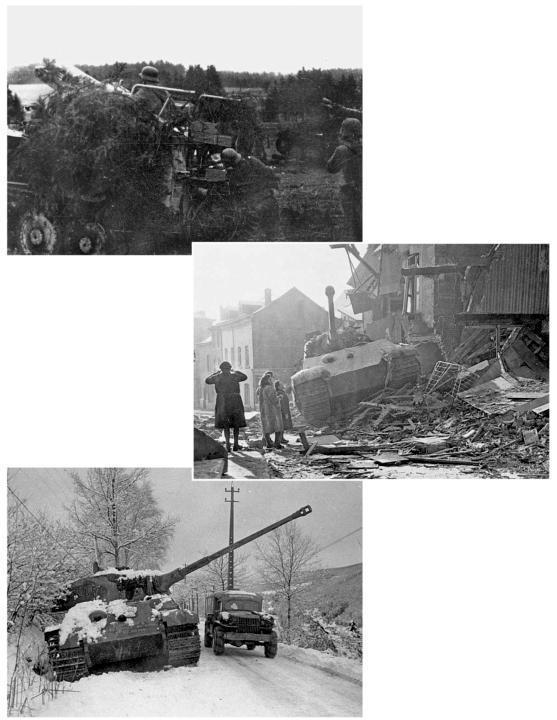
The first of Peiper's King Tigers to be lost was this one (No. 105), commanded by SS-Obersturmfuhrer (1st Lieutenant) Jurgen Wessel, which was abandoned after it got stuck in debris on Rue St. Emilon in Stavelot on 18 December.
One of the final photos on the four rolls of film captured from the German cameraman was this shot of a pair of 15cm SiG 33/1 Sd.Kfz. 138/1 Grille selfpropelled howitzers supporting the 1st SS Panzer Division's advance on 18 December. Surprisingly, this type was still in production up to September, and these might very well have been from the final-production batches.
As Kampfgruppe Peiper ran out of fuel, it gradually abandoned its tanks. One of the last to be abandoned was King Tiger 204 of the 2nd Company of schwere SS Panzer Abteilung 501, left behind on the road near Gue in the early-morning hours of Christmas Eve after La Gleize had been abandoned. It was later driven a short distance by American troops and is seen broken down along the road near Ruy on 4 January 1945.
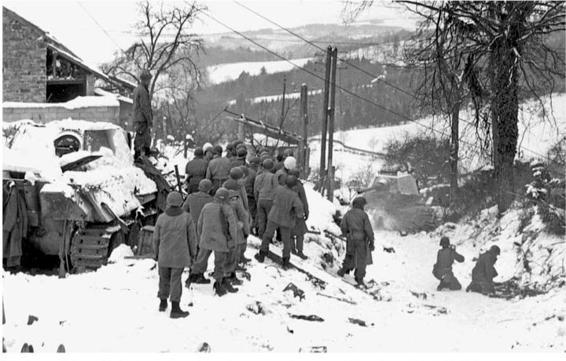
Kampfgruppe Peiper left behind some thirty-nine tanks, seventy half-tracks, and thirty other vehicles in La Gleize when they finally abandoned the town on 24 December. An intelligence and reconnaissance platoon from the 82nd Airborne Division later decided to use some of the tanks to test the penetration capabilities of the bazooka on 18 January 1945. To the left is a derelict Panther, while down in the gully is the target of the bazooka team, a King Tiger from schwere SS Panzer Abteilung 501.
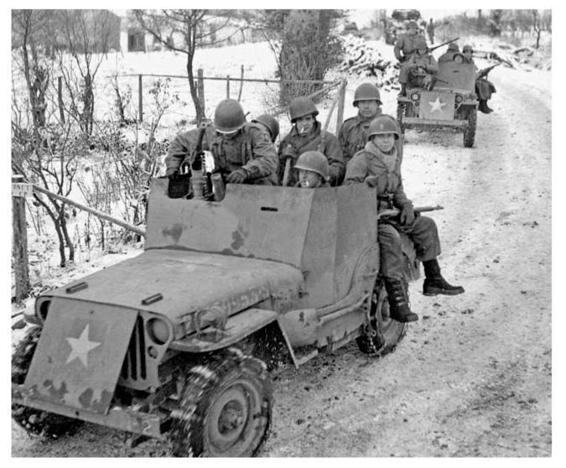
The 82nd Airborne Division used a standardized armor kit to reinforce its reconnaissance jeeps, as seen here during the Ardennes fighting.
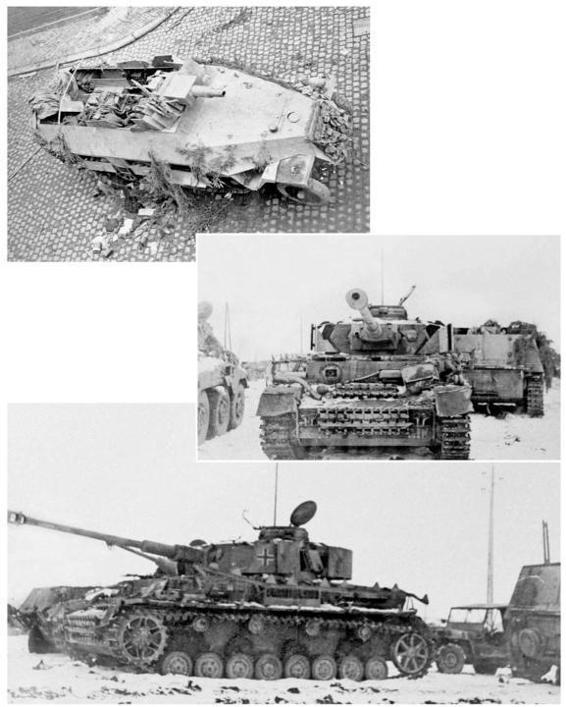
This Pz.Kpfw. IV was photographed in a holding area in Belgium by the U.S. First Army and is probably from the vehicles abandoned by Kampfgruppe Peiper near La Gleize.
Another view of the same Pz.Kpfw. IV in the U.S. First Army holding area in Belgium.
Kampfgruppe Peiper left Stavelot on its way northwest but was followed later on 18 December by Kampfgruppe Knittel, which fought a losing battle for the town against the 30th Infantry Division later in the day. This Sd.Kfz. 251/9 assault gun was knocked out by a rifle grenade in the fighting. It was probably also hit by a round from the 843rd Tank Destroyer Battalion, as a projectile has passed through both sides of the thin armor plate on either side of the 75mm howitzer.
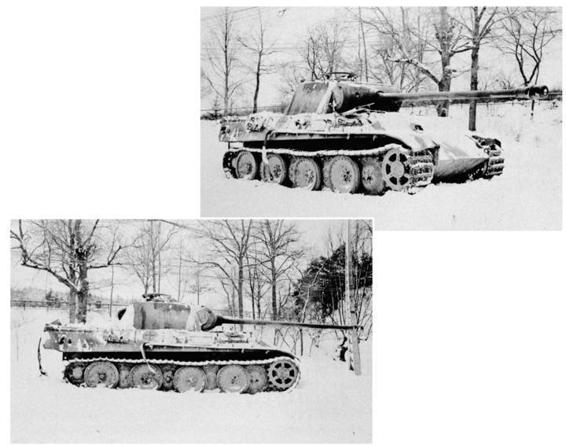
This Panther Ausf. G belonging to Kampfgruppe Peiper of the 1st SS Panzer Division was recovered from the area near La Gleize and moved to the U.S. First Army headquarters near Spa, Belgium, for a display to the headquarters units.
Another view of the Panther Ausf. G shows its tactical number painted on the turret side; 111 indicates 1st Battalion, 1st Company, 1st Tank.
The principal antitank weapon in the early days of the Ardennes fighting was the 2.36-inch bazooka, which was widely used by the infantry regiments scattered along the front. Its performance was erratic, sometimes quite effective when used by a brave rifleman ambushing a German tank from the side, but just as often useless when fired from the front or from too great a range. Here, an armored infantryman from the 3rd Armored Division guards a road near Manhay later in the month.


A team from the 203rd Engineer Battalion prepares a bazooka near Buisonville, Belgium, late in December. The engineers were frequently assigned combat missions during the Ardennes fighting and were often a thorn in the Germans' side because of their success in destroying key bridges.
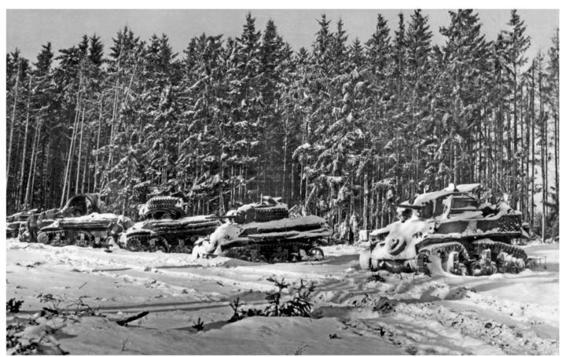
On 18 December, these M5A1's of Task Force Harper, 9th Armored Division, were overrun by the 2nd Panzer Division between St. Vith and Bastogne. The wrecks were subsequently used for static defense by the 2nd before being abandoned.

While it is often thought that the Battle of the Bulge was fought in a snow-covered landscape, much of the early fighting took place in cold, rainy weather. Here, paratroopers of the 506th Parachute Infantry Regiment of the 101st Airborne Division march along the Bastogne-Hauflige road on 19 December to reinforce Team Desobry north of the encircled city. In the background are an assortment of armored vehicles, including an M3A1 half-track and an M7 105mm howitzer motor carriage.
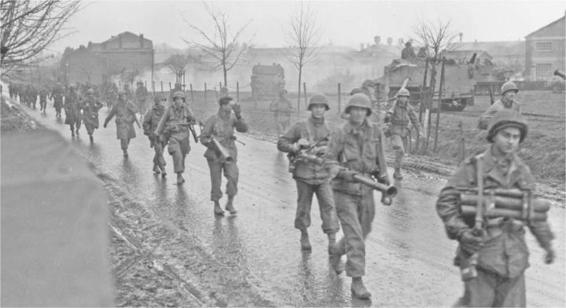
Another view of the paratroopers of the 506th PIR of the 101st Airborne along the Bastogne-Hauflige road on 19 December. In the lead here is a bazooka team, and in the background is an M3A1 half-track.

A column of M36 90mm gun motor carriages move forward in support of the 82nd Airborne Division's attempt to halt the advance of Kampfgruppe Peiper near Werbomont, Belgium, on 20 December. They probably belong to the 740th Tank Battalion, a former secret Leaflet tank unit retraining on mine-exploder tanks that month. The unit arrived in Belgium without tanks and scrounged up whatever it could find. At this stage of the war, the M36 was still relatively uncommon, with only 236 actually deployed. Nevertheless, they proved invaluable in the Ardennes, as they were the only U.S. Army vehicle capable of handling the Panther or Tiger. This unit did not come in contact with Peiper that day, as the German column moved east.
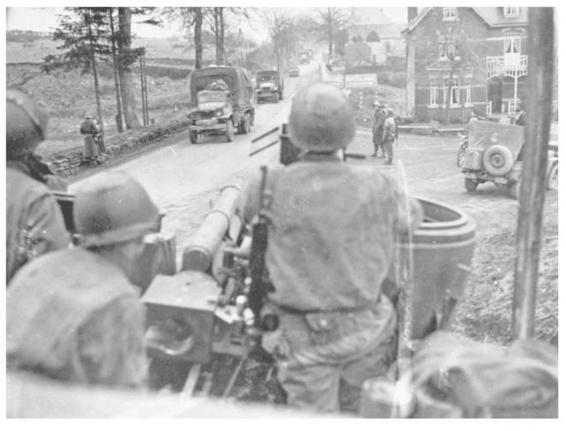
Although not the clearest shot, this photo shows a dramatic moment during the Battle of the Bulge as this M7 105mm howitzer motor carriage has been positioned along a road junction leading up to the Elsenborn Ridge on 20 December with the assignment of stopping any approaching German units. The ridge was the key defensive position along the northern salient of the Bulge, and the failure of the Sixth SS Panzer Army to seize the ridge forced the Germans to turn their attention southward toward Bastogne.
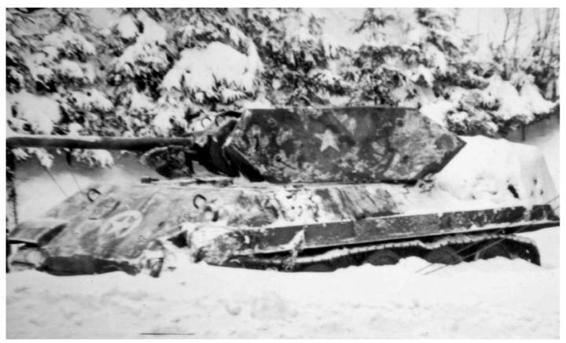
Otto Skorzeny's Panzer Brigade 150 was equipped with German equipment modified to resemble American vehicles. The unit was intended to sneak behind American lines to seize key bridges in advance of the main attack, but it failed to launch its intended deep-penetration mission because of road congestion. Instead, on 21 December, they were employed in a conventional attack against the U.S. 30th Division in Malmedy. This was one of their five Panther tanks modified to resemble an M10 tank destroyer, abandoned on the Malmedy-Spa road.
A pair of Panthers of the 1st SS Panzer Division abandoned south of Stavelot after the failure of Kampfgruppe Peiper to breakthrough beyond La Gleize.


This was the Panther (bumper code B-10) of Lieutenant Gerstenschlager, part of Panzergruppe Mandt, Kampfgruppe Z, during the attack on Malmedy on 21 December. With his head outside the turret during the initial attack, Gerstenschlager was fatally wounded by small-arms fire. His crew drove the tank back to the Cafe du Rocher de Falize, which was the headquarters of Hauptsturmfuhrer (Captain) von Foelkersam, the commander of Kampfgruppe Z. It was the only tank to survive the original morning melee in Malmedy and was disabled in a freak accident in the afternoon during an artillery barrage when it rolled into a wall of the Cafe de Routier de Falize, embedding the barrel.
A view of Oberfeldwebel (Master Sergeant) Backmann's ersatz M10 (B-7) knocked out near the Cafe le Maire on 21 December by Lieutenant Snyder with a bazooka hit into the rear engine compartment. This photo was taken sometime after the skirmish with the tank partly covered in snow.

This is the ersatz M10 (B-4) commanded by platoon leader Lieutenant Mandt. It ran over a mine and was abandoned in front of the positions of Company B, 99th "Norwegian" Separate Infantry Battalion, near the Malmedy railroad viaduct. It is seen being removed nearly a month later on 17 January.
This is a front view of the ersatz M10 (B7) commanded by Backmann of Panzer Kompanie Dreier, Kampfgruppe Z. This tank was knocked out by a bazooka round from an American artillery forward observer, Lieutenant Snyder. Note that between the false bumper codes are the XY markings intended to identify Panzer Brigade 150 to German traffic police.
This is a rear-view detail of one of the ersatz M1 O's from a U.S. Army intelligence report prepared after the fighting. It shows the sheet-metal structure added to the hull and turret rear.

This detail shot shows the rear-left corner of the turret, with details of the attachment of the false side armor on the ersatz M10.
Although not of the best quality, this photo from the American intelligence report shows the sheet-metal mantlet cover added over the Panther's mantlet in the hopes of creating the false impression of an American M10 tank destroyer.
This overhead shot shows the changes to the Panther turret, especially the substitution of a simple split hatch for the normal cupola. This was a source of complaint during training at Grafenwohr, as the crews felt it offered too little protection for the tank commander.
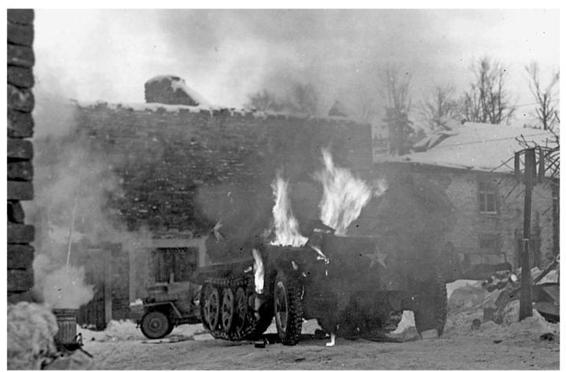
Because of a shortage of captured American equipment, Panzer Brigade 150 used other types of German equipment, simply painted in olive drab with American stars. This Sd.Kfz. 250 was captured by U.S. troops while still on fire.
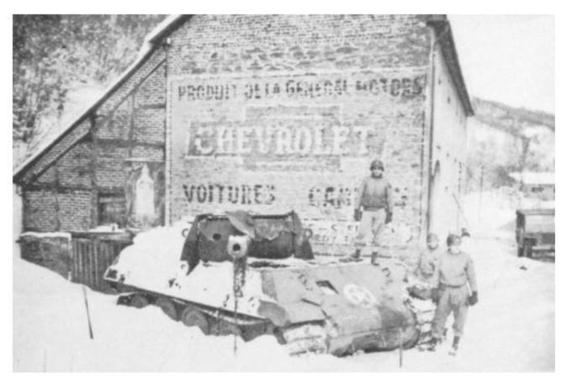
Besides the Panther tanks, five StuG III assault guns were converted for Panzer Brigade 150. Since they bore no resemblance at all to any American vehicle, their camouflage seems rather odd. The muzzle brake was removed and side skirts added. This one was abandoned near the Baugnez crossroads, site of the infamous Malmedy massacre.
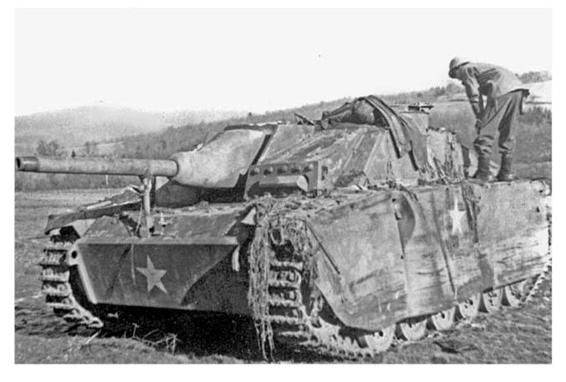
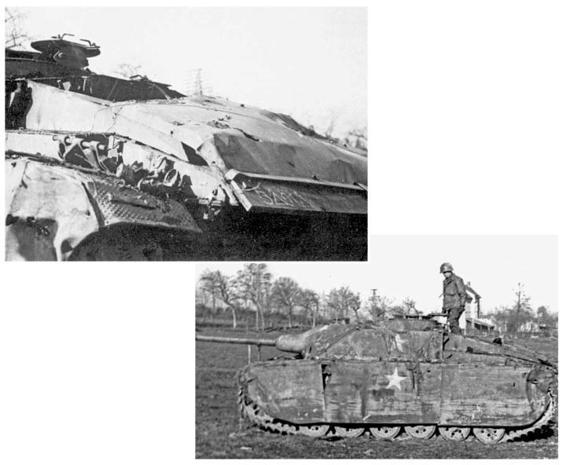
This side view provides a good overview of the changes made to the StuG I I I for Panzer Brigade 150. Unfortunately, it bears no resemblance at all to any American armored vehicle, in spite of its white stars.
For unknown reasons, a false engine deck was added to the StuG I I I conversions. In the lower-left corner, the false bumper codes are evident, identifying the vehicle as belonging to the 5th Armored Division, which was not in the Ardennes at the time.

This StuG III of Panzer Brigade 150 was abandoned and booby-trapped following the failed attack on Malmedy. Here, some troops from the 291st Combat Engineer Battalion are attempting to remove the booby traps. Mud has obscured the tactical markings on the vehicle, but the false stars are still plainly evident.
A Panther Ausf. G of the 1st SS Panzer Division knocked out in the fighting near the Baugnez crossroads, where the infamous massacre took place. It has been burned out, but the tactical number 111 is barely evident on the turret side. This is a new-production vehicle with the revised chin mantlet and crew heater.
The threat posed by Kampfgruppe Peiper led to desperate measures. Although the U.S. Army seldom used its 90mm antiaircraft guns for antitank defense like the Germans did with their 88mm guns, the Battle of the Bulge was an exception. Here, a 90mm antiaircraft gun of the 143rd Anti-Aircraft Artillery Battalion has been set up near a destroyed Panther tank in the outskirts of Malmedy on 22 December, supporting the 30th Infantry Division. In the background is the M4 high-speed tractor used to tow the gun. A second battalion, the 11 0th Anti-Aircraft Artillery, also provided antitank defense at Malmedy.
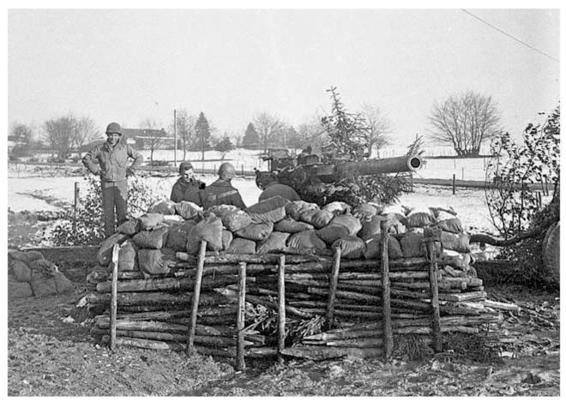
Another example of a 90mm antiaircraft gun being used in an antitank role to help support the 30th Infantry Division's cordon around Malmedy on 22 December. In this case, it has been positioned behind a makeshift defensive work of sand bags and small timber. The 90mm guns were used on several occasions, including the fighting for Stoumont on 19 December, where they were credited with destroying three Panthers from Kampfgruppe Peiper.
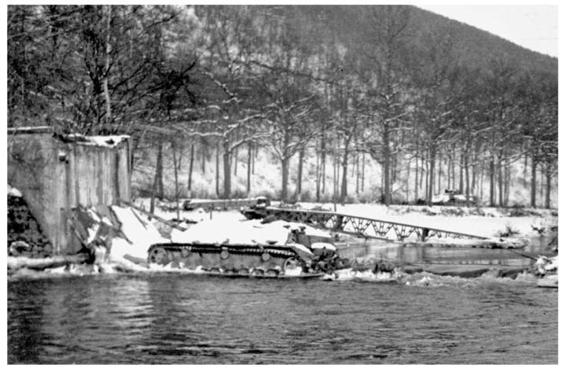
The final German attempt to relieve Peiper by SS Panzer Grenadier Regiment 1 near Petit-Spa on 21 December was frustrated when the leading Jagdpanzer IV/70 collapsed the bridge. Divisional engineers tried to erect a K-Gerat bridge next to it, but it was downed by intense American artillery fire.
The crew of an M10 3-inch gun motor carriage of the 823rd Tank Destroyer Battalion. They were credited with knocking out four German tanks in the initial Ardennes fighting around Stoumont and are seen here on 21 December. This unit was assigned to the 30th Division for most of the war.

A scene in Stoumont after the fighting ended. This 75mm PaK 40 antitank gun had been positioned to cover the N33 roadway. Behind it is an abandoned Panther from the 1st SS Panzer Division.

A pair of M4A3 (76mm) tanks of the 9th Armored Division knocked out during the critical fighting around St. Vith. Two combat commands from the 7th and 9th Armored Division held this critical crossroads, delaying the German exploitation of the penetrations in the Bastogne sector.
With the eastern approaches to the Meuse blocked and the I SS Panzer Corps stopped, the II SS Panzer Corps was shifted to the center of the Bulge to support Hasso von Manteuffel's attack. Much of the fighting centered around the town of Manhay astride one of the more valuable road junctions. This M4A1 medium tank of the 3rd Armored Division was positioned on the N494 road going west from Manhay on 23 December in an attempt to halt the advance of the 2nd SS Panzer Division. It is covered with straw for improvised camouflage.
Another view of the 3rd Armored Division M4A1 from Task Force Kane along the Manhay road. These roadblocks were eventually overcome by assaults by the 2nd SS, whose 4th Company of SS Panzer Regiment 2 attacked Manhay on 23 December, knocking out several M4 medium tanks of the 7th Armored Division.

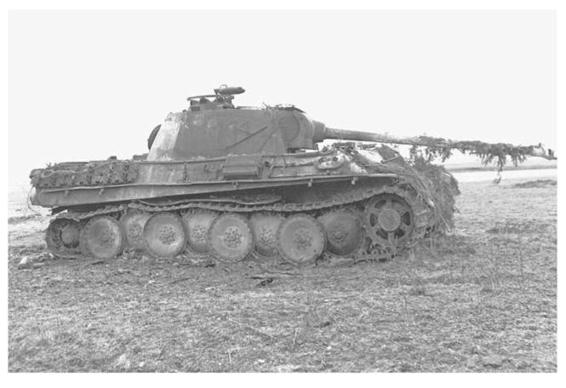
A Panther Ausf. G of the 2nd SS knocked out in a fork in the road between Manhay and Grandmenil during the fighting with the 3rd Armored Division on 23 December.

The initial attacks in the center of the Ardennes front had to cross several rivers. This StuG III did not quite make it over the north bank of the Our River near Welchenhausen, which was being defended by the 112th Infantry, 28th Division. The vehicle probably belonged to the 244th Sturmgeschutz Brigade, which was supporting the 560th Volksgrenadier Division in the area.
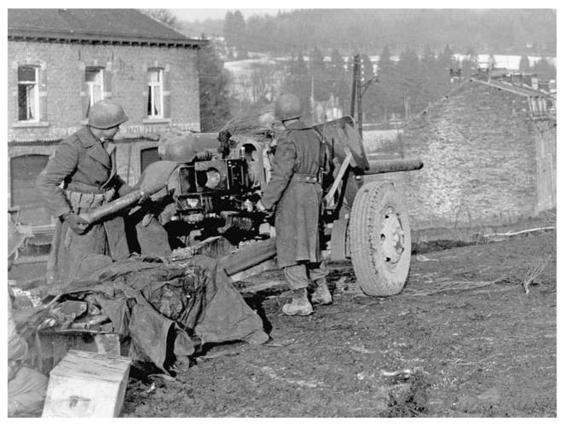
A portion of the tank-destroyer battalions were equipped with towed 3-inch guns like this weapon covering a road junction in the 7th Armored Division's sector near Vielsalm, Belgium, on 23 December. Although several of these units distinguished themselves in determined stands during the Battle of the Bulge, the lack of mobility and protection of these towed weapons led to widespread criticism in later assessments of the battles.
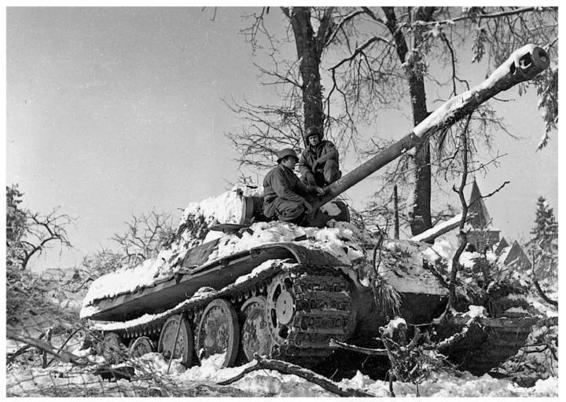
GIs inspect another of the Panther Ausf. G tanks of the 2nd SS knocked out during the fighting with the 3rd Armored Division in Grandmenil. This photo was taken several days after the battle on 4 January after snow had covered the area.

On Christmas Eve, the 2nd SS Panzer Division swept through Manhay and into Grandmenil, pushing aside Task Force Kane from the 3rd Armored Division. However, after being pummeled by air strikes on 26 December, the town was assaulted by Task Force McGeorge of the 3rd Armored Division and taken in the early-morning hours of the twentyseventh by paratroopers of the 517th Parachute Infantry. This was one of the 2nd SS Panthers lost in the fighting. It is being inspected by a GI from the 3rd Company, 289th Infantry, 75th Division, which occupied the town on 30 December.
This particular Panther Ausf. G of the 2nd SS was one of several lost in the fighting at Manhay on the road from Trois Ponts. It is being inspected by American troops in early January after the town was retaken.
An M10 3-inch gun motor carriage is dramatically lit by the blast of its own gun as it provides fire support.
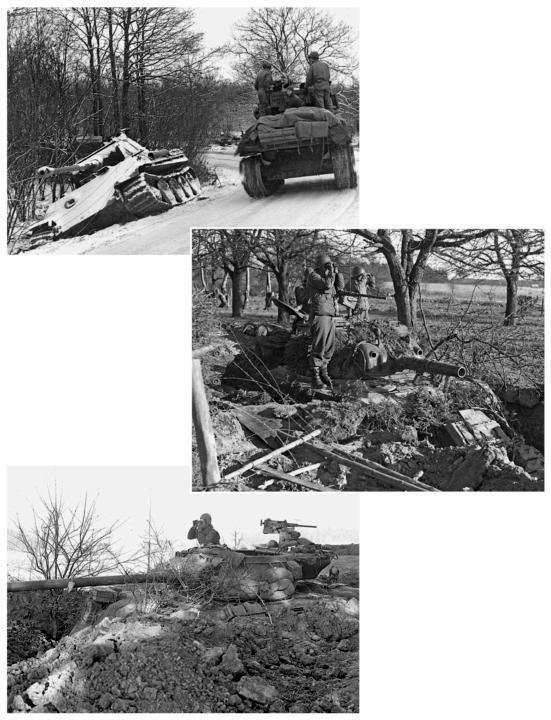
An M4 (105mm) assault gun of a headquarters company of the 7th Armored Division waits in hull-down position near Manhay during the fighting with the 2nd SS Panzer Division on 27 December. The tank is positioned in an entrenchment created by divisional engineers.
An M4 (76mm) of the 2nd Armored Division passes by an abandoned Panther Ausf. G of the 2nd SS Panzer Division lost during the fighting near Grandmenil at the end of December.
A well-entrenched M36 90mm gun motor carriage of the 814th Tank Destroyer Battalion holds positions near Manhay on 27 December during the fighting with the 2nd SS.

The crew of an M7 105mm howitzer motor carriage of the 7th Armored Division prepare ammunition while waiting for a fire mission during the fighting near Manhay. The ammunition was packed in the black fiberboard tubes seen here. This M7 is one of the lateproduction types manufactured in 1944.
The separate tank battalions supporting the American infantry divisions along the Belgian border were equipped mainly with the 75mm Sherman. The 707th Tank Battalion was attached to the embattled 28th Division, and one of its M4A3 tanks can be seen knocked out behind a StuG III assault gun in the village of Clervaux after the fighting. This battalion suffered the heaviest casualties of any of the tank battalions serving in the Ardennes.
Combat Command B, 10th Armored Division, was trapped inside the Bastogne pocket along with the 101st Airborne Division. CCB was divided up into several task forces defending along the southern perimeter of the town. This M4 served with Task Force O'Hara and was knocked out near Mageret.


The Fuhrer-Grenadier-Brigade was committed piecemeal to the fighting near Bastogne, and one of its battle groups attacked the U.S. 80th Division in Heiderscheid on Christmas Eve 1944. It suffered significant losses in the fighting, including the StuG III to the left and two Sd.Kfz. 251 half-tracks. The half-track in the center is one of the rare Sd.Kfz. 251/17's with a turret 2cm autocannon.

A close-up of the Sd.Kfz. 251/17 from the Fuhrer-Grenadier-Brigade knocked out during the skirmish at Heiderscheid on Christmas Eve. The small turret contains a 20mm gun.

The threat posed by the lead elements of Manteuffel's Fifth Panzer Army led Montgomery to deploy the British 29th Armoured Brigade along the Meuse. Lt. Robert Boscawen, commander of 2 Troop of the Coldstream Guards, sits in a Sherman 17-pounder Firefly guarding one of the bridges over the Meuse at Namur on Christmas Day. British armored units were deployed along the Meuse in the days before Christmas to prevent a possible German crossing.
Another Coldstream Guards Sherman tank on Christmas, talking with the crew of a three-quarter-ton truck assigned to press correspondents. The neighboring 3 Royal Tank Regiment was sent over the Meuse near Dinant before Christmas and stopped the lead elements of the 2nd Panzer Division only five and a half miles from the Meuse in a short engagement on 24 December.
GIs inspect a StuG I I I assault gun knocked out during the fighting at Heiderscheid.

A view of some more British Shermans of the 29th Armoured Brigade at Namur, this time with spare Churchill track on the turret for added protection. There is another Firefly in the background.
The German Seventh Army forces attacking southwest of Bastogne were almost devoid of tanks at the outset of the campaign. Gradually, more armored strength was shifted to this sector in hopes of securing a breakthrough to the Meuse. On Christmas Day, King Tiger No. 312 of the 3rd Company of schwere SS Panzer Abteilung 501 was abandoned near Engelsdorf. It was later claimed by the 628th Tank Destroyer Battalion. Here, on 8 January 1945, some GIs are using it to string communication wire while a group of Belgian schoolgirls passes by.
The Panzer Lehr Division left this Bergepanther recovery vehicle in the town of Morhet southwest of Bastogne in mid-December. This shows the vehicle nearly a month later after the January snowfalls and before it was packed up and shipped back to the United States for evaluation.

The U.S. First Army retrieved a King Tiger (No. 332) of schwere SS Panzer Abteilung 501, part of Kampfgruppe Peiper, which was abandoned near Bourgoument following the fighting in the Ambleve Valley.
The King Tiger on board the trailer with the ramp still in place.
A U.S. Army crew from the 463rd Ordnance Evacuation Battalion recovers a King Tiger on board the Culemeyer trailer. This particular tank is the wellknown 332 from schwere Panzer Abteilung 501, attached to Kampfgruppe Peiper during the Battle of the Bulge.
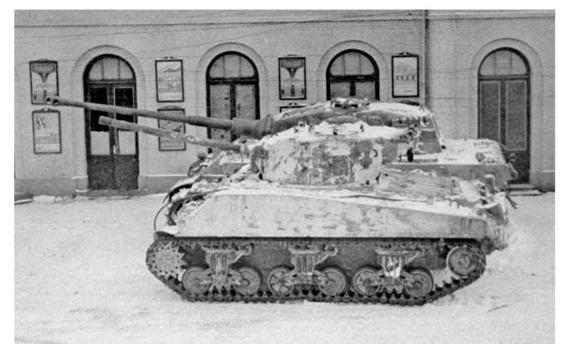
King Tiger 332 was moved from Bourgoument to Spa, near the U.S. First Army headquarters for display to senior staff. It was placed next to an M4A3 (76mm) to show the relative size difference. This tank was subsequently moved to Aberdeen Proving Ground and subsequently to the Patton Museum at Fort Knox.

King Tiger 332 at Spa in January 1945.
King Tiger 332 as taken from a window overhead.
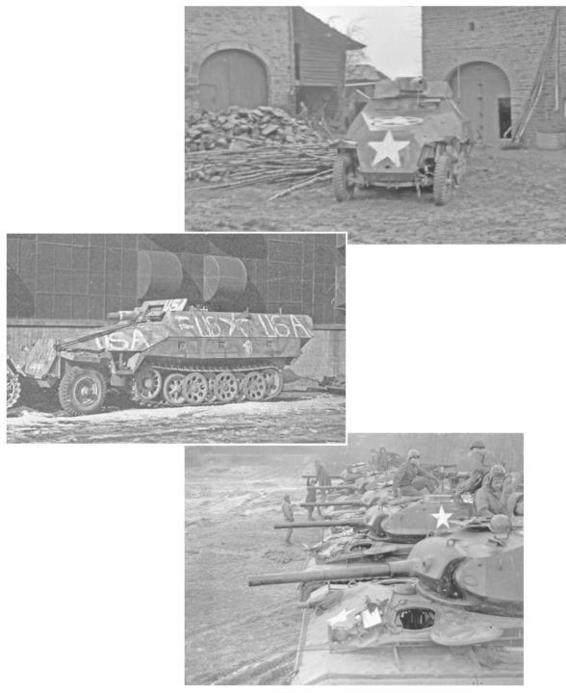
The 1st Company, 504th Parachute Infantry Regiment, 82nd Airborne Division, captured two of these Sd.Kfz. 251/9 assault guns from Kampfgruppe Peiper around La Gleize and put them into use for impromptu armored support after painting them with American stars. This was an assault-gun version of the common Sd.Kfz. 251 armored half-track, armed with a short 75mm gun.
Intended to replace the M5A1 light tank, the new M24 light tank began to arrive in small numbers around Christmas. This is from a batch of tanks being prepared at Kornelmunster, Germany, on 26 December and earmarked for cavalry reconnaissance squadrons, but in fact, the first was unofficially acquired by the 740th Tank Battalion and saw its combat debut in the fighting around Malmedy in support of the 82nd Airborne Division.
Another view of one of the 82nd Airborne Division's Sd.Kfz. 251/9 assault guns. This vehicle was shipped back to Aberdeen Proving Ground in Maryland for technical evaluation.

On 20 December, the 116th Panzer Division captured the fuel dump at Samree, but it was pushed out by the U.S. 2nd Armored Division on 10 January. Here, some military police of the U.S. 334th Infantry, 84th Division, try to repair an Sd.Kfz. 250 half-track that had been left behind. The tactical insignia on the bow identifies it as belonging to the 116th's PanzerjagerAbteilung 146 (1 46th Tank Destroyer Battalion).
The catastrophic effects of an ammunition fire and the resultant explosion are all too evident from the shattered hulk of this Pz.Kpfw. IV of Kampfgruppe Maucke, 15th Panzer Grenadier Division, knocked out in the outskirts of Bastogne in late December during a fight with paratroopers from the 101st Airborne Division.
This Pz.Kpfw. IV (named LustmolchHappy Salamander in English) of Kampfgruppe Maucke was knocked out in Champs on the approaches to Bastogne in an encounter with the 502nd Parachute Regiment, 101st Airborne Division, on 26 December.

The approaches to the village of Villers-la-Bonne-Eau, a small village on the southern edge of Bastogne, are littered with the debris of war, including a German 88mm FIaK 36 and an American M4 medium tank, probably from the 10th Armored Division, which fought in this sector.
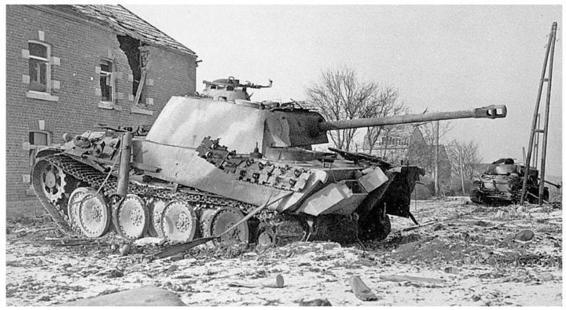
The farthest penetration by the 116th Panzer Division was Hotton, where hard fighting with the 3rd Armored Division took place on Christmas and the following days. This Panther from Kampfgruppe Bayer was one of a number left behind in the town after the fighting, with a Pz.Kpfw. IV evident in the background. This is a relatively late-production Panther with the crew heater and extended chin mantlet.

A Panther Ausf. G of the 116th Panzer Division during the fighting for Hotton on 26 December, with a Pz.Kpfw. IV (No. 611) in the background. The Panther is a new-production tank built no earlier than October 1944, judging from the crew compartment heater cowling on the rear engine deck. Most of the Panther tanks used in the Ardennes offensive were brand-new vehicles.

A view of one of the Pz.Kpfw. IV tanks of the 116th Panzer Division knocked out during the fighting in Hotton.

Another view of a Panther Ausf. G of the 116th Panzer Division knocked out during the savage fighting for Hotton. Here, a local woman walks past the wreck on 1 January.
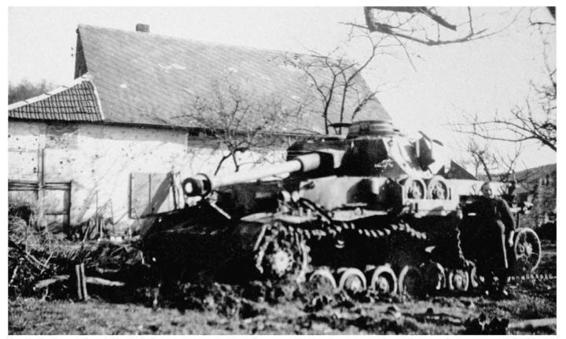
A Pz.Kpfw. IV of the 116th Panzer Division knocked out near Hotton.

One of several Panther Ausf. G tanks of the 116th Panzer Division knocked out by the 638th Tank Destroyer Battalion during the bitter fighting for Hotton.
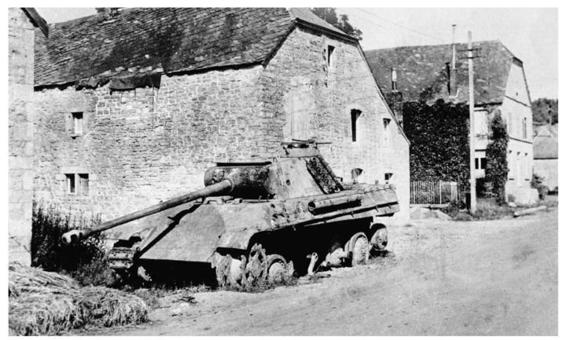
Another Panther Ausf. G of the 116th Panzer Division knocked out in Hotton.

A Panther Ausf. G knocked out by an M18 76mm gun motor carriage of the 638th Tank Destroyer Battalion during the fighting for Hotton.
Hotton was defended primarily by reararea units of the U.S. 3rd Armored Division, including headquarters troops. This M4 was one of the two tanks involved in the initial defense and was knocked out during the fighting.
An M5A1 of the 3rd Armored Division knocked out in Hotton during the fighting with the 116th Panzer Division. By this stage of the war, the prominent tactical markings carried on the hull side have been completely painted over.

The spearhead for Patton's attempt to relieve Bastogne was CCA, 4th Armored Division. The first tank to enter Bastogne was Cobra King, an M4A3E2 Jumbo of Company C, 37th Tank Battalion, command by Lt. Charles P. Boggess. It is seen here after its arrival on 26 December.
Manteuffel's Fifth Panzer Army made the deepest advance into the Bulge toward the Meuse at Dinant. The narrow finger was attacked from all sides, leading to a series of vicious tank battles for the Celles pocket. This Panther Ausf. G from the Panzer Lehr Division was knocked out during the attacks on Buissonville in the days after Christmas.
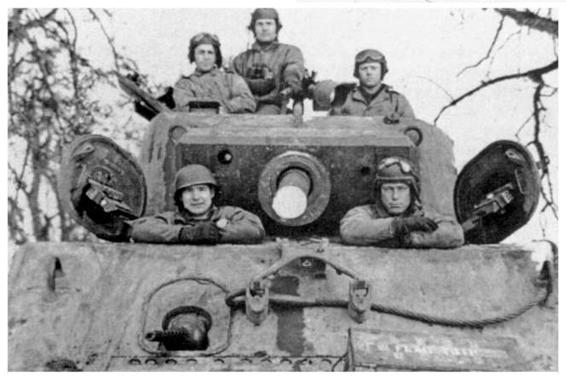
A close-up of the crew of Cobra King in Bastogne after the siege was lifted.

A scene from inside Bastogne after the siege was lifted. The M4A3E2 tank in the center is probably Cobra King.
This StuG III assault gun was hidden in a wrecked home on the approaches to Bastogne and held up the 4th Armored Division spearhead until knocked out by 500-pound bombs from strafing P-47 fighter-bombers.


A 4th Armored Division M4 knocked out in the outskirts of Bastogne is recovered by a Dragon Wagon recovery and evacuation vehicle, which consisted of an M26 tractor truck and an M1 5A1 semitrailer. A close examination of the hull side shows why many crews painted out the white stars on the hull side.
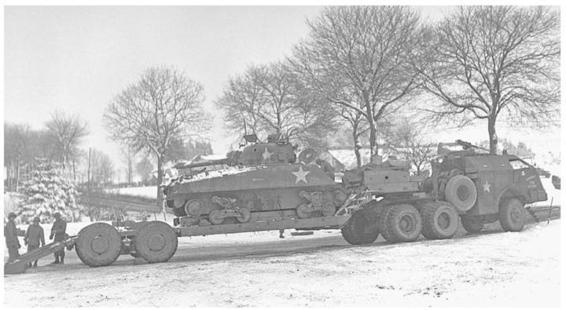
Another view of the tank recovery by a Dragon Wagon outside Bastogne. This was the standard evacuation vehicle in armored divisions in 1944-45.
Lt. Col. Creighton Abrams, commander of the 37th Tank Battalion, points out the name on his M4A3 (76mm) tank to visiting pilots after his battalion spearheaded the Third Army's relief of Bastogne.
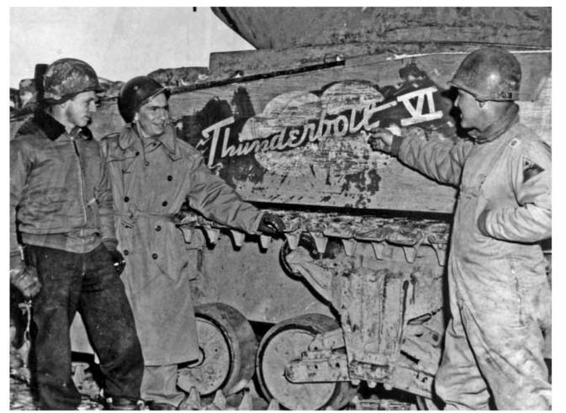

The 4th Armored Division spearheaded the Third Army's attack toward Bastogne even though it was seriously depleted in tank strength from its fighting in the Saar region. As a result, it had priority for new replacement equipment, including some of the first of the new M4A3E8 tanks deployed to the ETO. These had the new horizontal volute suspension system, which offered better performance on soft ground than the previous vertical volute suspension.
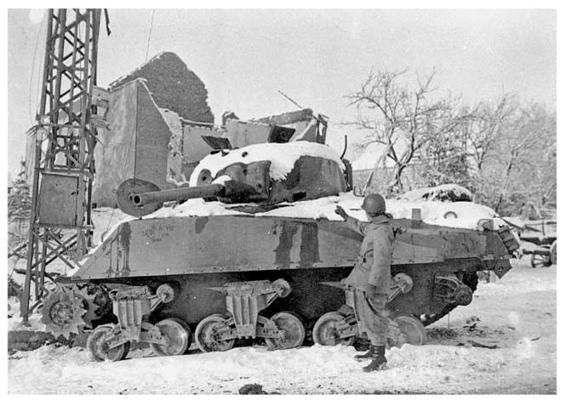
This M4A3 from the 6th Armored Division was knocked out in Hompre on the outskirts of Bastogne during the attempts to relieve the city in late December. The GI is pointing to where a large-caliber antitank-gun round penetrated the base of the turret.

An M4A3 (76mm) medium tank passes through the ruins of Benwihr, Belgium, on 27 December.
Another Panther Ausf. G of the 9th Panzer Division is inspected by GIs of the 83rd Division the day after the battle there. The 9th lost sixteen Panthers during the Battle of the Bulge, about a third of its strength.


An M5A1 light tank from Company D, 37th Tank Battalion, 4th Armored Division, leads a column of trucks into Bastogne on 27 December during Patton's drive to relieve the town.
While the British 29th Armoured Brigade blocked to road to the Meuse, the 2nd Armored Division attacked the exposed flank of the 2nd Panzer Division with full force. Here, some M4A1's (76mm) carry infantry of the 291st Regiment, 75th Infantry Division, into an assault near Frandeux on 27 December. The 2nd Armored Division's attacks around Celles shattered Manteuffel's spearhead near the Meuse.

This old veteran, a Sd.Kfz. 233 schwere Panzerspahwagen (75mm), was lost in the Celles pocket in late December in fighting with the U.S. 2nd Armored Division. The trident insignia on the bow identifies it as belonging to the 2nd Panzer Division This particular family of 8-by-8 armored cars had largely been superseded by 1944 by the newer Sd.Kfz. 234 series, but some old veterans like this one continued to serve until lost in combat.
Another view of a collection of equipment captured in the Celles pocket. In the foreground is a pair of 150mm SiG infantry guns, and behind them is an Sd.Kfz. 234 Puma armored car.
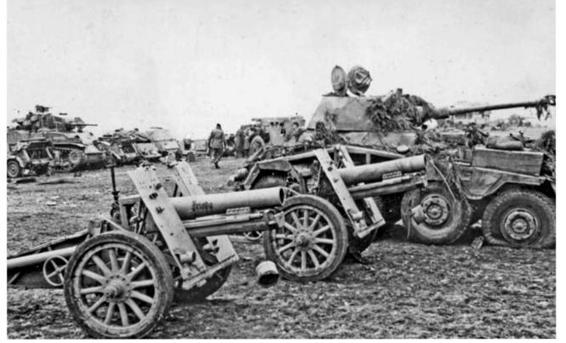
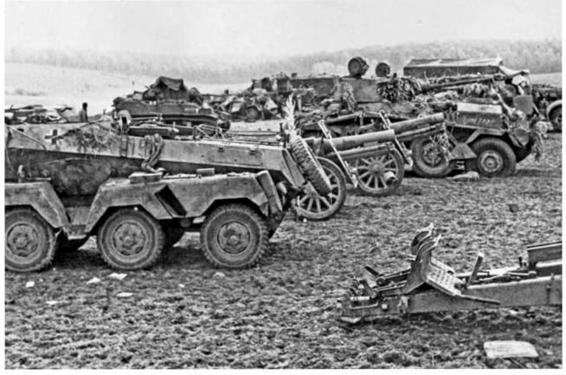
A view of Celles booty taken from farther down the row shows an Sd.Kfz. 233 schwere Panzerspahwagen armored car in the foreground.

German prisoners walk past an M3A1 half-track of the U.S. 4th Armored Division on 27 December during the attempts by Patton's Third Army to relieve Bastogne. There was intense fighting along the route for the next several days as the Germans tried to sever the link between Bastogne and the Third Army.
With CCR trapped in Bastogne, CCA of the 9th Armored Division was attached to the 4th Armored Division to take part in the operations to relieve Bastogne. An M4A3 (76mm) of Company C, 19th Tank Battalion, Task Force Collins, moves forward on 27 December as part of the effort to open the road from Neufchateau to Bastogne. The tank is fitted with a standardized engineer camouflage kit with Sommerfield matting, a type of metal fencing designed to permit the crew to attach branches and foliage for camouflage. This company seized the town of Sibret from the 5th Fallschirmjager (Paratroop) Division that day, capturing about forty prisoners.
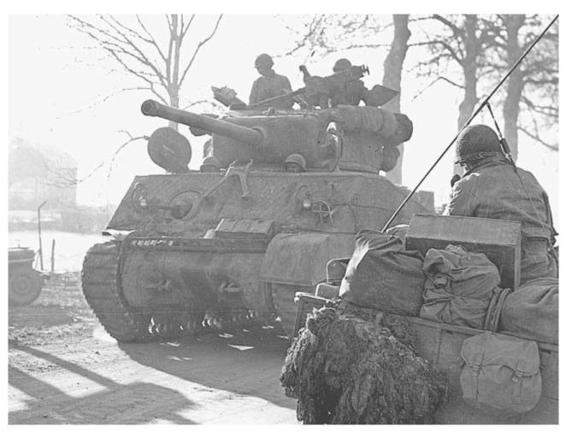
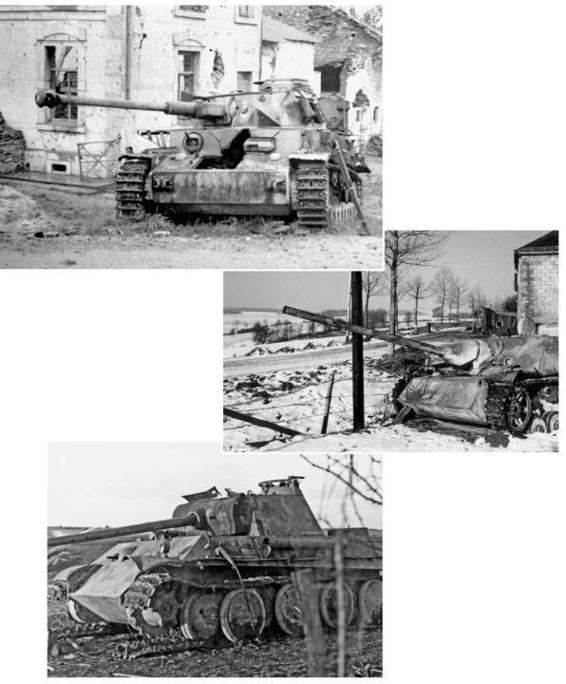
A Jagdpanzer IV knocked out on the outskirts of Bastogne after Christmas.
A Pz.Kpfw. IV knocked out in the fighting near Bastogne and photographed the following summer. It has suffered a catastrophic failure of the front armor, probably a direct hit by an artillery round.
A Panther Ausf. G knocked out and burned in the Bastogne area. There are at least two bazooka impacts on the turret side.
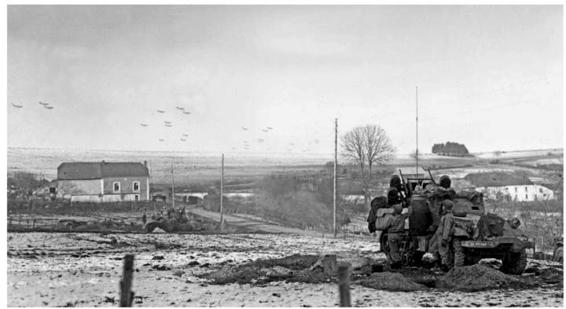
Snow fell around Bastogne later in the month, as seen herein a view of an M16 machine-gun motor carriage from the 488th AntiAircraft Artillery Battalion of Patton's Third Army, which had already broken through to the encircled city. Here, the half-track crew watches as C-47 transports fly supplies into Bastogne on 27 December.
During the Ardennes battle, the Luftwaffe made one last major attempt to attack Allied forces, and antiaircraft units were put on heightened alert. This is an M15A1 of Battery D, 467th Anti-Aircraft Artillery Battalion, guarding one of the Meuse River bridges in Sedan, France, on 27 December.
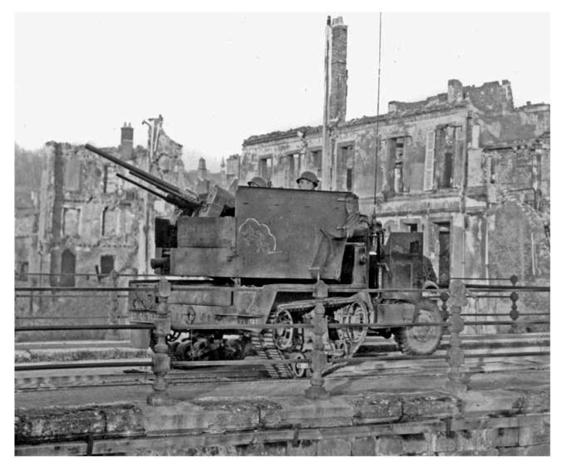

The 5th Fallschirmjager Division captured six M4 tanks intact in Wiltz and put them back into service after painting them prominently with German crosses. This one is seen abandoned a few weeks later in the center of Esch-surSure.
Lacking paint, some units trapped in Bastogne tried other methods of snow camouflage. This is an M3A1 half-track of the 10th Armored Division using white sheets.
An M3A1 half-track from the 4th Armored Division moves forward through Chaumont in Luxembourg during the attacks to relieve Bastogne. The new folding rear stowage racks have been modified to permit stowage across the whole rear of the vehicle.
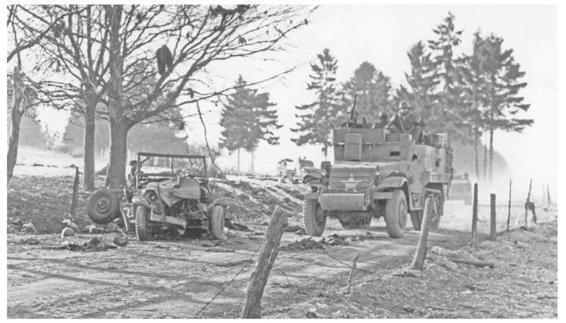
An M3A1 half-track from the 4th Armored Division passes by a mined jeep from the 25th Cavalry Squadron on the road through Chaumont.

A Panther Ausf. G knocked out by an M18 76mm gun motor carriage of the 704th Tank Destroyer Battalion, 4th Armored Division, during the fighting in the Ardennes in December.
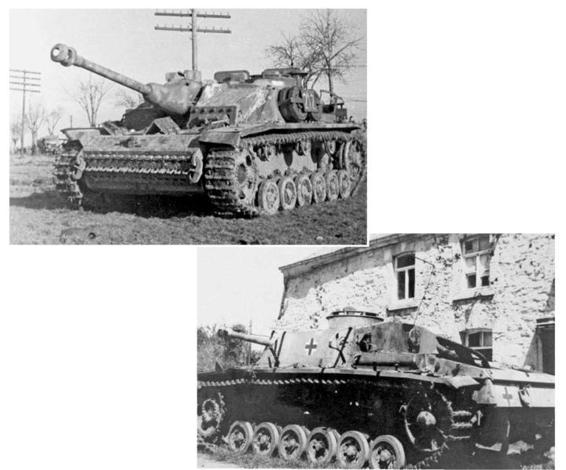
A StuG I I I Ausf. G abandoned near Bastogne.
A StuG III Ausf. G with the improved Saukopf mantlet lost during the fighting near Bastogne.
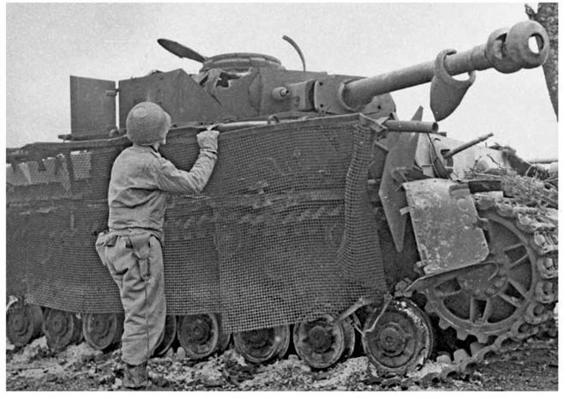
One of the alternative forms of protective skirts for the Pz.Kpfw. IV was the wiremesh shields sometimes nicknamed Thoma shields. Although these are often described as antibazooka shields, they were in fact adopted by the German army as protection against Soviet antitank rifles that could otherwise penetrate the thinner side armor of German tanks.

Another example of a knocked-out Pz.Kpfw. IV with the Thoma protective skirts from the 3rd Company, Panzer Regiment 33, 9th Panzer Division, outside Bastogne after Christmas.
This provides a third example of the late Pz.Kpfw. IV with the Thoma shields, this time from SS Panzer Regiment 1, knocked out in the fighting around Lutrebois.
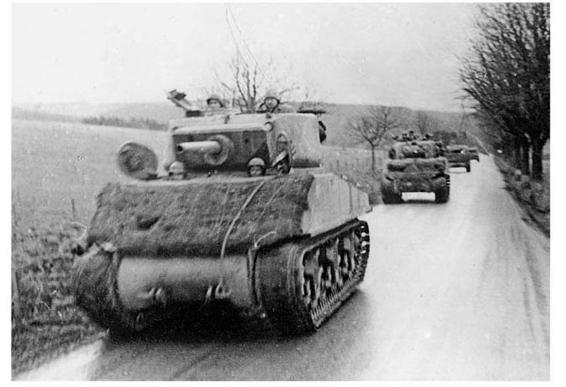
An M4A3E2 assault tank leads a counterattack in the Bastogne area in late December. It is fitted with multilayer applique armor on the glacis plate, typical of that added in to U.S. Ninth Army tank units and made from layers of spare track and sand bags and topped by camouflage net.
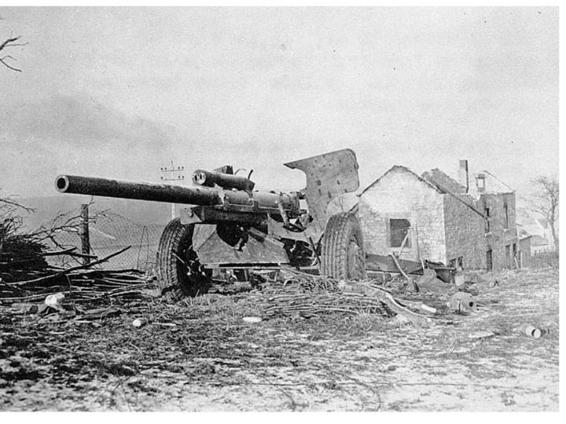
A 3-inch antitank gun lies wrecked at a crossroads outside Humain after it was put out of action by a German tank a few days after Christmas. This particular gun was credited with knocking out fifteen German tanks during the intense fighting against the 9th Panzer Division around Humain.

Three Panther Ausf. G's stand abandoned in a field outside Humain on 28 December. The 9th Panzer Division attempted to defend the town against an attack by the U.S. 2nd Armored Division but was ejected after a fierce ten-hour battle on the twenty-seventh.
Troops from the U.S. 84th Division inspect a knocked-out Panther Ausf. G in the fields outside Marcouray on 9 January 1945. This was probably one of the tanks from the 116th Panzer Division that took part in the fighting with the 3rd Armored Division in this sector in late December and early January.
A late-production M7 105mm howitzer motor carriage prepares to fire in support of the 101st Airborne Division near Bastogne in late December. The censor has obliterated the unit-identification code on the side of the pulpit.
Preparing an M12 155mm gun motor carriage for action while supporting the 3rd Armored Division around Houfallize in late December.


A GI sweeps for mines near a damaged Sd.Kfz. 250 half-track on the main street of Houfallize.
A pair of tanks of the 3rd Armored Division in the woods near Houfallize. The Sherman to the left is one of the original M4A1 (76mm)'s in use with the division since Operation Cobra; to the right is one of the much-prized M4A3E2 assault tanks.
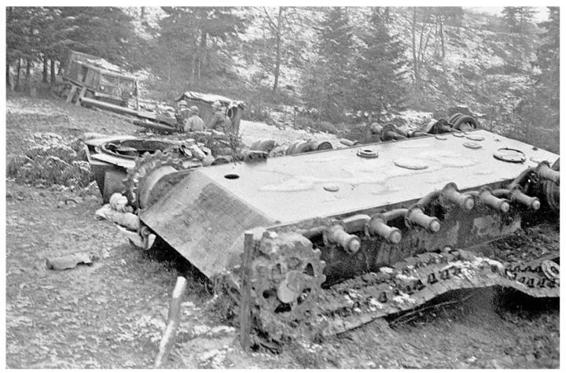
A Panther tank abandoned in the Houfallize area after the fighting. These overturned tanks usually resulted from American road-clearing operations when bulldozers attempted to shove them off main thoroughfares.

Another example of an overturned Panther in the Houfallize area.
A Pz.Kpfw. III abandoned in Houfallize. This tank type was seldom in frontline use as a battle tank by this stage of the war, but it was still used as a command vehicle in some units.
An Sd.Kfz. 250 light half-track abandoned on the streets of Houfallize.

A scene of the devastation in Houfallize after the fighting, with a Panther tank of the 116th Panzer Division overturned in the Ourthe River near the bridge.
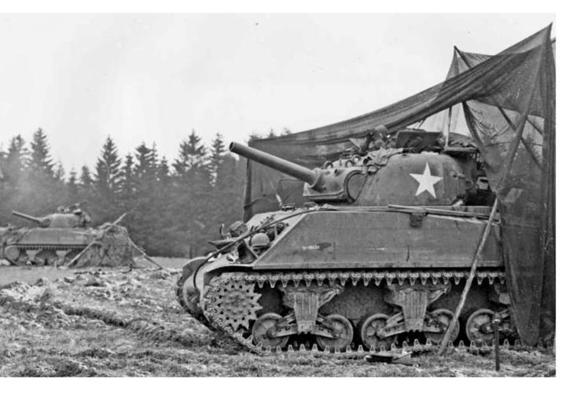
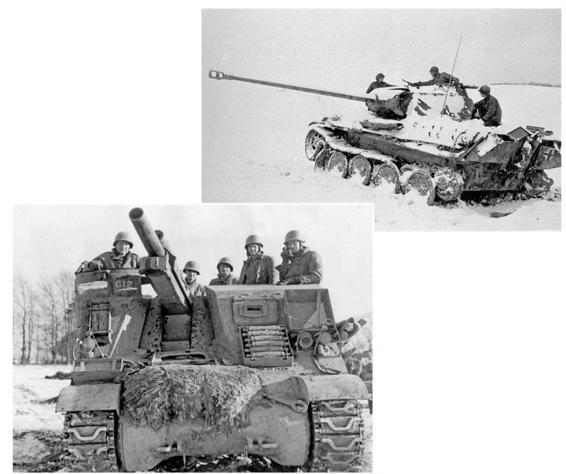
M4A3 (105mm) assault guns from the 750th Tank Battalion fire on German positions from a field near Manhay, Belgium. Like most artillery vehicles, they have been provided with camouflage netting.
A Panther Ausf. A knocked out during the fighting around Bastogne. The tank carries large turret numbers, barely visible on this photo because of weathering; they are of the style more commonly associated with Normandy, so this may very well be a rare survivor of that campaign.


A 105mm Sturmhaubitze assault gun knocked out by the U.S. 99th Division during the Battle of the Bulge. This was a version of the more common StuG I I I but armed with a 105mm howitzer instead of the usual 75mm gun.

An M4 (105mm) assault gun of the HQ Company, 68th Tank Battalion, 6th Armored Division, moves forward to Bastogne through Habay-la-Neuve on 29 December. The 6th was sent into Bastogne to take part in efforts to break the encirclement on the eastern side of the town in mid-January.
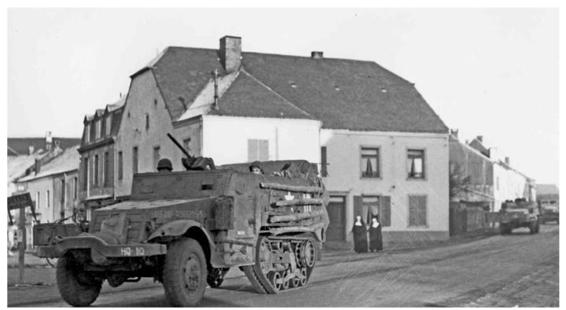
An older M3 half-track (named Helen) of a headquarters unit from the 6th Armored Division moves through Habay-la-Neuve during the Ardennes fighting on 29 December. The logs lashed to the side were used to help unditch the vehicle's forward wheels if soft mud was encountered.

Snow began to fall heavily at the end of December. Here, tankers gather around a fire to warm up behind their M4A3 (105mm) howitzer tank near Eupen, Belgium.

An M18 76mm gun motor carriage of the 704th Tank Destroyer Battalion and an M15A1 combination motor carriage half-track from the 4th Armored Division lie knocked out on the southern approaches to Bastogne on 29 December after having been hit by German artillery fire.

An armored infantry unit of the 10th Armored Division uses white cloth for camouflage over their half-tracks while stationed in the outskirts of Bastogne on 29 December.

An M15A1 combination gun motor carriage of Battery D, 197th Anti-Aircraft Artillery Battalion, guards a bridge through the town of Limbourg in Belgium. The bridge is a temporary engineer span built after the original bridge had been destroyed during earlier fighting.

An M36 90mm gun motor carriage of the 628th Tank Destroyer Battalion waits in ambush near the bridge over the Ourthe River in Hotton during the fighting with the 116th Panzer Division on 30 December. The M36 is well concealed under a camouflage net.
The crew of an M5A1 of the 759th Tank Battalion, VII Corps, warms up around a fire at a forward outpost on 30 December. This particular unit was the only tank battalion in the ETO equipped only with light tanks. It served for most of the campaign with the 4th Cavalry Group.

A U.S. Army heavy wrecker attempts to recover a disabled Panther and Pz.Kpfw. IV of the 2nd Panzer Division in the Bastogne area. Much of the division's armored equipment was lost in the pockets around Celles during the encirclement battles after Christmas.
A knocked-out Panther Ausf G. photographed at night.
A U.S. Army Air Force liaison officer poses next to a disabled StuG I I I assault gun in the Ardennes.

The HQ Company of the 2nd Battalion, 32nd Armored Regiment, 3rd Armored Division, moves forward near Marche, Belgium, on 31 December. The tanks are M4 (105mm) assault guns, while to the right is an M3A1 half-track.
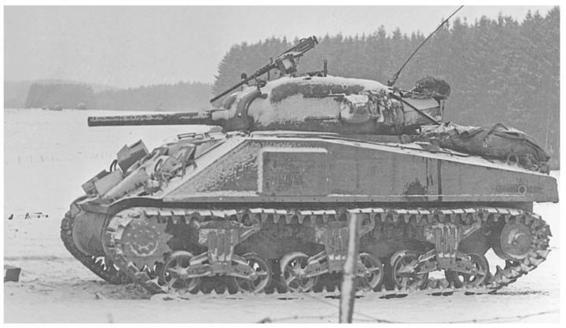
Once the 37th Tank Battalion reached Bastogne, there remained the difficult task of keeping the road open between Patton's Third Army and the town. After Christmas, the remainder of the 4th Armored Division was used to widen the breach. This is a snow-covered M4A3 of the 35th Tank Battalion, 4th Armored Division, operating in the approaches to Bastogne near Sainlex on 31 December.
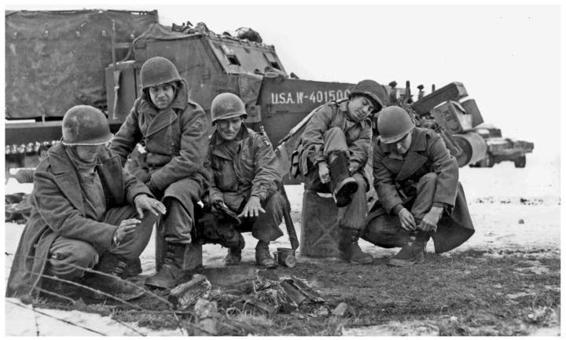
The crew of an M15A1 combination gun motor carriage of the 777th Anti-Aircraft Artillery Battalion and some paratroopers from the 101st Airborne Division warm their hands over a small fire on the outskirts of Bastogne on 31 December.
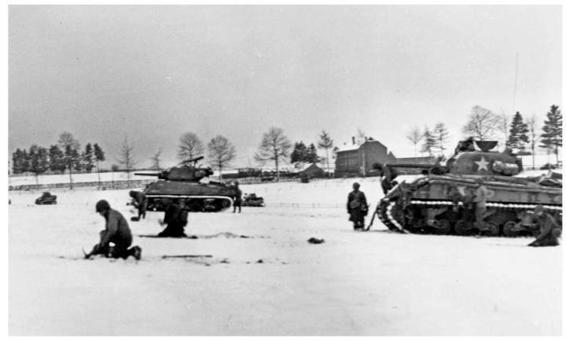
The 44th Armored Infantry Battalion, 6th Armored Division, digs in to create defensive positions with the support of an M4 and M4A3E2 assault tank in the outskirts of Bastogne on 31 December.
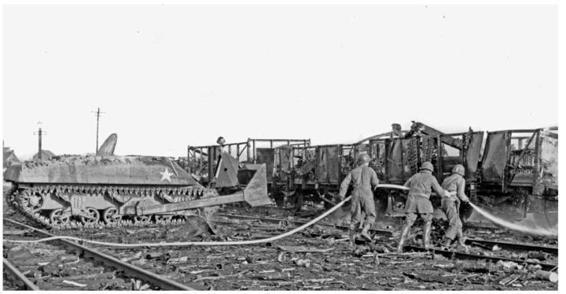
A turretless M4A1 medium tank with dozer blade is used to help fight fires in the railyard at Ramillies, Belgium, on 31 December.

Another example of an improvised bulldozer conversion in Belgium in late 1944.
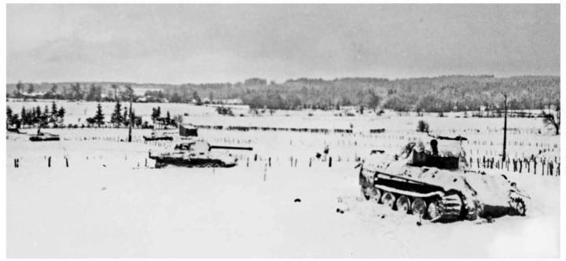
Some of the fifteen Panther tanks littering a field between Grandmenil and Houfallize during the fighting late in December.
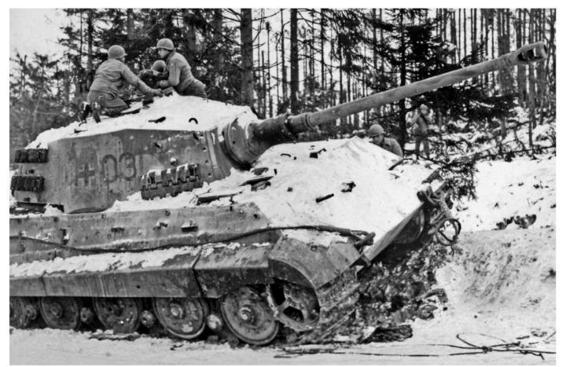
GIs inspect King Tiger 03 from the headquarters section of schwere Panzer Abteilung 506 (506th Heavy Tank Battalion), abandoned by the roadside in Villers la Bonne Eau on the Bastogne-Houfallize road. The battalion was involved in an attack on New Year's Eve.
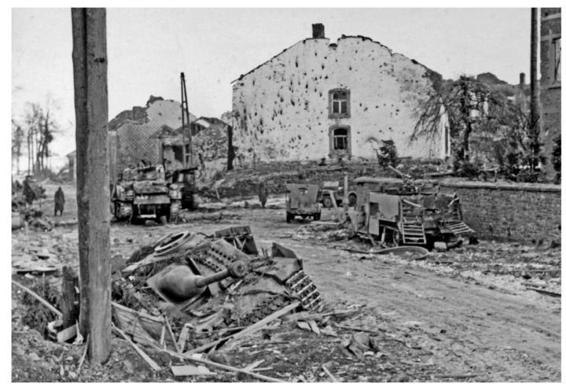
Armored vehicles litter the main road through Noville in the Bastogne area after the heavy fighting there at the end of December. In the left foreground is an abandoned StuG III assault gun while above it is a burned-out M4 medium tank. To the right is a destroyed M2A1 half-track.
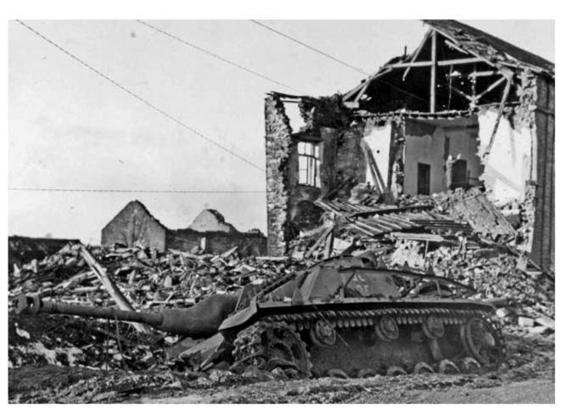
A StuG I I I knocked out in the streets of Noville during the fighting in the Bastogne sector after Christmas.
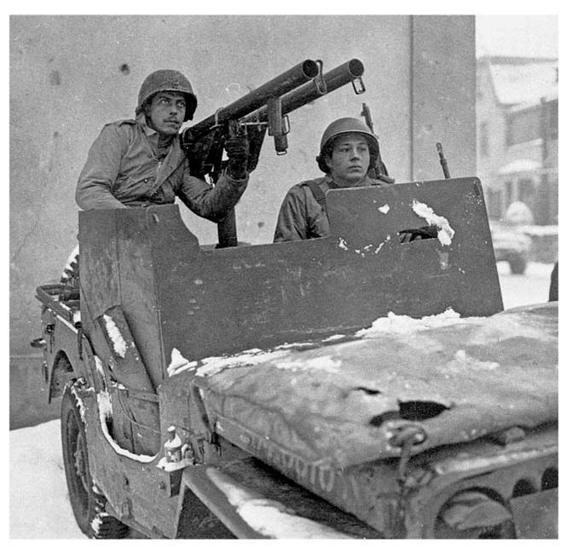
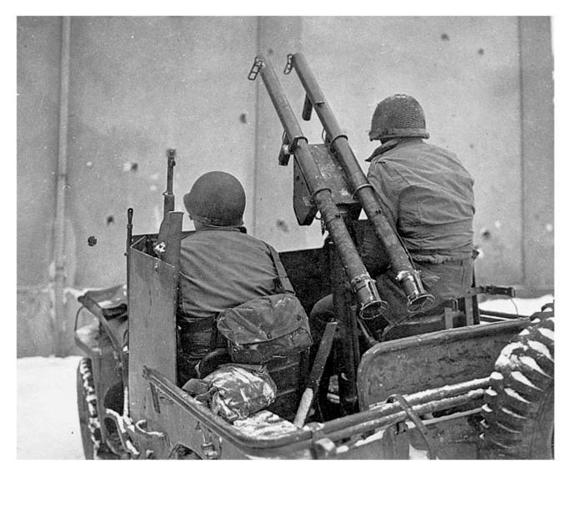
The intelligence and reconnaissance platoon of the 60th Infantry, 9th Infantry Division, developed its own improvised bazooka launcher for its armored scout jeeps, as seen here during the Battle of the Bulge.
Another view of the 60th Infantry's bazooka jeep. The bazookas were mounted on a pedestal instead of the usual .50-caliber heavy machine gun.