
The examples use the following equipment:
Skywatcher Skymax Pro 180mm, Maksutov-Cassegrain, 2700mm focal length, f/15 focal ratio
Skywatcher Esprit 80mm Refractor, 400mm focal length, f/5 focal ratio
Skywatcher HEQ5 – Tracking mount
Crayford Focuser
ZWO ASI224MC – Colour imaging camera with IR cut filter
As already mentioned, the method of stacking many photos together to produce a single high-quality image is very effective in reducing noise and capturing a detailed photograph. The general rule is that the more photos you use for the stack, the lower the noise will be on the final image. However, you will reach a point at which stacking more frames does not greatly improve the final quality and finding. It may take a bit of trial and error to find this point. There is no issue with stacking more images than you need apart from the increased capture time and filling up additional hard drive space. The correct number of frames required depends on the quality of each frame which makes up the stack. Low-quality frames will require thousands of individual images, whereas higher quality frames from a DSLR, for example, may only require 50 images. Capturing video has a benefit over single non-video derived pictures due to the ability to capture many photos in such a short space of time. This short exposure time captures breaks in the atmospheric ‘seeing’ to produce distortion-free images which allow you to stack a large number of frames without these atmospheric effects.
Capturing the most exquisite detail is best achieved using a dedicated high frame rate planetary video camera. This camera usually features a small sensor compared with a DSLR and a very narrow field of view. This type of camera produces a much higher resolution on the final processed image. The principle of this technique is to capture a minimum of 5000 frames and stack the best ones to produce the final image. I will be covering this technique over the next few pages.
High frame rate cameras do not look like typical hand-held cameras, as the functionality is generally less varied and the design much more straightforward. The camera comprises a sensor, a nosepiece connector, USB port and a serial port. Some cameras have built-in infra-red filters and more expensive cameras have integrated cooling systems to reduce unwanted thermal noise. The cameras are controlled using capture software on a PC via the USB port. Some of the cheaper cameras use a USB 2 interface which may restrict the frame rate. Therefore, check the interface and preferably purchase a USB 3 model, as this will increase the data capture rate.
The high frame rate video camera I used for the close-up images in the book was a ZWO ASI224MC; this is a one-shot colour camera and is well suited to planetary and lunar photography. This camera is one of many cameras on the market. The model you decide on depends on the type of image you want to capture and the size of your budget. Colour cameras are generally less sensitive than the mono camera counterpart due to the sensor Bayer matrix. This means each pixel has either a red, green or blue filter over it which discards two-thirds of the light. Mono camera sensors do not require the pixel filters and each pixel can use all the light gathered to create the image, increasing the sensitivity, although the images are in black and white. If you are content with black and white, you may find a mono camera suitable, however if you wish to resolve mineral colours on the Moon, a colour camera would be your choice. Coloured images are possible with a mono camera, although you would need to buy a filter wheel and a set of coloured RGB filters to build up the picture using additional complex image processing. I regard this as more advanced astrophotography and is beyond the scope of this book. I recommend that beginners use the mono camera for black and white captures or a one-shot colour camera.
Although your eyes cannot see infra-red (IR) radiation, sensors work differently, and colour cameras require an IR cut filter to block the infra-red part of the spectrum. This is due to the sensor being extremely sensitive to IR radiation, causing unwanted blur, noise or colour distortion which can degrade the image. Therefore, the addition of the filter provides much sharper images which are free of interfering wavelengths. Not all cameras come with a built-in filter and you may need to purchase one separately. They come in 1.25” and 2” sizes and screw into the camera or the nosepiece. When purchasing your colour camera, check whether a filter is included.
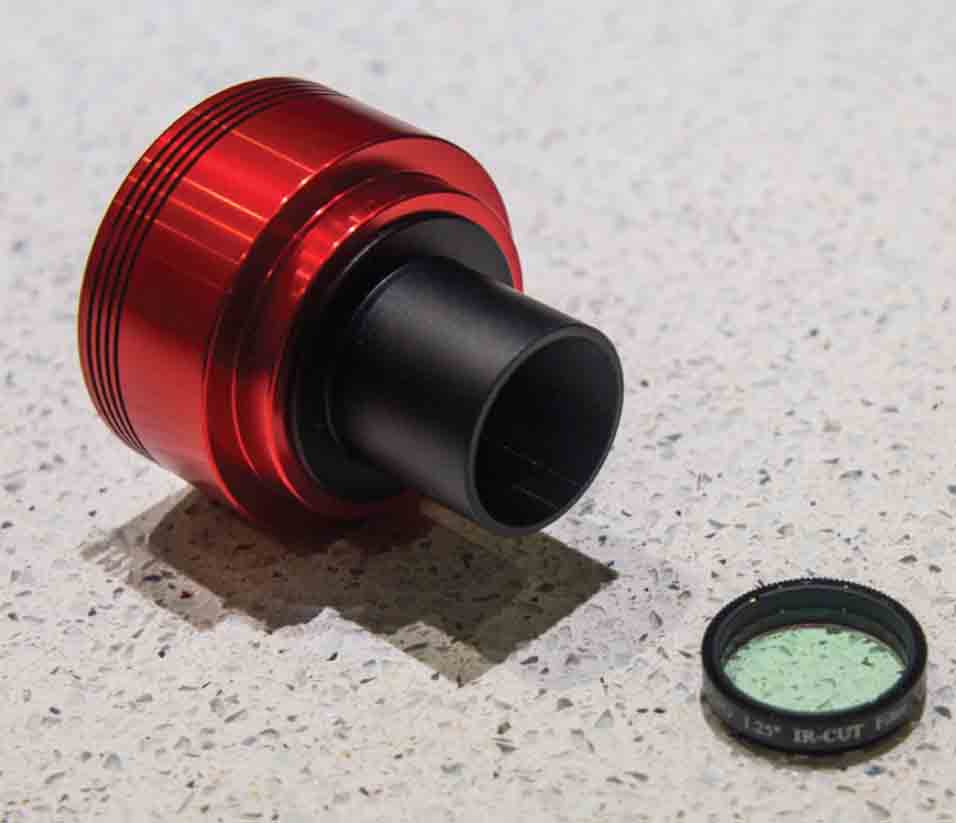
ZWO ASI224MC High Frame Rate colour camera, IR cut filter
Attaching to a telescope
Connecting the camera to a telescope is a straightforward process and the techniques discussed can be applied to other telescope models that are not shown. As a beginner, you should initially attach the camera to the prime focus position before trying to use a Barlow lens, as the Barlow lens adds another level of complexity of achieving focus due to the extended focal length. Attach the camera to the eyepiece holder using the 1.25” nosepiece adapter or, if the orifice requires a 2” diameter, insert the camera directly, as it has a 2” designated ridge for this purpose. The prime focus position will allow you to find the focus point using the telescope focusing mechanism, although you often find that the focusing mechanism supplied with the telescope does not move smoothly and is not always suitable for fine-tuning. If this is the case, purchase a dual speed focuser, which features a delicate feather dial, or preferably an electronic focuser, as fine focusing is essential to achieve a quality image at these long focal lengths. You can connect these types of focusers to the imaging train, however note that a focuser may slightly increase the focal length and therefore the magnification.

Camera attachment to the focuser using the 1.25” reducer.
The image shows how the focuser attaches to the OTA with the camera in position.
Set up your telescope on the tracking mount and, if you have an equatorial mount, ensure it is polar aligned. It is good practice to do this, as we will be using the tracking function on the mount to allow enough time to capture the frames. If the tracking is out slightly, you will find that the target will slowly drift out of view during the capture, especially under high magnification.
When you are set up, point the telescope towards the Moon. You may have to replace the eyepiece temporarily to find the Moon, although it is easier to do this by using the finder scope and leaving the camera in position. When the Moon is in the field of view, ensure that the lunar tracking is on to prevent the Moon drifting out of sight. However, if your mount does not have lunar tracking and only sidereal tracking, the difference is minimal if the image capture time is relatively quick. The sidereal tracking rate will start to lose the Moon from the field of view if you are tracking for an extended period at a high focal length.
As the camera is essentially just a chip, you will need separate image acquisition software to capture your video. Before you connect the camera to the PC, ensure that the correct camera driver is installed and designated capture software is downloaded and installed. This will provide a live view and allow you to record the video. The software options commonly used are Firecapture and Sharpcap. Both are very good and free to download from the following sites:

ASI224MC attached to the Skymax Pro180.
https://www.sharpcap.co.uk/
http://www.firecapture.de/
I will be using Sharpcap as the software choice for examples in the book. However, you should download and trial both applications to see which you prefer. The software will allow you to view the image in real time, adjust the focus and finally capture your video.