4
The period between May 1297 and March 1298 saw William Wallace rise in meteoric fashion to military and political leadership in Scotland. Although it is fairly certain that he was an outlaw when he murdered William Heselrigg, the English Sheriff of Lanark, in the early summer of 1297, within a few months Wallace was being viewed in an entirely different way. By 11 October 1297 – after victory over the English at the Battle of Stirling Bridge (11 September) – Wallace was describing himself, together with Andrew Moray, as joint leader at Stirling Bridge, as ‘leaders of the army of the kingdom of Scotland’ (letter to the towns of Lübeck and Hamburg). On 29 March 1298 Wallace defined himself in another official document, the Charter of William Wallace to Alexander Scrymgeour, as
. . . knight, Guardian of the kingdom of Scotland and commander of its army, in the name of the famous prince the lord John, by God’s grace illustrious king of Scotland, by consent of the community of that kingdom . . .
This was perhaps even applicable shortly after the death of Andrew Moray in late November 1297. Just a few months after his emergence ‘from his den’, William Wallace had been elevated in social status to knight and was acknowledged as sole military and political commander in Scotland in the name of his King, John Balliol. In the hierarchical, aristocratic world of medieval state and martial affairs, this was a phenomenal achievement.
It could be argued that William Wallace’s rapid rise to military and political power was made possible partly by the failures of the English in Scotland. Certainly, Scottish resistance, in general, had been aided not only by a mixture of insensitive political and economic policies imposed by the new English administration after 1296, but also a rather complacent military strategy supposedly aimed at crushing the growing opposition from May 1297. Resistance in 1297 seemed most unlikely given the apparent ease and thoroughness of the English victory and takeover in 1296. The symbolic removal of Scottish regalia, especially the Stone of Destiny, added to the actual expulsion of the Scottish King and the chief families involved in Scottish central and local government, left few rallying points for future opposition. However, Edward I’s policy in 1297 of using all resources at his disposal in all lands under his direct rule – and this now included Scotland – to maintain his hold over Gascony and launch a major campaign in Flanders against the French King had unforeseen consequences in Scotland. A kingdom that had just lost its king, and independent status, suddenly felt the harsh realities of direct rule. A large sum of over £5,000 was soon raised from Scotland for use outside the country, and this was achieved through compulsory seizure of a major economic asset, wool. A rumour was reported by Scottish nobles in July 1297 that
. . . they were told for a certainty that the king would have seized all the middle people of Scotland to send them beyond the Scottish sea in his army, to their great damage and destruction . . .
This sparked widespread unrest, as such policies affected most classes in Scottish society. When similar plans called forth political opposition to Edward I in England from both nobility and clergy in 1297, it is hardly surprising that a stronger reaction was provoked in Scotland where exactions also emphasised the impact of loss of independence.
The fact that Edward I gave full priority to warfare against the French in 1297 had repercussions for the manner in which the English governed Scotland. The English records of 1297 show how little attention (and regard) Edward I and his chief advisers gave to Scotland. In this context, the remark that Edward I is reported (by Thomas Gray in his Scalacronica) to have made as he gave custody of Scotland to John Warenne, Earl of Surrey, in 1296 may be accurate: ‘When you get rid of a turd, you do a good job.’ Lack of enthusiasm, and even contempt, for the detailed administrative consolidation that was necessary after the English victory over the Scots in 1296 was as evident in Warenne’s actions as Edward’s words. The Guisborough Chronicle provides us with some details about this:
The earl of Warenne, to whom our king had committed the care and custody of the whole kingdom of Scotland, because of the awful weather said that he could not stay there and keep his health. He stayed in England, but in the northern part, and sluggishly pursued [the exiling of the] enemy, which was the root of our later difficulty . . .
The Guisborough chronicler also notes that Hugh Cressingham, the King’s Treasurer in Scotland, had failed to construct the stone wall that the King had ordered to be built on the new rampart at Berwick, the headquarters of the English administration. The fact that many English officials did not want to be in Scotland may account for both the uncaring manner with which they implemented Edward I’s policies and also their complacency towards any apparent Scottish resistance. Certainly, Hugh Cressingham soon established a reputation as a man ‘who robbed too much’ (Guisborough Chronicle). Justiciar William Ormesby was accused by the same source of strenuously persecuting those who had not sworn fealty to Edward I; while William Heselrigg, Sheriff of Lanark, was also targeted (quite literally) by William Wallace for some offence committed against the Wallace family.
Hugh Cressingham, whose frequent letters to Edward I are our main source for suggestions of the build-up of resistance in Scotland, reflects the English King’s opinion that the surrender of the forces led by James Stewart, Robert Wishart, Bishop of Glasgow, and Robert Bruce would be the key to the ending of Scottish resistance:
Sire, the letter says that if you had the earl of Carrick [Bruce], the Steward of Scotland, and his brother (who, as you understand, are the supporters of the insurrection) . . . you would think your business done.
This view seems to have been shared by Henry Percy and Robert Clifford who were in charge of the English forces to which Stewart, Wishart and Bruce capitulated at Irvine (Ayrshire) in July 1297. According to Cressingham’s letter to Edward I,
. . . we would have made an expedition on the said Thursday, had it not been for Sir Henry Percy and Sir Robert Clifford, who arrived on the Wednesday evening in that town [Roxburgh], and made known to those of your people who were there, that they had received to your peace all the enemies on this side of the Scottish sea.
Percy and Clifford ignored Cressingham’s advice to attack enemies of the English north of the Forth or pursue William Wallace who had ‘a large company in the forest of Selkirk’. The unsatisfactory outcome, as far as Cressingham was concerned, was that:
. . . no expedition should be made until the earl’s [Warenne’s] arrival; and thus matters have gone to sleep, and each of us went away to his own residence . . .
Cressingham’s increasing worries in this period of hectic letter-writing, i.e. the last week in July 1297, were further reflected in his next correspondence:
. . . not a penny could be raised in your [realm of Scotland by any means] until my lord the earl of Warenne shall enter into your land and compel the people of the country by force and sentences of law.
His statement that Scotland was, by this time, virtually ungovernable without speedy and decisive military action is forthright:
But, sire, let it not displease you, by far the greater part of your counties of the realm of Scotland are still unprovided with keepers; and some have given up their bailiwicks, and others neither will nor dare return; and in some counties the Scots have appointed and established bailiffs and ministers, so that no county is in proper order, excepting Berwick and Roxburgh, and this only recently. But, sire, all this shall be speedily amended, by the grace of God, and the arrival of the lord earl, Sir Henry Percy, and Sir Robert Clifford, and the others of your council.

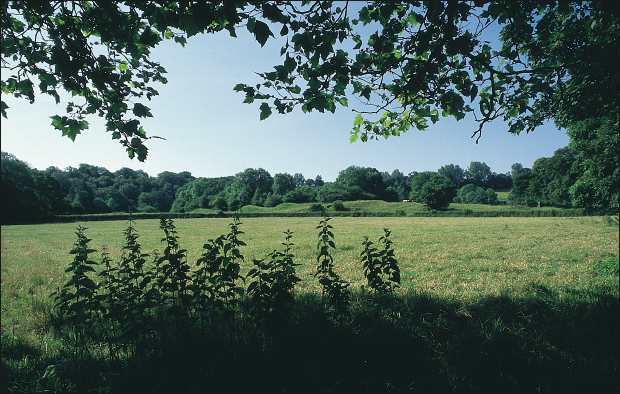
This view shows an area that was once Rothbury Forest. This area together with Selkirk Forest (the ancient Ettrick Forest) in southern Scotland were of strategic importance to William Wallace as he prepared his army for the fight against the English.
Further delay in English military action occurred, no doubt, in early August as a result of Edward I’s proposal for Earl Warenne to join him on the continent (clearly still the King’s priority) and be replaced in Scotland by Brian Fitz Alan at less cost. Edward I planned to move more senior figures and additional resources to his continental campaign. He clearly thought that Scottish opposition would scatter with a show of English force (however late), as it had done in 1296 at Dunbar and in 1297 at Irvine. Brian Fitz Alan, however, was as reluctant as Warenne to take on responsibility for Scotland, as detailed by him in a letter to Edward I, 5 August 1297:

Castle Urquhart, situated on Strone Point on the western shore of Loch Ness.
THE MORAYS
The family of Moray (later Murray) was descended from a Fleming called Freskin, who was given Duffus near Elgin by David I (1124–53) as part of a planned crown settlement in this important region of Scotland. In the early thirteenth century, the family took the surname ‘Moray’ or ‘de Moravia’ as a result of their growing importance in the area. They were promoted into territorial, administrative and ecclesiastical offices to further royal interests and loosen the grip of the earls of Caithness. By the mid-thirteenth century the Morays held the earldom of Sutherland, the lordships of Duffus (near Elgin) and Petty (near Inverness) as well as lands in Strathspey. Given Alexander III’s anxiety to increase royal authority in the north in the second half of the thirteenth century, the Morays were more involved in royal service in this reign. Alexander Moray became Sheriff of Inverness, 1264–6 and Malcolm Moray was appointed Sheriff of Perth, 1257–89. Later, Andrew Moray was Sheriff of Ayr, and some time between 1289 and 1296 gained the office of Justiciar of Scotia, the most important political and administrative position in Scotland. The family were further empowered by marriage links with the Comyns, the most dominant political group in thirteenth-century Scotland. The Morays were powerful representatives of Scottish government and the Scottish kingship of John Balliol. It is intriguing to speculate what leadership role Andrew Moray, son of the Justiciar, would have played in the Scottish patriot movement if he had not been fatally wounded at the Battle of Stirling Bridge in 1297.
Duffus Castle. Freskin, the founder of the family ‘Moray’, ‘de Moravia’ (a name adopted as a surname in the early thirteenth century), received Duffus near Elgin as part of his grant from David I in the twelfth century. His family was responsible for the initial ‘motte’ (mound) at Duffus.

Fortrose Cathedral. Andrew Moray, joint leader of Scottish resistance in northern Scotland during 1297, was gravely injured in the Battle of Stirling Bridge (22 September 1297) and only survived for a few months. He was buried at Fortrose Cathedral.
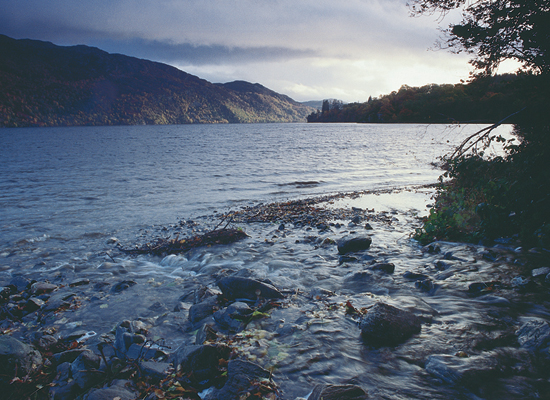
Loch Ness. Andrew Moray captured Urquhart Castle, on the western shore of Loch Ness, during his campaign of resistance in northern Scotland. Urquhart presided over the strategic route along the Great Glen to Inverness. Control over Loch Ness was important for authority over northern Scotland.

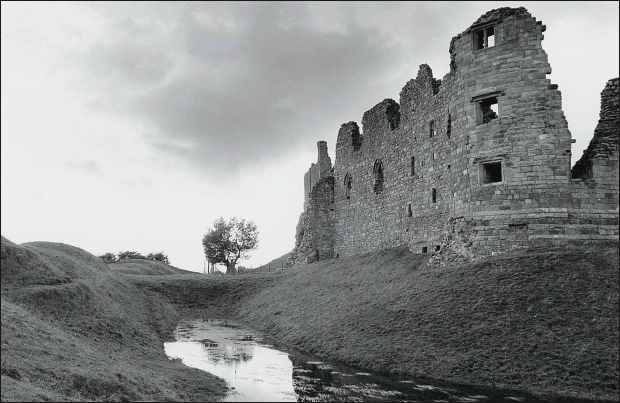
Bothwell Castle, one of the most impressive fortifications of thirteenth-century Scotland. It was planned by Walter Moray after 1242 but was not completed before the start of the Scottish wars.
I do not think that I in my poverty can be able either well or honourably to keep the land in peace to your profit and honour, when such a nobleman as the earl cannot well keep it in peace for what he receives from you.
When Fitz Alan tried to bargain for a better financial deal – that he would take custody upon the same terms as Warenne had – Edward refused and Warenne eventually continued as Keeper of Scotland. Cressingham gave another warning early in August that
. . . peace on the other side of the Scottish sea is still in obscurity, as it is said, as to the doings of the earls who are there [the Comyns, one Earl of Buchan and the other Lord of Badenoch, released from an English prison to pacify the north] . . .
The fact, also, that Wallace was strong enough to lay siege to Dundee Castle and that he and Moray were able to move around large areas of the country that were not under firm English administrative control, still had little impact on the official English conduct of their campaign against Scottish resistance.
By late August 1297, Warenne had at last reached Berwick and the forces of Cressingham and Warenne advanced from Berwick to Stirling, which was reached in the first week of September. It was important to consolidate control over Stirling, the most strategic crossing point of the Forth and to confront the forces of Andrew Moray and William Wallace, which were moving without restriction north of the Forth. According to the Lanercost Chronicle, the Scots ‘began to show themselves in rebellion’ by about 8 September and this may indicate that the forces of Moray and Wallace, hitherto engaged in individual action, had combined to form a large army of resistance. The joint strength of their two groups, as well as the success that they had enjoyed up to this point, seems to have persuaded Wallace and Moray to face the English army in pitched battle rather than employ the ‘hit and run’ tactics of the ambush. John of Fordun confirms the fact that Wallace led by fear as much as popular support. This is particularly reflected in his threat to the burgesses of Dundee who were left to continue to besiege the English in Dundee Castle:
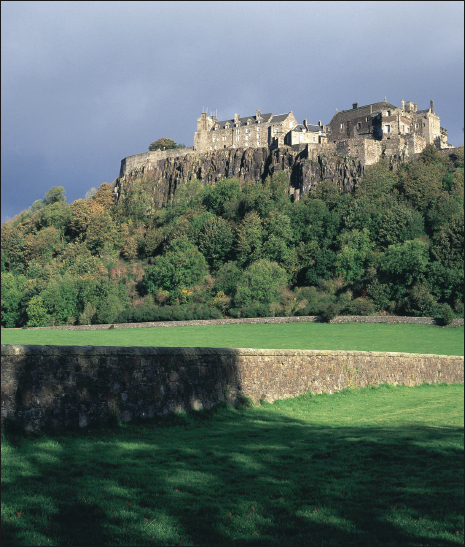
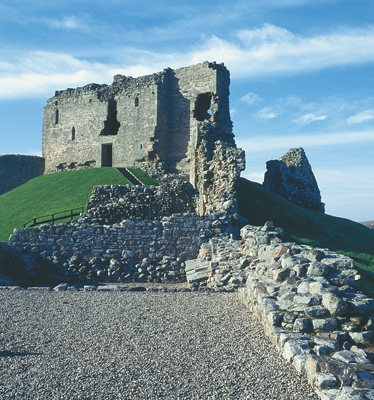
Stirling Castle, the key stronghold that linked northern and southern Scotland. Control over this castle was important for asserting authority over the whole of Scotland. This is reflected by the Battle of Stirling Bridge (1297), the three-month siege of 1304 and the Battle of Bannockburn (1314).
William . . . straightway intrusted the care and charge of the siege of the castle to the burgesses of that town on pain of life and limb . . .
Fordun also indicates that Wallace’s control had a much wider base:
. . . in a short time, by force, and by dint of his prowess, [he] brought all the magnates of Scotland under his sway, whether they would or not. Such of the magnates, moreover, as did not thankfully obey his commands he took and browbeat . . .
These sentiments seem to run counter to the notion that Wallace was, at this stage, a frontman acting on behalf of James Stewart and Bishop Robert Wishart. Who then was leader of Scottish resistance to the English in early September 1297?
It has been seen that opposition to the English administration in Scotland was widespread in the north as well as the south. Individuals named in the sources as being actively involved in the revolt during 1297 were, apart from William Wallace, Andrew Moray, William Douglas, James Stewart, Robert Wishart, Bishop of Glasgow, Robert Bruce, Earl of Carrick, Duncan Macdougall, Macduff of Fife and his two sons, John Stewart and Alexander Lindsay. In addition, Hugh Cressingham and English chroniclers suspected that the leading members of the Comyns were not acting in Edward’s interests in helping to put down (as they had promised) the rebellions in Scotland following their release from English prisons. The English officials had no proof that the Comyns were siding openly with the Scots before Stirling Bridge, though Moray, a kinsman of the Comyns, would not have been able to gather as many supporters without, at least, the clandestine backing of the Comyn-dominated local administration of the north.

Noble power bases in south-west Scotland.
It could also be said to be true that without at least the tacit approval of the Stewarts and Bishop Wishart Wallace too would have struggled to gain local recruits in central and south-western Scotland. The Lanercost and Guisborough chroniclers assert throughout their narratives of the 1297 revolt that Wishart and Stewart masterminded the revolt and Wallace’s actions. In early July 1297, Robert Wishart, James Stewart and Robert Bruce, Earl of Carrick, came out in open opposi-tion to Edward I. In their company were James Stewart’s brother, John, Alexander Lindsay and William Douglas (who had participated with William Wallace in the attack on Justiciar William Ormesby at Scone). They were defeated – or more accurately, they capitulated to the English forces of Henry Percy and Robert Clifford at Irvine on 7 July.
The fact that Wishart, Stewart and Bruce had not completed the terms of the surrender a month afterwards has suggested to historians that they were engaged in an exercise of deliberate procrastination in order to assist the other revolts in Scotland. It was clear from the negotiations that Wishart, Stewart and Bruce saw themselves as leaders of the Scottish political community and that Edward I and his officials also considered them to be the leaders of Scottish resistance. Perhaps this official view is reflected in the unambiguous verdict given by the English chroniclers. However, the accepted theory of political rule in Scotland was being tested by the reality of military leadership of a nationwide anti-English resistance movement. Traditional political leaders such as the Comyns and their allies in 1296 and Wishart, Stewart and Bruce in 1297 did not feel that they could match a large English army and, therefore, at Dunbar (1296) and Irvine (1297) surrender terms were soon sought. They had made a political point and were seeking a political solution. Andrew Moray, William Douglas and William Wallace had less to lose than Stewarts, Comyns and Bruces by taking a purely military, and certainly less vacillating, approach. Their aim was simply to remove the English from the country.
The three most successful resistance leaders – Moray, Douglas and Wallace – had different backgrounds. Moray and Douglas were sons of noblemen from families linked by a relationship since the late twelfth century. Wallace, on the other hand, was the son of a knight. Moray had perhaps better credentials for leadership being from a family strongly associated with Scottish government and related by marriage to the Comyns who dominated that government. Wallace and Douglas had reputations as troublemakers. Wallace, though in the following of the Stewarts, had probably been an outlaw since 1296 and, unlike most of the Stewart retinue, had not sworn fealty to Edward I. William Douglas, though from an aristocratic family, had a reputation for rash actions and, despite having his goods restored to him after his surrender of Berwick Castle to Edward I, according to the Guisborough Chronicle he ‘turned robber working with a robber’. Douglas was present with Wallace during the attack on the Justiciar William Ormesby at Scone and was also with Stewart, Wishart and Bruce at Irvine. He was with Moray and Wallace at Stirling Bridge on 11 September 1297. Unlike Stewart, Wishart and Bruce after ceding at Irvine, Douglas remained uncooperative, as a letter to Edward I from Hugh Cressingham, 24 July 1297, reveals:
Dear sire, because sir William Douglas has not kept the covenants which he made with sir Henry de Percy, he is in your castle of Berwick, in my keeping, and he is still very savage and abusive . . .
After Irvine, only Moray and Wallace remained to lead Scottish resistance. The Guisborough chronicler’s description of William Wallace’s support probably applies equally to that of Moray:
The common folk of the land followed him as their leader and ruler; the retainers of the great lords adhered to him; and even though the lords themselves were present with the English king in body, at heart they were on the opposite side.

Rothbury Forest, Eddingham. This forest was used as a base by William Wallace as he organised the invasion of northern England in October 1297.
In late July, Moray was described as having a ‘large body of rogues’ (letter of the Bishop of Aberdeen and others to Edward I, 25 July 1297) in Speyside, while at the same time, Wallace ‘lay there with a large company (and does so still) in the forest of Selkirk’ (letter from Hugh Cressingham to Edward I, 23 July 1297). The successes of Moray and Wallace, in northern and southern Scotland respectively, had separated the traditional political leaders from their retainers and followers. Could the Comyns, Stewarts and Bruce be anything more than supportive bystanders in early September as the English forces approached Stirling? How significant was the fact that Robert Wishart’s considerable influence had been removed by his imprisonment in Roxburgh Castle (he was released on parole only in spring 1298)? Indeed, the Lanercost Chronicle suggests that Wishart had primary responsibility for the rebellion of 1297, ahead of James Stewart, referring to the Bishop as ‘ever foremost in treason’. As Bishop of Glasgow, he had the most effective means, through the parish priests of his diocese, of disseminating the message of revolt. Certainly, Edward I’s subsequent complaint to the Pope that ‘it was by abetment and counsel of the prelates and clerks of their land that the Scots rose with William Wallace’ (cited in C. Kightly, Folk Heroes of Britain [London, Thames & Hudson, 1982]) and his later treatment of Wishart indicates that the Bishop bore a heavy responsibility for the inception of Scottish resistance.

Cambuskenneth Abbey, Stirling. The ruins of the abbey, founded in about 1147 by David I of Scotland, are overlooked by Stirling Castle and the town. Edward I visited the abbey in 1303/4.
The Battle of Stirling Bridge was fought on 11 September 1297. The English forces of Cressingham and Warenne had reached the English-held Stirling Castle during the first week of September. The Scottish force, led by Moray and Wallace, was at Dundee on about 8 September and had to march 50 miles to reach Stirling. On 9 September, before the Scots reached Stirling, James Stewart, Malcolm, Earl of Lennox, and other Scottish nobles approached the English army. According to the Guisborough Chronicle, the Scottish lords:
. . . came in to ask us [the English] whether we would delay a little while, to see if they could pacify their retainers and the other Scots folk in any way. So we gave them until 10th September when they returned saying that they could not do as they had hoped, but that they would nevertheless come to join us the next day with 40 knights.
The Lanercost Chronicle, rather more explicitly, accuses James Stewart of treachery:
. . . the Steward treacherously said to them [the English] – ‘It is not expedient to set in motion so great a multitude on account of a single rascal; send with me a few picked men, and I will bring him to you dead or alive.’
Both English chroniclers continue to write as if, at this stage, as at the beginning of the 1297 revolt, Stewart was masterminding the military activities of Wallace. The English writers also focus on Wallace rather than Andrew Moray. The reality was probably different, especially after the abject surrender, without a fight, of Stewart, Wishart and Bruce, self-styled leaders of the community of the realm, at Irvine in early July. With some of his associates at Irvine, namely William Douglas and Robert Wishart, in prison, Stewart must, at best, have been ‘on probation’, i.e. needing to be on his best behaviour, as far as the English commanders were concerned. It is probable that he was making a token gesture of arbitration in keeping with his political status; it is possible that he wished to persuade Moray and Wallace that a pitched battle with an English army superior in cavalry and larger in number was foolish – that had been his own policy in 1296, following Dunbar, and in 1297 at Irvine. It is unlikely that he had, at this time, sufficient military credibility to offer advice to Moray and Wallace – and have such counsel accepted. It is most improbable, therefore, that he had the military boldness to lure the English over the bridge at Stirling to allow the army of Moray and Wallace to ambush them, as suggested by the Lanercost chronicler. Delaying tactics, as after Irvine, was the most that Stewart could offer Wallace and Moray.
Details of the Battle of Stirling Bridge are chiefly drawn from the Guisborough chronicler who may have been party to an eyewitness account of the Yorkshire nobleman, Marmaduke Thweng. This did not, however, stop Walter of Guisborough from greatly exaggerating the figures for those involved in the battle. He gave the English numbers as 1,000 horsemen (cavalry) and 50,000 footmen (many were Welsh), with the Scottish army comprising 180 horsemen (cavalry) and 40,000 footmen. Hugh Cressingham wrote to Edward I on 23 July that he had mustered from Northumberland 300 horsemen and 10,000 footmen, so this is a minimum figure. What is clear is that the English army had greater numbers in total and a striking superiority in cavalry – and it was unheard of, at this time, that such a large mounted force could be defeated. Stewart was a cautious pragmatist rather than a coward.
The Scottish force had gathered on the slopes of the Abbey Craig, the site of the Wallace Monument today. Their position was a mile north of the original bridge over the Forth. North of the bridge was a causeway with fairly soft ground on either side of it. On the south side of the Forth, half a mile from the bridge, lay Stirling Castle. In the days before the battle, it seems that the English were anticipating a Scottish surrender, as at Irvine and Dunbar, and were prepared to wait for it. Even when Lennox wounded an English foot soldier as he left the English camp with Stewart, on 9 September, to negotiate with Moray and Wallace, Warenne ignored the call for instant vengeance, as reported in the Guisborough Chronicle:
Let us wait tonight, and see whether they keep their promise in the morning; then we shall better be able to demand satisfaction for this insult . . .
The events of the morning of 10 September reveal, yet again, the lackadaisical, disorganised approach of the English commanders, as well as their belief that the Scottish would capitulate eventually. The Guisborough Chronicle continues:
Thus it was ordered that everyone should be ready to pass over the bridge of Stirling the next morning, and more than 5,000 of our infantry, with many Welshmen, did in fact then cross it; but they were called back again, because the earl had not yet woken from his sleep . . .
When he did awake, Warenne still showed a complete lack of urgency. As the Guisborough chronicler reveals, he put chivalry before practicality and ‘made several new knights’:
Meanwhile our infantry was crossing the bridge a second time, but they were ordered back yet again, for the Stewart and Lennox were seen riding in with only a small retinue, and not with the 40 knights they had promised. We thought, therefore, that they must be the bearers of good tidings . . . but they only made excuses saying they could neither persuade their followers to submit nor even obtain horses or weapons from them . . .
The impression given by the English chroniclers and the Scottish chronicler John of Fordun was that the Scottish lords had lost control over their retinues to Moray and Wallace. It is interesting that, even at this stage, Warenne sought a Scottish surrender and so, according to the Guisborough chronicler, he sent across two Dominican friars to ‘that robber Wallace’ to ‘see if by any chance he wished to put forward any peace terms’. Wallace’s unequivocal reply, no doubt voiced previously to Stewart and Lennox, was as follows (Guisborough Chronicle):
‘Go back and tell your people that we have not come here for peace; we are ready, rather, to fight to avenge ourselves and free our country. Let them come up to us as soon as they like, and we shall prove this in their very beards.’

Stirling Old Bridge. The bridge that gave its name to the Battle of Stirling Bridge was a wooden one close to (a little upstream of) the present ‘old bridge’, which was built in the sixteenth century. According to the Seal of the Burgh of Stirling, the original wooden bridge had eight spans.
When this reply was heard, the reaction of the rasher men on the English side once more showed a complacent disregard for the smaller Scottish force: ‘Let us go up to them at once; their numbers are but small.’ (Guisborough Chronicle). This complacency with regard to the Scottish strength of numbers came, of course, from the top of the English command. Cressingham was keenly aware of Edward I’s shortage of money and had already ordered home the troops that Henry Percy had brought to Stirling from Cumbria and Lancashire, as recorded by the Guisborough chronicler:
. . . saying that our army was already quite large enough, and that there was no point either in putting themselves to needless trouble or in spending more of the king’s treasure than they could help . . .
There then followed debate in the army about how the English attack on the Scottish forces would be conducted. According to the Guisborough chronicler again, Richard Lundie, a Scottish knight who had come over to the English side at Irvine, gave good advice:
‘My lords, if we cross that bridge now, we are all dead men. For we can only go over two abreast, and the enemy are already formed up: they can charge down on us together whenever they wish. There is, however, a ford not far from here, where 60 men can cross at a time. Give me 500 cavalrymen, then, and a small body of infantry, and we will outflank the enemy and attack them from behind: while we are doing that, the earl and the rest of the army will be able to cross the bridge in perfect safety.’ But our leaders refused to accept this sound advice, declaring that it would be unsafe to divide our army.
It is probable that, at the outset, Moray and Wallace did not have a strategy to ambush the English at the bridge. After their march from Dundee, it is unlikely that they were in a position to strike against the English when they twice crossed the bridge on the morning of 10 September. However, the rather confused manoeuvrings of the English army during this morning must have given them the idea (and the confidence) to launch an attack on the English when they eventually made their way across the bridge on 11 September.
It is in keeping with the conduct of the English campaign against Scottish resistance in 1297 that the eventual decision to cross the narrow bridge at Stirling was taken by the militarily inexperienced Hugh Cressingham, and for financial rather than military reasons. Even worse, Earl Warenne allowed himself to accept the Treasurer’s dubious judgement (Guisborough Chronicle):
‘It will do us no good, my lord earl, either to go on bickering like this or to waste the king’s money by vain manoeuvres. So let us cross over right away, and do our duty as we are bound to do.’
The worst fears of Richard Lundie were realised (Guisborough Chronicle):
Thus (amazing though it is to relate, and terrible as was to be its outcome) all these experienced men, though they knew the enemy was ready at hand, began to pass over a bridge so narrow that even two horsemen could scarcely and with much difficulty ride side by side . . . and so they did all the morning, without let or hindrance, until the vanguard was on one side of the river and the remainder of the army on the other. There was, indeed, no better place in all the land to deliver the English into the hands of the Scots, and so many into the power of so few.
According to the Guisborough Chronicle, which is supported by the Lanercost Chronicle, the Scots waited until as many English had crossed the bridge as they thought they could successfully attack. Moray and Wallace and their forces then moved down from the hill:
. . . sending meanwhile a large body of spearmen to block the [northern] end of the bridge so that no English could either come across or retire over it.
Later writers elaborated on the ambush, with Thomas Gray reporting in Scalacronica that Wallace ‘caused the bridge to be broken’. Even more elaborately, Blind Harry’s The Wallace tells how Wallace employed a ‘cunning carpenter, by name John Wright’ to sabotage the bridge by cutting through the main beam and supporting it with a wooden pin. Wright, hiding under the bridge ‘in a close cradle’ knocked out the pin on hearing a blast from Wallace’s horn, which signalled that sufficient English troops were on the bridge. Such a detailed plan was probably not feasible and the more contemporary and very full account of the Guisborough chronicler states that the bridge remained intact, and this is a more preferable version.
In the Guisborough Chronicle it is reported that 100 English knights and 5,000 infantry were killed either by Scottish spearmen or by drowning in the Forth. The vanguard of the English army was almost completely destroyed, while the cavalry were unable to be deployed because of the boggy turf on the north side of the bridge, the confines of the river, which surrounded them on three sides, and the pressure of the Scottish infantry. A few lightly clad infantry escaped by swimming but Sir Marmaduke Thweng, the knight who probably related his account to the Guisborough chronicler, decided to face the Scottish troops:
‘My dear fellow, do not tell me to drown myself on purpose. Forget all that nonsense and follow me, and we will hack a path through the midst of them.’
Thweng succeeded but Cressingham, fatally impatient to defeat the Scots at the earliest opportunity, and the standard-bearers of both the King and Warenne were slain. The Scots made an example of the hated Treasurer, and according to the Lanercost chronicler, Wallace ‘. . . caused a broad strip [of skin] to be taken from the head to the heel, to make thereof a baldrick for his sword’. The Guisborough chronicler reports an equally grisly end for Cressingham: ‘. . . the Scots afterwards flayed his fat body, and divided strips of skin amongst them, not as holy relics, but as mockery of him . . .’. In Scalacronica Thomas Gray states that the Scots ‘. . . in token of hatred made girths of his skin.’
The English forces under Earl Warenne on the south side of the bridge saw the devastation and confusion. Warenne was unable to come to Cressingham’s aid because of the narrowness of the bridge and decided to flee with a small following to Berwick. The Lanercost chronicler records that he escaped ‘with difficulty’, leaving Marmaduke Thweng at Stirling Castle while the rest of his army followed him to Berwick. At this late stage, with Warenne and the English army in retreat, Stewart and Lennox emerged to harry the English baggage train and all English fugitives from the battle.
The Scots suffered few casualties at Stirling Bridge but Andrew Moray, joint leader of the Scottish army, was seriously injured, and he died from his wounds in November 1297. This meant that William Wallace took an even more prominent role in the continuing Scottish campaign against the English presence. According to the Scalacronica, William Wallace:
. . . followed the said Earl of Warenne in great force and skirting Berwick, arrived on Hutton Moor in order of battle; but perceiving the English arrayed to oppose him, he came no nearer to Berwick, but retired and bivouacked in Duns Park [north of Berwick].
Warenne left Berwick with Wallace’s approach, leaving the town wasted before his departure. The Scalacronica gives a strong impression of Wallace now being in clear command of military operations:
. . . perceiving the departure of the Earl of Warenne, sent the chevalier Henry de Haliburton to seize Berwick, and appointed others to besiege Robert de Hastings in Roxburgh Castle with a great force.
The Scots entered Berwick, the town that still lacked protective walls owing to the failure of Cressingham – perhaps for financial reasons again – to provide them. The few remaining English in the town were killed, though the castle was not surrendered and, therefore, gave refuge to some. Wallace did not advance into Northumberland but the inhabitants of the county, fearing the worst, fled in terror to Newcastle with their families, belongings and animals.
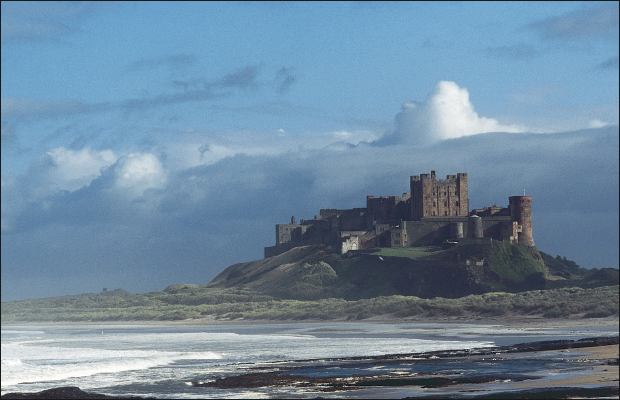
Bamburgh Castle, an important refuge for the people of northern Northumberland. The parishes of Norhamshire recorded sharp declines in tax revenues probably as a result of the damage inflicted on this area by Wallace and his army.
An invasion of northern England was not immediately forthcoming but the Northumbrians were right to fear that an offensive was imminent – the first recorded activity was on 13 October. In the weeks before this date, Wallace continued with his principal task of driving out the English from their few remaining enclaves in Scotland. Yet he had no siege weapons and though Stirling Castle, with Marmaduke Thweng as commander, soon surrendered owing to lack of provisions, Wallace was unable to take the castles at Berwick or Roxburgh.
The victory by Moray and Wallace at Stirling Bridge was, however, a huge psychological blow to the English and strengthened the position in Scotland of the only two successful leaders of Scottish resistance. The fact that the commanders of the army of the Scottish realm were already seen as the effective rulers of Scotland is indicated in a formal document dated 11 October 1297. Andrew Moray and William Wallace wrote to the mayors and people of the towns of Lübeck and Hamburg that Scottish ports were now open and safe for access for their merchants:
Andrew de Moray and William Wallace, leaders of the army, and the community of the realm, to their wise and discreet beloved friends the mayors and common people of Lübeck and of Hamburg . . . we willingly enter into an undertaking with you asking you to have it announced to your merchants that they can have safe access to all ports of the Scottish kingdom with their merchants because the kingdom of Scotland, thanks be to God, has been recovered by battle from the power of the English. Farewell. Given at Haddington 11th October 1297 . . .
This reveals that if the army commanded by Moray and Wallace at Stirling Bridge was the ‘army of the kingdom of Scotland’ its leaders now had control over clerks knowledgeable of the workings of the Scottish royal chancery. This document, one of only four surviving that emanated from Wallace himself, reveals that Scotland was, in practice, being run by its military leaders. They, however, had a clear grasp of economic necessities – their regime needed money, through trade, to be able to maintain its independence and the letter to Lübeck and Hamburg was probably one of many sent to Scotland’s trading partners to encourage a resumption of trade. A postscript to the letter contains a further request to the mayors of Lübeck and Hamburg:
. . . to agree to promote the business of John Burnet and John Frere, our merchants, just as you may wish us to promote the business of your merchants . . .
This definitely shows Wallace in a rather different light to ‘outlaw’, ‘robber’ or ‘guerrilla leader’. Instead, he is portrayed as a man capable of grasping the economic detail necessary for political leadership.
Another letter of 7 November, this time a letter of protection issued by Andrew Moray and William Wallace, sheds further light on Wallace’s political position. Here Moray and Wallace describe themselves as
. . . commanders of the army of the kingdom of Scotland, in the name of the famous prince the lord John, by God’s grace illustrious king of Scotland, by consent of the community of that realm.
It is clear what Wallace stood for and it is also evident from the order of their names in the letter that Andrew Moray was still regarded at the time, though gravely wounded, as the senior of the two. At some stage in the period between 7 November 1297 and 29 March 1298, William Wallace was knighted to give him, in theory, the same noble status as Moray, Stewart, Comyn and Bruce. It is stated in the Charter of William Wallace to Alexander Scrymgeour, 29 March 1298, that he acquired the title of
. . . knight, Guardian of the kingdom of Scotland and commander of its army, in the name of the famous prince the lord John, by God’s grace illustrious king of Scotland, by consent of the community of that kingdom.
By this time, if not earlier – Moray died in November 1297 – Wallace had become sole military and political commander of Scotland. He invested Alexander Scrymgeour with the Constabulary of Dundee as a reward for carrying the royal standard in battle. In practice, Moray and Wallace formally resurrected the principle of Guardianship soon after their victory at Stirling Bridge. The Guardians had held the nation in trust for its rightful monarch between 1286 and 1291 and, as has been seen, upheld the tenet of an independent Scotland through the Treaty of Birgham (1290). Moray and Wallace still regarded John Balliol, forcibly deposed by Edward I and still in captivity in England, as the lawful King of Scotland. They acted in his name and used his seal in government.
It is important to be aware that through their military successes before Stirling Bridge, but principally in the battle there, Moray and Wallace had eclipsed the traditional ruling families of Scotland. The events after Stirling Bridge cause us to question the strongly held view that is expressed through the Guisborough Chronicle and the Lanercost Chronicle: that Wallace was merely the military arm of the political resistance masterminded by Bishop Robert Wishart and Wallace’s feudal lord, James Stewart.
If this had been the case, why did Wallace after Stirling Bridge not hand over the reigns of political power to James Stewart and Robert Wishart, who had clearly seen themselves, with Robert Bruce, as the leaders of the Scottish political community in early July 1297? Why did Andrew Moray not defer to his kinsmen, the Comyns, who had returned to Scotland by this time, although they were still not openly backing Scottish resistance? Of the traditional aristocratic ruling elite in Scotland, the Comyns appear to have been the least involved in the Battle of Stirling Bridge and its aftermath. They had pledged to put down the rebellion in the north of Scotland and, despite the doubts of Hugh Cressingham, were still believed to be loyal to Edward I as late as 26 September 1297. The presence of John Comyn, the younger, heir of the main Badenoch branch of the family, in Edward I’s army in Flanders may have dissuaded the Comyns from an open position. Their attitude may have changed by March 1298 when John Comyn, the younger, was among the Scots who deserted Edward’s army and sought help at the French court. Robert Wishart, imprisoned in Roxburgh Castle, which was still in English hands, was unable to assume political control, even if asked. Yet James Stewart had, after the Battle of Stirling Bridge had been won, joined in with the attack on the English army’s baggage train. He would have been the natural, experienced political leader, a former Guardian. However, it is clear that before Stirling Bridge, the traditional Scottish political leaders, such as Stewart, had lost the support of their retainers because of their cautious political (and military) stance. Moray and Wallace had the backing of the retainers and chief military adherents of the major Scottish nobles.
Moray and Wallace were certainly competent enough to assume the political mantle that Stirling Bridge brought them. However, their judgements have tended to be overshadowed, especially in English eyes, by Wallace’s invasion of northern England between mid-October and 22 November 1297. Some of their early decisions included negotiations with foreign ports, the replacement of a key figure in the political as well as ecclesiastical life of Scotland following the death (in France) of the Bishop of St Andrews, William Fraser, in 1297 – William Lamberton was elected at Wallace’s behest on 3 November – and the holding of parliaments.
The Scottish invasion of northern England is perhaps the best-documented episode of William Wallace’s career and is discussed in depth in C.J. McNamee, ‘William Wallace’s Invasion of Northern England in 1297’, Northern History XXXVI (1990), 40–58, to which the following section is greatly indebted. The earliest reference to Scottish activity in northern England concerns the burning of Felton Mill (about 7 miles from Rothbury) on about 13 October. The Guisborough chronicler refers to Scottish raids in Northumberland on 18 October but the major incursion did not take place until 11 November. This date probably marks the involvement of William Wallace and a more organised invading force after scattered raids by Scots caught up in the euphoria of the victory at Stirling Bridge. Another possible motive for the random assaults and the more regulated invasion was the lack of provisions in Scotland. The fifteenth-century Scottish chronicler, Walter Bower, refers to the shortage of corn in Scotland as a result of poor weather. Perhaps, too, the harvesting season in Scotland had been badly disrupted by the fighting as Moray and Wallace had gathered large numbers of men willing to fight for their cause. Wallace and Moray would have known that Edward I was out of the country and not able, for a while, to mount a counter-offensive to avenge Stirling Bridge. Warenne had, in fact, retreated from Berwick to York. There could not be a better opportunity for plunder and to consolidate assets for the battles ahead. An outline of the invasion route is given in the Lanercost Chronicle:

Newcastle, the castle. Newcastle prepared to be attacked on several occasions in 1297 but it was too strong for Wallace’s forces. The castle site was considerably affected by the arrival of the railway in 1849. The main medieval remains comprise the keep (late twelfth century) and the gatehouse, Black Gate (mid-thirteenth century).

Newcastle walls. Little remains of the 2-mile circuit (started in 1265) that was praised for its strength and magnificence in the sixteenth century. Newcastle was not fully enclosed by walls in 1297 and no doubt this fact caused panic at the time and ensured that the work was speedily completed.
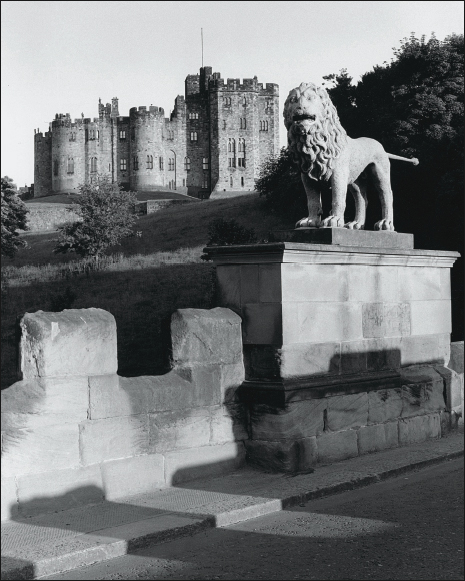
Alnwick Castle. The garrison here seemed to offer William Wallace’s invasion force at least some opposition in 1297. Perhaps, as a result, the Scots devastated the town. Alnwick’s defensive fortifications were considerably developed under the Percy family in the fourteenth century but were still strong enough in 1297 to resist Wallace. The castle was not taken by Wallace’s forces.

Carlisle Castle, which defied William Wallace in 1297 and Robert Bruce in 1315. Given Wallace’s army’s lack of experience in siege warfare, castles could only be taken through either surprise or subterfuge. Usually, Wallace avoided well-defended strongholds such as Newcastle or Carlisle.
After these events the Scots entered Northumberland in strength, wasting all the land, committing arson, pillage, and murder, and advancing as far as the town of Newcastle; from which, however, they turned aside and entered the county of Carlisle. They there did as they had done in Northumberland, destroying everything, then returned into Northumberland to lay waste more completely what they had left at first; and re-entered Scotland on the feast of St Cecilia, Virgin and Martyr, without, however, having been able to capture any castle either in England or Scotland.
Cockermouth. Scottish raids reached almost to Cockermouth Castle in the west during 1297. Again Wallace tended to avoid besieging strongholds.
Brough Castle. It is probable that William Wallace bypassed this castle and reached as far as Bowes before abandoning his march into the bishopric of Durham.
Once again rather more detail about the Scottish invasion is to be obtained from the Guisborough Chronicle. The Scots are described as:
. . . splitting up into separate troops, and sending out scouts before them, came suddenly and secretly into Northumberland . . . whose inhabitants, thinking that the enemy would not now come, had foolishly returned to their homes. Quickly spreading all over the county, they slew many and carried off much spoil: they set up a camp in Rothbury Forest (near the border) and came and went just as they liked, for there was no one to scare them off. At that time the service of God totally ceased in all the monasteries and churches between Newcastle and Carlisle, for all the monks, canons and priests fled before the face of the Scots as did nearly all the people. And thus the enemy went on plundering and burning . . . with no opposition save from our men in Alnwick castle and a few other strong places . . . until about 11 November, when they gathered themselves together and moved off, harrying as they went.
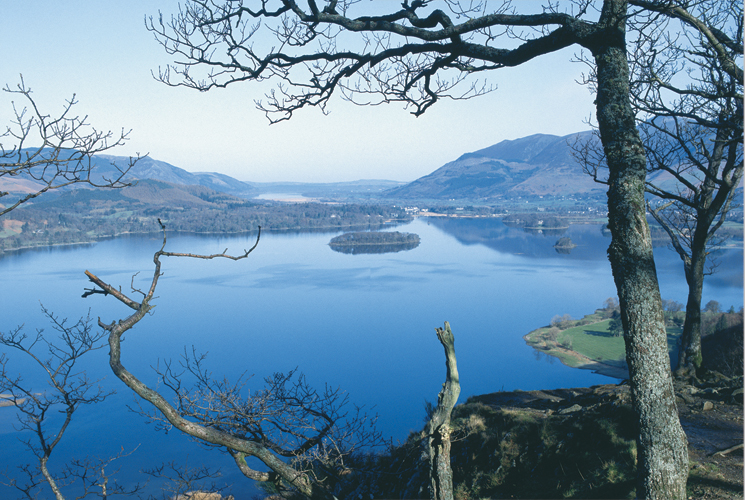
Derwentwater. Wallace’s army did cause some damage in the area of Bassenthwaite Lake and may have passed by Keswick and Derwentwater on the way to Stainmore and the bishopric of Durham before this expedition was abandoned.
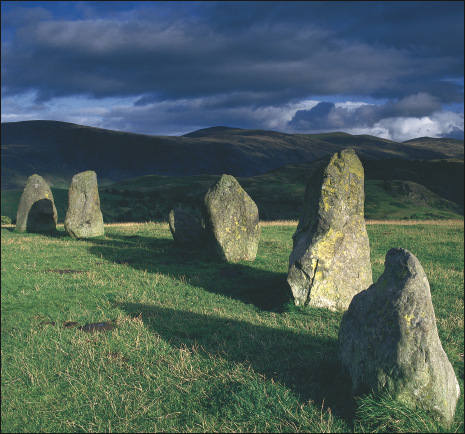
The ancient stone circle at Castlerigg, Keswick, would have overlooked the probable route taken by William Wallace as he passed through this area.
The Scots progressed into northern Cumbria and approached Carlisle, recently repaired and too strong for an army lacking in siege weaponry. According to the Guisborough chronicler, Wallace sent in:
. . . some shameless priest who said, ‘William the Conqueror, whom I serve, commands you to give up this town and castle without bloodshed: then you may leave unharmed with all your goods. But if you do not instantly obey him, he will attack and kill you all.’
In this case, Wallace was not a ‘conqueror’ at Carlisle and instead moved through Inglewood Forest almost as far as Cockermouth. The Scots did not reach Westmorland but did contemplate advancing into the bishopric of Durham. This suggests that they reached a point near Bowes on Stainmoor where they were stopped (as many travellers have been) by snow storms, but also the rumour (probably false) that ‘an immense number of Durham folk were ready to meet them in arms’ (Guisborough Chronicle). The Scots then, perhaps on about 18 November, decided to march back to Scotland via Tynedale. Now joined by the notoriously independent and undisciplined men of Galloway, Wallace used Hexham Priory as his base for two days while his men ravaged the lower Tyne valley almost to the gates of Newcastle itself. Just as Berwick’s town walls had not been completed by Hugh Cressingham, so the town walls around Newcastle were unfinished. Its castle, rather than the walls, remained its greatest strength and a garrison was maintained at the castle from 6 November until February – it consisted of 6 men at arms, 60 crossbowmen and 40 archers. The Scots did not attack, Wallace’s forces returning north to Scotland while the men from Galloway, having received their share of the plunder, probably returned home through Tynedale.

The South Tyne valley was ravaged by William Wallace’s army in 1297 from their base in Hexham. Bywell and Corbridge were particularly affected.
The degree of estimated devastation in northern England has tended to depend on the location of the English chronicle source – the further south the chronicler, the more extreme the horrors of the Scottish invasion of 1297. William Rishanger reports that:
Driving together English men and women, the vile Scots tied them with whips and scorpions until they dropped. They even snatched up babes from the cradle or their mothers’ breasts and cut them open, and they burned alive many children in schools and churches.
The site of Newminster Abbey. In the absence of English military assistance, Newminster Abbey, a Cistercian daughter-house of Fountains Abbey (Yorkshire), tried to bargain with the Scottish forces under Wallace but the abbey was looted after their promise of gifts was not fulfilled.
The author of Song on the Scottish Wars wrote, in similar tone, of Scottish atrocities:
. . . the troops of the Scots reduce the estates of many to cinders, William Wallace is the leader of these savages; the rejoicings of fools breed increase of griefs. – To increase the wickedness which they had hitherto perpetrated, these wicked men deliver Alnwick to the flames, they run about on every side like madmen . . . Many ask each other how it happened, that Newminster was not touched by the fire. The monks promise gifts, but they do not fulfil their promise; as there was need, so was the thing carried into effect. – On this account they led away captive the prior of the monastery, whom they then found; having carried away the goods, they left the houses empty.
Songs recorded in the Lanercost Chronicle reflect contemporary opinion on raids on Lanercost Priory and also Hexham Priory:
Of the Impiety of the Scots
O Scottish race! God’s holy shrines have been defiled by thee,
His sacred temples thou hast burnt, O crying shame to see!
Think not that thou for these misdeeds shalt punishment avoid,
For Hexham’s famous sanctuary polluted and destroyed.
The pillaged house of Lanercost lies ruined and defaced;
The doers of such sacrilege must cruel vengeance taste.
Let irons fire and famine now scourge the wicked race,
With whom henceforth nor fame nor faith nor treaty can have place.
The Scottish nation, basely led, hath fallen in the dust;
In those who forfeit every pledge let no man put his trust

Hexham Priory. Wallace used the priory as a base for two days and it proved difficult to control the notoriously wild men of Galloway. There was some looting at the priory.
It is perhaps unfortunate that the Scottish invasion of 1297, an episode that gives us more information on Wallace’s career than any other part of his life, does not show him in the best of lights. An incident recorded in the Guisborough Chronicle, however, shows the difficulties he had in preventing his troops from plundering, and also the respect he had for the Church:
The Scots came to Hexham Priory . . . some Scots spearmen broke in there, shaking their weapons and shouting, ‘Bring out the treasures of your church or we’ll kill you at once’ . . . At that moment William Wallace himself entered, and abusively ordered his men to get out: then he requested the canons to celebrate a Mass, and straightway they began to do so. After the elevation of the Host, Wallace left the church to remove his armour, while the priest made ready to distribute the bread and wine, with the Scots soldiers crowding round him in hopes of stealing the chalice. Indeed when he returned from washing his hands in the sacristy, he found that not only the chalice but all the ornaments of the altar had been pilfered . . . so that he could not finish the Mass he had begun, because everything had been stolen. And while he stood wondering what to do, Wallace returned, saw what had happened, and told his followers to pursue the men who had done that sacrilege and hang them: but of course they were never found, for the soldiers only pretended to seek them . . . before he left Wallace gave them his letters of protection . . .
Lanercost Priory. Much damage was inflicted here as Wallace’s raiding party moved into Cumberland. No doubt the priory suffered partly as a result of the lack of success of the Scots at the siege of Carlisle 10 miles to the west of Lanercost.
The Scottish invasion of northern England in 1297 was in many ways an unsavoury affair showing all the savagery and destructiveness of war. Tax records, rather more independent than the biased and sometimes lurid chronicle accounts, tend to corroborate the references to destruction along the Scottish invasion route. They record particular areas of ruination through evidence of sharply declining tax revenues, for example, in the parishes of north-east Northumberland. There were particularly heavy attacks around the Cheviot Hills and Alnwick seems to have suffered, perhaps as a result of the unexpected assaults on the Scots from men from the castle. There was also a great deal of activity in Tynedale where Bywell and Corbridge were laid waste. John of Fordun gives a terse description of Wallace’s progress in Cumberland: ‘. . . after having burnt up the whole land of Allerdale, and carried off some plunder, he and his men went back safe and sound’. This seems to be supported by tax records: fourteen parishes in the diocese of Carlisle were exempted from the triennial crusading tenth of 1301 because of war damage four years earlier.
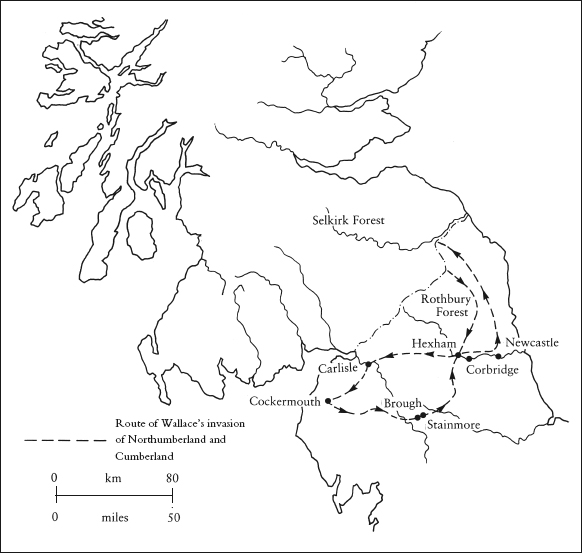
Wallace’s invasion of Northumberland and Cumberland, 1297.
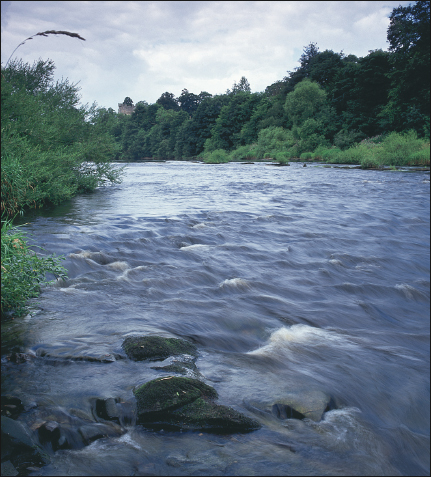
Bywell Castle on the River Tyne. Wallace’s army caused much destruction in Tynedale and Bywell and Corbridge were laid waste.
At the end of 1297 and the beginning of 1298, William Wallace’s reputation stood at its highest. His military and political success can be judged partly by the bitterness of English invective against him. The Song on the Scottish Wars portrays a particularly stark image of him:
Now the malignant people return to Scotland; and the honour of knighthood is given to William; from a robber he becomes a knight, just as a swan is made out of a raven, an unworthy man takes the seat when a worthy man is not by . . .
However, the English could not yet take away from William Wallace the position he had earned by early 1298, as recorded in the Charter of William Wallace to Alexander Scrymgeour:
William Wallace, knight, Guardian of the kingdom of Scotland and commander of its army, in the name of the famous prince the lord, John, by God’s grace illustrious king of Scotland, by consent of the community of that realm.