5
When Edward I’s expeditionary force sailed to Flanders on 24 August 1297, the English King did not anticipate a military disaster such as that which occurred at Stirling Bridge on 11 September. Despite worrying messages, in early August, from Hugh Cressingham that ‘peace on the other side of the Scottish sea is still in obscurity’, and English administrative control over wide areas of Scotland was poor, Edward I did not feel that the Scots posed a threat. He had, after all, been told in early August that ‘your enemies of Scotland were dispersed and frightened from their foolish enterprise’ (letter of Hugh Cressingham to Edward I, 4 August 1297) and seems to have believed that the only danger to him came from Stewart, Wishart and Bruce and that this had ended at Irvine. Wishart had, in August, written to Hugh Cressingham apologising for his conduct. Edward, no doubt, still had confidence in the Comyns being able to re-exert their influence over Scottish rebels. The safe conduct, to come to visit his father, issued to Andrew Moray, the younger, on 28 August (four days after Edward’s departure to Flanders) was another sign that the English King felt that he had the means to control Scottish nobles (and therefore Scotland) – Andrew’s father was still detained in the Tower of London. Edward certainly did not consider that Wallace was a major threat.
Edward’s complacency was dispelled after he heard about Stirling Bridge, sometime before 24 September, when he ordered Robert Clifford and Brian Fitz Alan to join forces with the Earl of Warenne and proceed towards Scotland. Walter Bower reports that:
King Edward, ablaze with mad anger and unable to contain himself through sorrow . . . wrote a threatening letter to William the guardian of Scotland, stating among other matters that if the king himself had remained in his kingdom, Wallace would not have dared to attempt such deeds; but if he dared to invade England again, he would at once realise that the avenging hands of the king himself were seeking retribution upon him and his men for their presumption. In short, when Wallace heard of the impudence and threatening boasting of the king, he sent a message back to him to say that he would revisit his kingdom once more before the celebration of Easter.
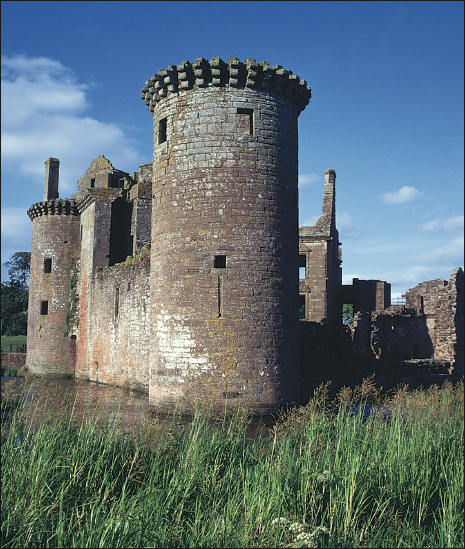
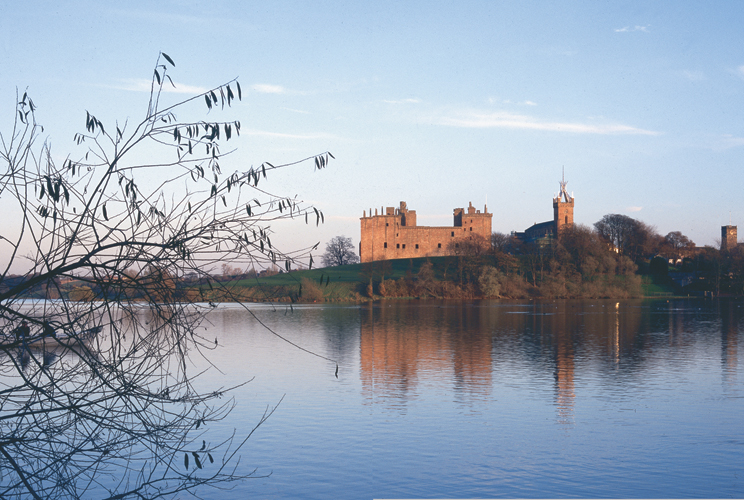
Caerlaverock Castle. A castle impressive in both strength and style, Caerlaverock with its distinctive red sandstone was at the centre of the Anglo-Scottish war in the early fourteenth century.
Edward I’s anger can well be believed and, no doubt, there was real fear among Englishmen that, in Edward’s absence, Wallace would make deep inroads into England. By the fifteenth century, however, Scottish tradition was elaborating on this rumour and in Blind Harry’s work Wallace’s invasion of England reached St Albans. The reality was that, after the plunder raid on Northumberland, William Wallace’s priority was defence against an English counter-attack. An English force under Warenne did, in fact, re-take Berwick and relieve the siege at Roxburgh Castle in early 1298. The Lanercost Chronicle gives a good impression of Wallace’s strategy at this time, of making supplies for English forces very scarce in southern Scotland:
. . . after the earls had left Roxburgh, the Scots came by night and burnt the town, and so they did to the town of Haddington, as well as to nearly all the chief towns on this side of the Scottish sea [Firth of Forth], so that the English should find no place of refuge in Scotland. Thus the army of England was soon compelled to return to England through lack of provender.
Perhaps, the plunder raids on Northumberland and Cumberland of October–November 1297 served a dual purpose – the Scots increased their own supplies and, at the same time, deprived any English army approaching Scotland. It was, in effect, a ‘scorched-earth’ policy, which made it difficult for the English in northern England as well as southern Scotland to obtain provisions.
It was not, however, only a lack of rations that halted English military operations in early 1298. Edward I, in fact, ordered these to cease until he could, personally, take charge of them. The King did not arrive in England until 14 March. He ordered a council, or special conference, to take place in April at York where the campaign would be discussed. The movement of the exchequer from London to York indicated that York would be his military and political headquarters for the Scottish campaign. Edward’s summons to the council included the Scottish lords – if they did not appear, they would be considered enemies. Edward himself set off for York in late April, visiting shrines of saints on the way. He was at Ely from 6–7 May, at Bury St Edmunds from 9–10 May and proceeded to Walsingham, Lincoln and Beverley, finally reaching York on 24 May. His army was ordered to muster at Roxburgh, his knights on 23 June and the infantry on 25 June.

Solway Firth, near Caerlaverock.
YORK AS A WAR CAPITAL
Blind Harry’s The Wallace, followed by the film Braveheart, falsely claimed that William Wallace penetrated Yorkshire and even captured York. It is true, however, that Wallace had a dramatic and significant long-term influence on York. Edward I reacted to Wallace’s victory at Stirling Bridge on 11 September 1297 by establishing York as his war capital in the summer of 1298. Despite his victory at Falkirk in July 1298, the English King was unable to consolidate control within Scotland and York therefore remained his military and administrative capital between 1298 and 1305, with the Exchequer, Chancery and the main judicial benches being based there. The resulting influx of officials, lawyers and suitors at the various courts, as well as soldiers, greatly increased the prosperity of the city. The catering profession certainly flourished, as did the trades associated with warfare, such as sword-makers, fletchers, armourers, bowyers and saddlers. However, there were also problems caused by local tradesmen and landlords giving in to the temptations of profiteering. As a result, in 1301, a series of ordinances were produced: ‘No bread over six days is to be sold’, ‘Taverners, wine sellers and sauce-makers shall not keep bad or putrid wine or vinegar in their houses’, ‘No doctor is to exercise his profession unless he has been instructed in the art of surgery’, ‘No-one shall keep pigs which go in the streets by day and night, nor shall any prostitute stay in the city’, ‘No-one is to put out excrement or other filth or animal manure in the city’. Being a war capital created problems as well as benefits. What is not usually appreciated is how far William Wallace was the catalyst for York’s development as a war capital in the Middle Ages.
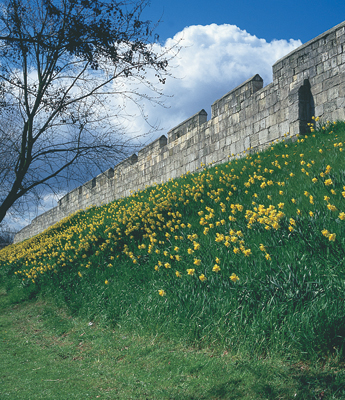
The city wall of York. The late thirteenth and early fourteenth centuries saw the city defences (a circuit of 2 miles) strengthened with stone walls and numerous towers.
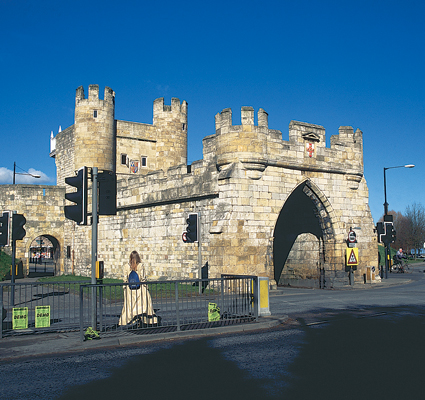
Walmgate Bar. The outer defences, the barbican, still remain at Walmgate, though they are no longer to be seen at York’s other medieval gateways. The barbicans reflect the ever-growing need for fortifications at York in the century after the Battle of Stirling Bridge.
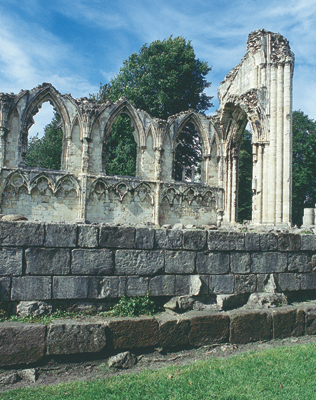
St Mary’s Abbey. When York became a war capital for the English government in 1298 York’s finest medieval buildings, such as St Mary’s Abbey and Clifford’s Tower, were used to house the royal household and government departments. The abbey became home to the Chancery.
The Undercroft at St Leonard’s Hospital. The ruins in the Museum Gardens, York, are few but the Undercroft does give a clue that St Leonard’s Hospital was one of the largest and finest buildings in medieval York and the largest medieval hospital in England.
The cessation of hostilities in the English campaign in early 1298 did, of course, give Wallace a useful and unexpected respite in which to prepare more fully for Edward’s army. According to the Lanercost Chronicle the Scots:
. . . set themselves down before the castles of Scotland which were held by the English, to besiege them with all their force, and through famine in the castles they obtained possession of them all, except Roxburgh, Edinburgh, Stirling and Berwick, and a few others; and when they had promised to the English conditions of life and limb and safe conduct to their own land on surrendering the castles, William Wallace did not keep faith with them.
Airth Castle, Falkirk. According to Blind Harry, Wallace’s uncle from Dunipace had been captured during the warfare and imprisoned at Airth before being rescued by Wallace. The historical Wallace and his army did not have the expertise to storm castles.
This extract again hints that Wallace did not fight by the normal rules of chivalry. However, there is little contemporary administrative record to show how Wallace prepared his forces. On 29 March, at Torphichen (West Lothian) Wallace granted to Alexander Scrymgeour (in the Charter of William Wallace to Alexander Scrymgeour, 29 March 1298)
. . . six marks of land in the territory of Dundee . . . and also the constabulary of the castle of Dundee . . . for faithful service and succour given to the said kingdom, in carrying the royal banner in the army of Scotland . . .
This indicates that he was certainly making military appointments. John of Fordun, the most contemporary Scottish source, unfortunately says little about Wallace’s organisation of his army but does emphasise his forcefulness in asserting his authority over both the nobility and the burgesses of Dundee. The Scotichronicon of Walter Bower and Chronicle of Pluscarden, however, have lengthy passages on Wallace’s marshalling of the infantry:
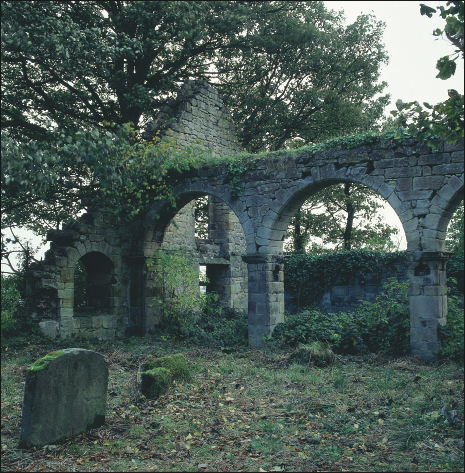
The church at Airth, now in a severe state of decay, would have been in existence in William Wallace’s time but only Blind Harry connects Wallace with this place.
. . . he encouraged his comrades in arms towards the achievement of whatever plan he had in hand to approach battle for the liberty of their homeland with one mind. And as regards the whole multitude of his followers he decreed on pain of death that once the lesser men among the middling people (or in practice those who were less robust) had been assembled before him, one man was always to be chosen out of five from all the groups of five to be over the other four and called a quaternion; his commands were to be obeyed by them in all matters, and whoever did not obey was to be killed. In a similar manner also on moving up to the men who were more robust and effective there was always to be a tenth man [called a decurion] over each nine, and a twentieth over each nineteen, and so on moving up to each thousand [called a chiliarch] and beyond else to the top . . . With everyone harmoniously approving this law (or substitute for law) they chose him as their captain.
The Chronicle of Pluscarden added that this was the advice given to Moses by Jethro. These chroniclers’ descriptions of Wallace’s fearsome discipline may not be exaggerated but the military system they outline seems to be derived from classical literature rather than William Wallace’s own military handbook of 1297. Walter Bower further reports in the Scotichronicon how:
. . . from every sheriffdom and shire, barony and lordship, town and village and country estate he had special lists drawn up containing the names of the men between sixteen and sixty who were fit for warfare. So that not one man could be absent unnoticed from a stated time and place without his knowledge, he laid it down as a fundamental law that not only in every barony but also in every sizeable township a gallows was to be erected on which were to be hanged all those inventing excuses to avoid the army when summoned without reasonable cause.
This is, perhaps, more in keeping with the planning Wallace could implement as he waited for Edward I’s army.
There was, already, in operation a method of summoning the common army of Scotland. This had been used in 1244 when Alexander II’s army briefly confronted Henry III at the border, in 1263 when the Norwegian threat was met at Largs, in 1286 when the Guardians of Scotland were concerned by the threat of civil war and in 1296 when Scotland tried to defeat Edward I’s army at Dunbar. Wallace undoubtedly employed this system in his own inimitable and uncompromising way. He could use Parliament to strengthen his military powers – at his trial in 1305 he was accused, among other charges, of convening Scottish parliaments – and, it seems, he had already, before Stirling Bridge, established (with Moray) control over the local administrative structure that was responsible for levying local men for militia duties. With his own undoubted powers of persuasion, William Wallace could ensure that a full complement of the ‘common army’ would be mustered and, as far as time allowed, trained. The evidence from the Battle of Falkirk was that the Scottish militia was well disciplined and trained.
William Wallace’s relationship with the Scottish nobility, and therefore his control over the cavalry element in the Scottish army, has been a controversial question among historians. Scottish nationalist writers of the fourteenth and fifteenth centuries blamed the nobles, and the Comyns in particular, for betraying Wallace at Falkirk. The issue is argued most forcibly by Walter Bower, in the Scotichronicon, in the mid-fifteenth century. To him, Scotland under Wallace ‘was making a surprising, in fact a successful recovery’ until:
. . . the magnates and powerful men of the kingdom, intoxicated by a stream of envy, seditiously entered a secret plot against the guardian under the guise of expressions of virgin-innocence but with their tails tied together. Hence some who had been restored to their fortresses and domains by him after they had been completely excluded by the same English, muttered with proud hearts and rancorous minds, saying to one another: ‘We do not want this man to reign over us.’ But the ordinary folk and populace, along with more of the nobles whose attitude was sounder and leaned more towards the public interest, praised the Lord on account of the fact that they themselves, saved from the daring attacks of rivals with the help of such a champion, were able to have the comfort of their own homes. What stubborn folly of fools! Wallace did not force himself into rulership, but by the choice of the estates he was raised up to be ruler after the previously-nominated guardians had been removed. And when you, Scotland, had been headless and unable to defend yourself, Wallace had appeared as a mighty arm and a salvation in time of trouble.
This view and the additional notion, found in John of Fordun, Walter Bower and Wallace’s biographer, Blind Harry, that the Comyns were the chief betrayers needs to be set against the background of Scottish nationalist writings of the fourteenth and fifteenth centuries. This context was of political instability, the renewed threat of English interference and loss of Scottish independence. Therefore, these writers’ review of thirteenth-century politics strongly emphasised the risk posed to the monarchy by faction and lawlessness of the nobility, which in turn threatened Scottish independence. The Comyns were a particular target for blame. It was the politically correct way, in the fourteenth and fifteenth centuries, to paint the Comyns in as black a light as possible in their dealings with Scotland’s two nationalist heroes, Wallace and Bruce. Comparisons can be made with the Tudor ‘myth’ of the Yorkist King Richard III, painted by Shakespeare and others as a crook-backed tyrant. Both ‘myths’ have been powerful and long lasting.
EDWARD I
Edward I was approaching fifty-seven years of age when William Wallace began his rebellion against English officials in Scotland in the early summer of 1297. Edward had been King of England since 1272, and was not only a very experienced international statesman but still an imposing figure of a man, able to inspire his troops with his stature and physical presence. When his tomb in Westminster Abbey was opened in 1774, his body was seen to be 6 ft 2 in in length, well above average for the time. Edward I was an active international diplomat and mediator in the 1270s and 1280s, keen to use marriage treaties to pursue alliances with the Aragon, the Habsburgs (of Germany) and the Brabant dynasties.
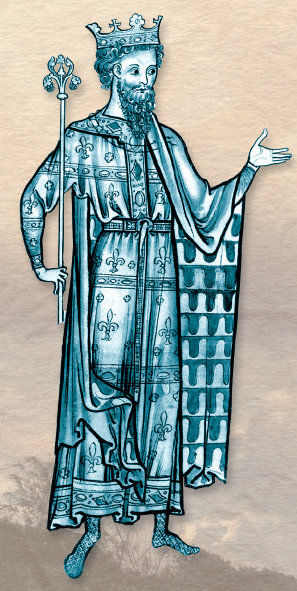
Edward I as a young man and certainly seeming to live up to his nickname ‘Longshanks’. (Reproduced by permission of the British Library [Royal MS 2A XX11 f. 219v].)
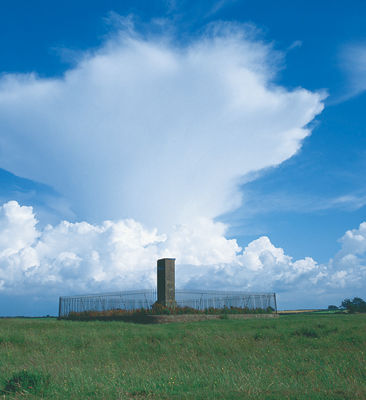
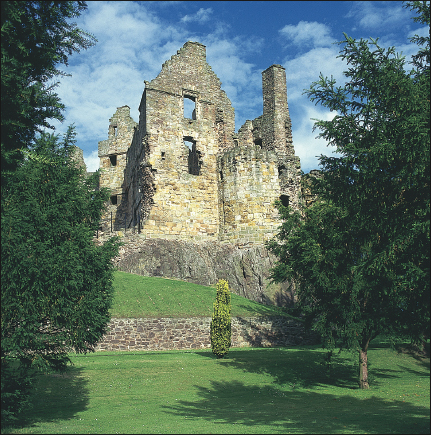
Holm Cultram Abbey, Cumbria. After Edward I’s death at Burgh-on-Sands on 7 July 1307, his body was taken to be buried at Westminster Abbey. However, before the long journey south, Edward’s entrails were removed and buried at the Cistercian abbey of Holm Cultram. The English King’s chief enemy in 1307, Robert Bruce, also had a connection with the abbey as his father was buried there.
Contrary to the image of Edward I as ‘Hammer of the Scots’ (a phrase to be found on his tomb), his policy towards Scotland was, at first, based on diplomacy. No doubt he gained an insight into Scottish affairs following the marriage of his sister, Margaret, to Alexander III of Scotland at York in 1251. In view of the good social relationships between the royal families of England and Scotland from the 1250s to the 1280s, it was natural, following Alexander III’s sudden death in 1286, for Edward to propose a marriage alliance between the very young heiress of Scotland, Margaret, the ‘Maid of Norway’, and his son, Edward. It was only after 1289 that Edward I took an increasingly interventionist line and seriously underestimated the strength of nationalist feeling in Scotland.
Burgh-on-Sands, where Edward I died. He had already spent some time at Lanercost Priory, having been taken gravely ill as he advanced north to launch a campaign against Robert Bruce. Edward’s death is marked by a monument surrounded by iron railings.

Edward I’s Seal, the Great Seal for the Government of Scotland. Reverse: a heater-shaped shield bearing arms, three leopards passant guardant in pale (England). (By permission of the Court of the Lord Lyon.)
Historical reality is more complex. The Comyns were officially recognised by Edward I as having returned to the Scottish patriot side by about November/December 1297, though there had been suspicions that they were not working in Edward’s interest in August. It is unlikely that they did not support their kinsman, Andrew Moray, as he built up his forces in northern Scotland in the summer of 1297. Noble families such as the Morays, Stewarts, Bruces and the Earl of Lennox took part, with varying degrees of credit, in Scottish resistance in 1297. Stewart and Malcolm, Earl of Lennox, had been involved in the Battle of Stirling Bridge – but only after it had actually been won.
The participation of the nobility in Scottish military resistance is a complicated issue. The patriotic credentials of few – most obviously the Bruces, Patrick, Earl of Dunbar and Gilbert Umphraville, Earl of Angus – could be questioned when hostilities commenced in 1296. It was a war led by the Comyn-dominated aristocratic governing community in the name of King John Balliol fighting for the principles that they had written into the Treaty of Birgham (1290). Yet the nobility did little actual fighting before submitting in 1296 at Dunbar or in 1297 at Irvine, and contributed little to the victory at Stirling Bridge. Their actions suggest that they wanted to use a show of force as a political weapon in negotiations with Edward, knowing that his priority was war against France and hoping that he would prefer a political solution in Scotland, which would with luck preserve their own power and landowning status in the country. Comyns, Stewarts and Bruces all played this diplomatic game of chivalric ‘cat-and-mouse’.
On the Scottish side, too, there seemed to be an inbuilt acceptance of the superiority of English military forces, especially the cavalry. Most of the Scottish nobility had social ties with English noble families because of their landholding in England. While this did not make their patriotism any less genuine when peace turned to war, it certainly gave them an understanding of the strengths of English troops. They may well have agreed with the sentiments expressed in the verses of the Song on the Scottish Wars written shortly after the Battle of Falkirk:
‘Do not be troubled,’ said they [the English knights to Edward I] ‘if the Scottish thieves sharpen axes for their own heads; one Englishman will slay very many Scots’ . . . the English like angels are always conquerors, they are more excellent than the Scotch and Welsh . . .
The Scottish nobility would have been aware that the proportion of knights, i.e. mounted soldiers, to foot soldiers in Scotland was much lower than in England. Matthew Paris, describing the Scottish confrontation with Henry III in 1244, noted that the Scottish had inferior horses to the English. The Lanercost Chronicle probably records correctly the relative strengths of the Scottish and English forces at the Battle of Falkirk:
. . . the Scots gave him battle with all their forces at Falkirk, William Wallace aforesaid being their commander, putting their chief trust, as was the custom, in their foot pikemen, whom they placed in the frontline. But the armoured cavalry of England, which formed the greater part of the army . . .
The question of the loyalty of the Scottish nobility should, therefore, be divided from discussion of the ineffectiveness of the Scottish cavalry.
It is clear that Wallace’s association with the Scottish nobility, too, should be separated from the issue of allegiance to the Scottish patriotic cause. Wallace’s relationship with his formal overlords, the Stewarts, was ambiguous in the period 1296 to 1298. The English chroniclers’ depiction of William Wallace, at the outset, as the frontman of James Stewart and Bishop Wishart and the assumption that Stewart was the mastermind behind Wallace’s actions at Stirling Bridge probably represented how they thought Wallace’s link with Stewart ought to be rather than the actuality. It is likely that Stewart did encourage Wallace before he (Stewart) came out openly in rebellion with his brother John, Wishart and Robert Bruce in July 1297. However, after the nobles’ abject submission, the retainers of most them, including the Stewarts, seem to have accepted Wallace’s leadership over that of their own lords. This was evident at Stirling Bridge and this, rather than Stewart’s apparent controlling tactics, explains the Stewarts’ peripheral role in the battle.
Wallace’s relationship with the Bruces has also been the subject of some debate. The Bruces started the war on the English side but the younger Robert Bruce joined the so-called ‘aristocratic’ revolt in conjunction with his family allies, the Stewarts, and Bishop Wishart. However, it is clear that both as military leader and political leader of Scotland after Stirling Bridge, William Wallace was acting on behalf of King John Balliol. The younger Bruce, and his father, still retained a counter-claim to the Scottish throne and William Wallace must have regarded them with suspicion.
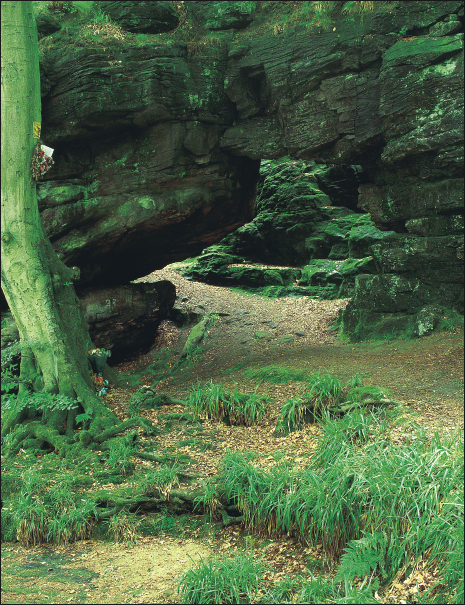
Wallace Cave by the River Avon. Allegedly, it was in this cave that William Wallace and some of his followers hid in the aftermath of the Battle of Falkirk. At least the Comyn family had always been strong supporters of John Balliol who was, in fact, their kinsman and thus there was common ground with Wallace here. However, while the accusations of treachery against the Comyns at Falkirk may be fourteenth- and fifteenth-century propaganda, there is evidence of tension, even personal animosity, between Wallace and the Comyns.
This ill feeling was openly displayed in 1299 – after Falkirk and after Wallace had ceased to be leader of the political community – at a council meeting at Peebles. David Graham, a front-line Comyn adherent, put forward ‘a demand for Sir William Wallace’s lands and goods as he was going abroad without leave’ (J. Bain [ed.], Calendar of Documents Relating to Scotland, II, no. 1978 [Edinburgh, 1881]). Wallace’s brother, Malcolm, objected and during the ensuing argument John Comyn, Earl of Buchan, turned on William Lamberton, Bishop of St Andrews, who was clearly defending the Wallaces. The election of Lamberton to the key political and ecclesiastical office of Bishop of St Andrews, on the instruction of William Wallace on 3 November 1297, was probably the real cause of animosity between the Comyns and Wallace. Comyn domination of Scottish politics in the second half of the thirteenth century had been supported by a long line of pro-Comyn bishops of St Andrews – Gamelin (1255–71) had probably been a member of the Comyn family; William Fraser (1279–97) was from a family of Comyn supporters; and it is clear that Master William Comyn, Provost of St Mary’s of the Rock at St Andrews (1287–1329) and brother of John Comyn, Earl of Buchan, hoped to follow in this line. The sudden death of William Fraser in France in 1297 and the political vacuum caused by the imprisonment in England of the Comyns and their allies in government from 1296, meant that his candidature could not be pursued by the Comyns during Wallace’s political ascendancy. Master William Comyn objected to his exclusion from the election process, Pope Boniface VIII acknowledging that a protest had been made in his letter to William on 7 May 1298. This was, in other words, a ‘live’ issue in the period leading up to the Battle of Falkirk. This family grievance once again became pertinent in 1299 when William Comyn’s brother, John, turned on Lamberton during the baronial council in August 1299. Later, in 1306, it was asserted that William Comyn had, in fact, been elected but superseded by Lamberton.
It was natural for the Comyns, in particular, to feel that their traditional leadership role had been usurped. The Comyns’ absence in England in 1296 was also exploited by Bishop Robert Wishart, ally of James Stewart and Wallace, in 1297 – Mr Robert, John Comyn of Badenoch’s physician, who had been placed in charge of the church of Great Dalton (Dumfriesshire) ‘was unlawfully ousted by the bishop of Glasgow’ (Grant G. Simpson and James D. Galbraith [eds], Calendar of Documents Relating to Scotland, V, no. 169 [Edinburgh, 1986]). Near contemporary Scottish sources do not attempt to hide Wallace’s forthright and uncompromising style and there may have been some truth to a reference in an earlier, more complete text of Walter Bower’s Scotichronicon that Wallace had suppressed the Comyns in Galloway. Not only were the Comyns politically powerless to appoint their candidate to the bishopric of St Andrews, the nobility in general seemed to have lost their traditional military leadership as a result of their poor showing in 1296 and 1297. They had even lost control over their retainers as Wallace and Moray had shown both before the Battle of Stirling Bridge and during it. The English chroniclers’ belief that Wallace was a frontman for James Stewart and Bishop Wishart seems to have less support than John of Fordun’s opinion that Wallace:
. . . in a short time, by force, and by dent of his prowess, brought all the magnates of Scotland under his sway, whether they would or not . . .
The nobility’s loss of its traditional leadership in political and military affairs in 1297, together with the forthright manner of Wallace’s leadership, were the real causes of tension. It is another matter, however, to talk of Wallace’s defeat at Falkirk in terms of betrayal. The battle must be judged on its own merits.
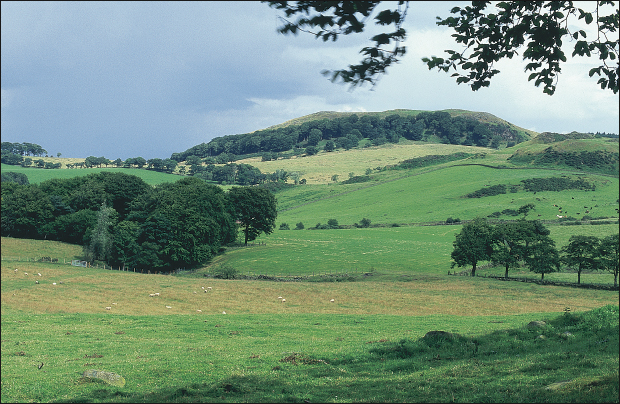
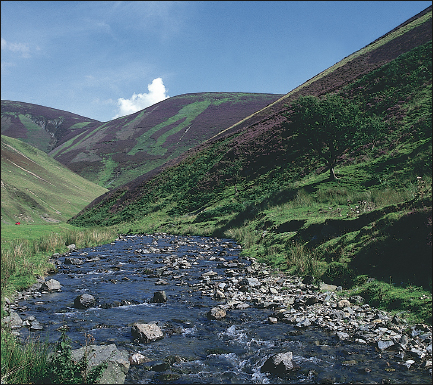
The Upper Tweed valley and Selkirk Forest. Often the route taken by English troops marching on campaign up the east of Scotland, Selkirk Forest was where Wallace acquired a valuable group of archers who fought for him at the Battle of Falkirk.
There is no doubt that Edward I took the Scottish military threat seriously as he joined his army at Roxburgh in early July 1298. His determination had been clear as soon as he heard news of the English defeat at Stirling Bridge. This extract from the Song on the Scottish Wars expresses the tone of his address to his knights: ‘Again you must prepare to fight for your country. I would rather conquer once than be often tormented.’ On his way north, Edward had visited sacred shrines and collected the banners of northern saints, St John of Beverley and St Cuthbert, to fly at the head of his army. His forces were impressive, strong in armoured cavalry (about 2,500), with an infantry totalling up to 25,000 on the eve of battle and many archers (there were over 10,000 infantry, mainly archers, from Wales, as well as crossbowmen from Gascony) and some 4,000 Irish mercenaries. National fervour had been roused in the English and this was reflected in political songs of the time. The following extract is again from the Song on the Scottish Wars:
What does the barbarous brutal and foolish race threaten? Will this perfidy remain unavenged? . . . William Wallace is the leader of these savages . . . ‘Do not be troubled’, said they (the knights) ‘if the Scottish thieves sharpen axes for their own heads; one Englishman will slay many Scots. It is not the part of a man who has a beard to join mice to a little cart’ – Wallace, or Gilmaurus, is scarcely better than a mouse, to whose victory the laurel will never grow; for they want strength and treasure: a bull who has lost his horns is the more eager for the war . . .
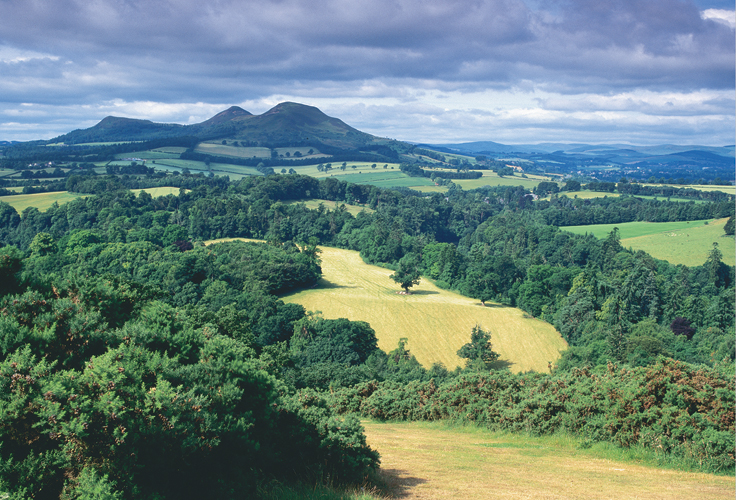
Eildon Hills, north-west of Dryburgh, where Edward I marched close by during his 1298 campaign.
The Cheviot Hills from Chillingham. In his 1298 campaign Chillingham was on Edward I’s outward and return routes.
Despite such vehement feelings, there must have been some doubt about the loyalty of the very large Welsh contingent.
The enthusiasm of the English and the allegiance of the Welsh would soon be tested as Edward I’s army marched north through Lauderdale to Braid, just south of Edinburgh, then on to Kirkliston, just west of Edinburgh. The detailed reporting of the Guisborough chronicler, probably based on an eyewitness account, describes the very real problems Edward I’s army faced owing to lack of provisions. Supplies to be brought by ship had been held back by unfavourable winds, and no food could be found in southern Scotland partly because of the famine of the previous year and partly as a result of the deliberate burning and wasting policy of Wallace.
Edward I sent a detachment of troops under Anthony Bek, Bishop of Durham, to try to capture the newly built and Scottish-held Dirleton Castle (with two other neighbouring castles). They had no siege weapons and, as the Guisborough chronicler testified, they were too weak from hunger to fight: ‘they had to subsist on nothing but a few peas and beans dug out of field’. The King was angry that Bek was unable to carry out his mission but the arrival of some food ships, and Edward I’s curt response to Bek’s initial failure, led to renewed English attempts to capture the castles and ultimate success within a few days. In the meantime, hunger among the vast infantry army had reached such an advanced stage that some Welshmen were dying. The arrival of a solitary supply ship, laden with wine rather than corn, made the situation worse. Edward I’s decision to allow the Welsh to be given wine to bolster their morale backfired when the Welsh became drunk and began brawling, which resulted in a number of priests being killed. English knights were ordered to charge them to restore order. However, the decision to have so many Welshmen in the infantry seemed to be unsound as the Welsh withdrew from the fracas, threatening to join the Scots. Edward’s response, ‘Who cares if all our enemies join together? With God’s help we shall then defeat the whole lot of them in one go’, seems to confirm, once more, a dangerous English superiority complex, so often reflected in the popular political songs of the day.
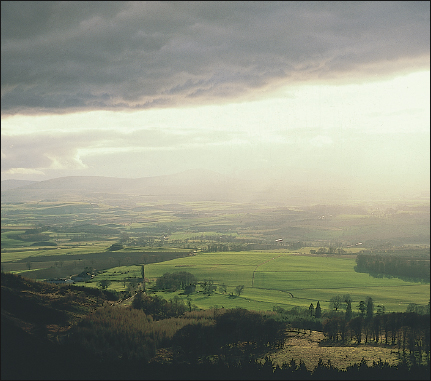
Lammermuir Hills. Edward I’s campaigns in 1298, 1301 and 1303 passed by these hills up the eastern side of Scotland.
Dirleton Castle. Standing on a rock in an attractive village, this thirteenth-century castle (newly built in 1298) was captured by the English prior to the Battle of Falkirk.
It seemed as if Edward had decided to withdraw to Edinburgh to await the arrival of further supplies when the pro-English Patrick, Earl of Dunbar, and Gilbert Umphraville, Earl of Angus, brought him a spy whose report changed the English King’s mind:
‘The Scots army and all your enemies are no more than 18 miles away from here, just outside Falkirk . . . [in Callendar Wood]. They have heard that you intend to retreat to Edinburgh, and they mean to follow you and attack your camp tomorrow night, or at least to fall on your rearguard and plunder your baggage.’ Then the King cried: ‘May God be praised, for He has solved all my problems. The Scots will have no need to follow me, for I will march to meet them at once.’
A hill at Cockleroy overlooking Linlithgow. Traditionally, it is claimed that Wallace watched Edward I’s forces from here as they made camp on their way to meet Wallace’s army at Falkirk. The gap between the two summits of Cockleroy is known as Wallace’s Cradle.
This account indicates that the English, up to that stage, had completely lost contact with the Scots and that Edward, without sufficient rations to feed his vast army, had no other option but to retreat to Edinburgh. This also suggests that Wallace’s tactic of wasting large areas of southern Scotland had succeeded – attacking the rearguard of a demoralised, hungry enemy was preferable, for Wallace, to engaging in a traditional battle, which favoured Edward’s army. Edward, encouraged by the spy’s statement, ordered his troops to arm and march towards Falkirk. They camped just east of Linlithgow. In a campaign that had not, up to this point, run smoothly, a further mishap occurred when the King was injured (some chronicles report that he broke two ribs) by his own charger when the animal kicked him as he slept.
Linlithgow Castle. Edward I’s marches into Scotland (in 1291, 1296, 1298, 1301 and 1303) usually took him to Linlithgow, and just outside here the English army prepared for the Battle of Falkirk.
William Wallace now seems to have decided to fight a pitched battle, clearly not his favourite option, to remove the English from Scotland. Historians, with hindsight, have criticised Wallace for not continuing with a ‘scorched-earth’ policy backed with ambush raids but he could not have known that ultimate victory could be achieved this way. Wallace must have been buoyed up by the success at Stirling Bridge, although this was not a typical engagement (despite the way it was portrayed in the film Braveheart, i.e. without the bridge).
Wallace prepared a defensive formation to try to counter Edward’s massive cavalry superiority. The Guisborough Chronicle gives a very detailed account of Wallace’s grouping. Callendar Wood was at the rear of his forces, the Westquarter Burn running in front and below him. His infantry troops were positioned ‘on hard ground on one side of a hill beside Falkirk’. The English cavalry would be impeded a little by boggy ground before they reached the Scots. Wallace organised his ‘army of Scotland’ into four great schiltroms described by the Guisborough chronicler as being:
. . . made up entirely of spearmen, standing shoulder to shoulder in deep ranks and facing towards the circumference of the circle, with their spears slanting outwards at an oblique angle.
These ‘shield-rings’, bristling with 12-in iron-tipped spears and perhaps comprising between 1,000 and 2,000 men in each schiltrom, must have appeared like huge hedgehogs or porcupines. For further protection, according to the Rishanger Chronicle, there were, around each schiltrom,
. . . a great number of long stakes fixed into the ground and tied together with cords and ropes like a fence so that they would obstruct the passage of the English.
These enclosures must have looked like rings and, before the battle commenced, contemporary English chroniclers recorded Wallace making a typical down-to-earth joke about this: ‘I have browght yowe to the rynge, hoppe yef ye kunne [I have brought you to the ring, now dance if you can]’ (Rishanger Chronicle). Between the schiltroms was Wallace’s small body of archers from Selkirk Forest. These were under the command of John Stewart of Jedburgh, brother of James Stewart. At the rear was a small cavalry force contributed by the Scottish nobility, probably including the Comyns, James Stewart, Macduff of Fife, the earls of Lennox, Atholl, Menteith and Strathearn. It is not known whether Robert Bruce was present. The mounted troops were not apparently within the defensive formation and it had been usual practice for the Scots army to be, in effect, two forces, the cavalry of the nobility separated from the ‘common army’ of infantry, with little coordination between the two as a consequence.
On the morning of 22 July, Edward preferred to pause while his army replenished themselves – most had not eaten for 24 hours – but his main commanders, the earls of Norfolk, Hereford and Lincoln, insisted that a delay would be dangerous because of the closeness of the Scottish forces:
Then at once, the earls who commanded the vanguard led their men forward in line, for they did not realise at first that a peaty bog lay between them and the enemy: but when they saw this, they directed their men round the west of it, and so were a little delayed. Meanwhile, the second division, under Bishop Bek of Durham and thirty six chosen knights, swung round the bog to the east, making as much speed as possible so as to be first into battle . . . they pressed on and attacked the first Scottish schiltrom, while the earls charged with the vanguard on the other side of the field. The Scots cavalry fled without striking a blow the moment our men appeared, though a few of their lords remained to command the spearmen . . . [while Sir John Stewart] dismounted from his horse and stood in the midst of his people until both he and they – men of noble form and great stature – were all cut down.
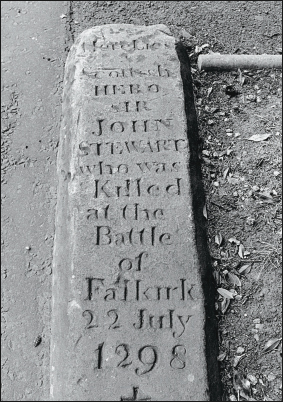
The grave of John Stewart in Falkirk churchyard. The tomb of John Graham is also to be found here, another Wallace supporter. Both men lost their lives at the Battle of Falkirk.
Scottish sources concentrate on the key moment in the Scottish defeat and emphasise the flight of the Scottish cavalry as betrayal. John of Fordun states:
For on account of the ill-will, begotten of the spring of envy, which the Comyns had conceived towards the said William, they, with their accomplices, forsook the field and escaped unhurt.
However, the Scottish horsemen were more suited to harrying, ambushes and skirmishes with foot soldiers and had little chance against a far superior English cavalry force in pitched battle. This had been shown at Dunbar in 1296 and Irvine in 1297. The Scottish cavalry had little role in the victory over the English at Stirling Bridge.
English chroniclers acknowledge that the Scots placed their ‘front pikemen . . . in the first line . . . stood their ground and fought manfully’ (Lanercost Chronicle). The English cavalry had no difficulty mowing down the Scottish archers, no doubt killing their leader, John Stewart, but could not penetrate the tightly packed schiltroms. Although few English knights were killed at Falkirk – the most significant casualty being Brother Brian le Jay, Master of the English Templars – over a hundred horses died. The impasse was broken when the English knights were withdrawn and the large number of archers on the English side were ordered to fire into the isolated ‘shield-rings’ of the Scottish infantry. This was a time when the Scottish cavalry could have given some protection by attacking the archers and thus disrupting the constant flow of arrows. Gradually, the schiltroms, whose spears, according to the Guisborough chronicler, ‘were as impenetrable as the branches of a thick wood’ to English knights, were themselves pierced by an unbroken bombardment of arrows. As soon as large gaps appeared the English horsemen were ordered to charge and the ‘shield-rings’ were broken. John of Fordun describes the key role played by a detachment of cavalry under Anthony Bek, which went
. . . by a long road round a hill and attacked the Scots in the rear and thus these, who had stood invincible and impenetrable in front, were craftily overcome in the rear.
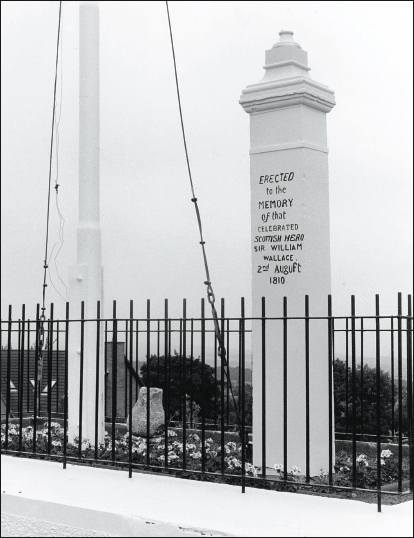
The Wallacestone Monument. Overlooking Falkirk, this 10-ft memorial was erected in 1810 to ‘that celebrated Scottish hero Sir William Wallace’.
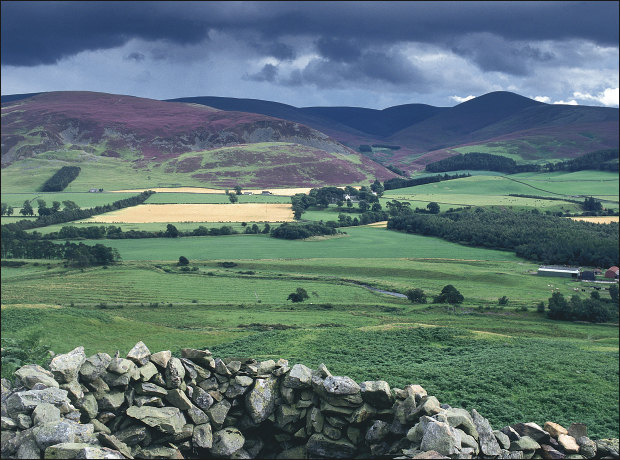
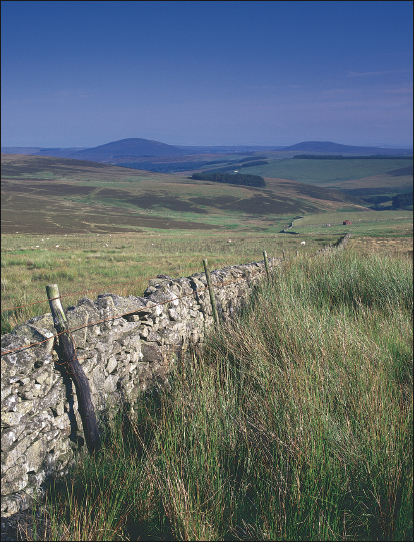
Lowther Hills. This area was close to the route of Edward I’s 1298 campaign between Ayr and Lochmaben.
Fordun states that Robert Bruce, the future King, was in this English unit, but this seems to be a mistake and must surely refer to Bruce’s father, who had been consistently on the English side and was known to be in the English army at Falkirk.
Falkirk was a hard and closely fought English victory, but after the ‘shield-rings’ were broken the Scottish infantry were massacred in their thousands. Wallace escaped during the battle when he saw that Scottish defeat was inevitable. English exultation was recorded in political songs, such as this extract from the Lanercost Chronicle:
Berwick, Dunbar and Falkirk too
Show all that traitor Scots can do
England exalt! thy Prince is peerless,
Where thee he leadeth, follow fearless!
The Song on the Scottish Wars puts the blame for the Scottish debacle firmly on William Wallace:
The site of Tibbers Castle. This stronghold was taken by the English in the follow-up to their victory at the Battle of Falkirk, 22 July 1298. After Falkirk, Edward I was at Ayr between 26 August and 1 September and reached Tibbers on 3 September.
Wallace, thy reputation as a soldier is lost; since thou didst not defend thy people with the sword, it is just thou shouldst now be deprived of dominion. But, in my view, thou wilt always be the ass thou wert formerly: – Thou wilt pass into a lasting proverb; thy kingdom is divided, and cannot stand; thy people now drink of the cup which thou hast prepared . . .
Wallace lost the military and political leadership of Scotland following the English success at Falkirk. Yet the defeat was not as decisive as English propaganda would have led contemporaries to believe. Edward I’s army marched north but little was achieved apart from the burning of St Andrews and Perth. Stirling was also burnt but it is possible that this may have been part of Wallace’s strategy to deny resources to Edward. Provisioning of his troops remained a problem for the English King as he moved southwards towards Ayr, where Robert Bruce, clearly now on the Scottish side, had burnt down the castle as further impediment to the English. Unlike 1296 after Dunbar, Scottish resistance continued after Falkirk, the Scots holding the country north of the Forth and having pockets of resistance in the south. Edward needed another offensive to consolidate his narrowly won victory at Falkirk. Yet problems with supplies, renewed political opposition and financial difficulties in England meant that Edward I had to abandon immediate plans for another campaign and return south. Neither the Scottish patriot movement nor Wallace had been completely eliminated.
Lochmaben Castle. The stone castle at Lochmaben, where some curtain walls survive to their original height, was the chief base of the Bruces in south-west Scotland. After the Battle of Falkirk, Edward I’s forces took Lochmaben 4–5 September 1298, after Bruce had rendered Ayr Castle useless to the English by fire.
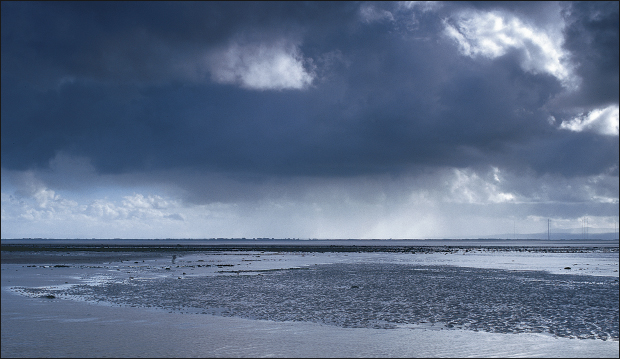
Solway Firth looking towards England. Most of the fighting in the Scottish wars after 1298 took place in the south-west, which made the Solway Firth a key crossing area for English armies.