
Chapter Eleven
Contents
· Green Framing Feeling
· Advanced Framing
· Material Selection
· Structural Insulated Panels (SIPs)
· SIP Installation
· SIP Tools
Green Framing is as much an attitude as it is an act of doing certain forms of framing. There are some framing designs and materials that are considered “green” but to be a green framer it takes a belief that you want to be a part of the global effort to reduce our effects on the ecosystem. In this chapter I will show you how the green movement is affecting the materials we use and in some cases the way we frame. I will also give you a basic understanding of the construction industry efforts to become green. In additions to this, I will discuss some behaviors that if you so choose will make you a part of the movement.
A little history is probably a good place to start. It’s hard to say when the first discussions about how the human race is effecting the environment occurred and what we can do to our building practices to prevent ill effects, but Optimum Value Engineering, which has become known as Advanced Framing, was one of the first applications of green building. Advanced framing is an effort to conserve energy by altering framing techniques. It was soon realized, however that an overall building effort was needed to direct the construction industry in order to achieve the best effects. In 2000 the United States Green Building Council (USGBC) was formed and they created LEED (Leadership in Energy and Environmental Design) which is a construction and design industry joint effort to define and certify construction using green methods. The LEED program creates a tool for measuring the green building effectiveness by assigning credits in six areas: Sustainable Sites; Water Efficiency; Energy and Atmosphere; Materials and Resources; Indoor Environmental Quality; and Innovation and Design Process. Credits are totaled for individual jobs allowing for certification at different levels including, Certified, Silver, Gold, or Platinum. These certifications can be used in marketing programs.
LEED is an excellent construction- and design-oriented program to promote green building, however, it is a new and separate organization requiring its own fees and training. In 2008, the International Code Council (ICC) and the National Association of Home Builders (NAHB) came out with the National Green Building Standard ICC700-2008. Designed to guide the residential construction industry in green building, this standard was similar to the LEED system. It provided a rating system of environmental categories similar to LEED and performance levels of Bronze, Silver, Gold or Emerald. The ICC700-2008 is a good guide, but is hard to regulate.
In 2010, the ICC published the International Green Construction Code (IGCC), the first ever compilation of international green building codes and standards. USGBC along with other agencies worked to help develop the IGCC. USCBC’s LEED program set the format for guiding the design and construction industry in green building; however, it is a voluntary program and does not have jurisdictional enforcement capabilities.
The IGCC has similar topics for its five main content chapters, however, once the IGCC is accepted by a jurisdiction it becomes law for that jurisdiction. Unique to the IGCC for the other building codes is a section of regulations that relates to individual jurisdictions, so that each jurisdiction has to select from a group of regulations as to which ones they will require. There is an elective section where jurisdiction is required to determine the amount of a list of elective requirements that must be met.
It’s all a bit confusing and most of it does not apply directly to framing, however some items will. For example, Chapter 5 of the IGCC, “Material Resource Conservation and Efficiency,” notes a requirement to develop a construction material and waste management plan that requires not less than 50 percent of non-hazardous construction waste to be diverted from landfills.
Green building is wide spread in the construction process, however green framing is limited. Four parts of green framing that I will discuss are as follows:
1. Greening Framing Feeling
2. Advanced Framing
3. Material Selection
4. Structural Insulated Panels (SIPs)
Green Framing Feeling
Green framing feeling sounds a little subjective, but that’s because it has to be. For example, you are out on the job site framing, and the questions is whether to throw a small cut off of 2 6 into the trash or try to find a place to use it in your building process. Your decision is not only based on the cost of that piece of cut-off, but also the ease of just trashing it and the effect on the environment by using a new piece. Not an easy call to make, but you will have to make decisions like that all the time. If you choose the extra effort to conserve material, you will get a good green framing feeling.
Advanced Framing
A more tangible aspect of green framing is advanced framing. Based on the concept that wood is not as good an insulator as insulation, reduce the amount of wood in the exterior skin of a building and you will save energy and conserve building resources.
There are numerous ways to reduce the amount of wood in a building, but reducing the wood will reduce the building’s strength. There are ways, however, to reduce the amount of wood that either don’t affect the strength or still create strength enough to meet code requirements.
Some of the most common ways to reduce the amount of wood are the following:
1. Changing the stud layout from 16″ O. C. to 24″ O.C.
2. Changing common 3 stud backer to 2 4/2 6 L backer or ladder blocking
3. Using drywall clips instead of wood backing
4. Using insulation in headers instead of wood fillers
5. Using a cripple header instead of solid headers for non-bearing walls
6. Using single top plates
7. Eliminating trimmers where not necessary
8. Eliminating window cripples
9. Adjusting layout or door and window locations so layout aligns with stud-trimmers
10. Changing the exterior wall from 2 4 studs to 2 6 walls.
11. Using standard lengths during building so that standard material can be used with less waste.
The “Advanced Framing” illustration shows these 11 techniques. They may already be integrated into your plans or you can integrate them on your own. If they are not already on your plans, make sure they do not conflict with the plans or that you receive the engineer’s approval.
Advanced framing was originally developed to assist builders in using methods that would save energy in houses. Because energy conservation is a major component of green building it is now a part of green framing.
Advanced Framing

Material Selection
Material selection is a concern for green framing. The following are six ways in which material selection is considered green.
1. Use of Forest Stewardship Council (FSC) and Sustainable Forest Initiative (SFI) certified lumber. This is lumber that is harvested following environmentally friendly guidelines for sustainable practices. This lumber is tracked through the chain of custody from the forest to the end user. It is labeled for identification.
2. Use of salvaged or reused material. reusing lumber minimizes the need for new lumber.
3. Use of regional material. This is material that is harvested typically within 500 miles of the end use. The value gained is from the transportation energy savings.
4. Use of rapidly renewable material. This is usually considered material that has a 10 year or less growth cycle.
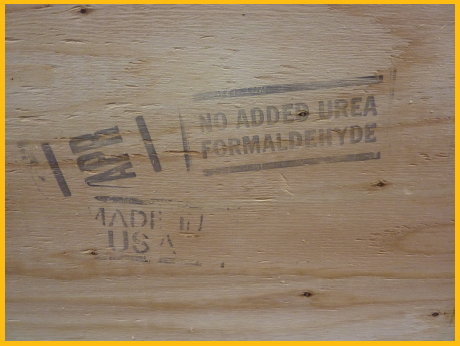
5. Use of composite panels that contain no added urea formaldehyde resins. Plywood and Oriented-Strand Board (OSB) commonly use adhesives containing urea formaldehyde which is a known carcinogen. No-Added-Urea Formaldehyde composite panels are available.
6. Minimized use of volatile organic compounds (VOCs). VOCs release toxins. Products such as subfloor adhesives will list the amount of VOCs that they contain. A tube of subfloor adhesive labeled “VOC Compliant” (see “VOC Compliant Subfloor Adhesive” photo) has VOC less water, less exempt solvent: <196g/l and <10.6% wt/wt. This makes it compliant with California ARB, which are among the strictest standards.
Forest Stewardship Council Label

Sustainable Forestry Initiative Label

Panel Label “No Added Urea Formaldehyde”
VOC Compliant Subfloor Adhesive

Structural Insulated Panels (SIPs)
SIPs are a structural sandwich panel made of a foam plastic insulation core bonded between two structural facings usually made of oriented-strand board (OSB). SIPs are most commonly used for walls and roofs, but can also be used for floors and foundation systems. SIPs are considered green because of their expected energy savings. It is also expected there will be conservation of material because SIPs are made in shops.
If you are framing with SIPs you will not be using the standard framing steps presented earlier in this book. Basically, you will be putting together panels of floors, walls and roofs with splines, headers, top and bottom plates, sealant, SIP tape, nails and SIP screws. Section R613 Structural Insulated Panel Wall construction of the International Residential Code gives prescriptive requirements for using SIPs for wall construction, but since each SIP manufacturer varies in their SIP construction it is best to follow the directions and plans the manufacturers provide.
SIP Installation
The concept of structural insulated panels was started in 1935, but it wasn’t until 1990 that they were used enough for the Structural Insulated Panel Association to be created to organize the SIP industry. SIPs from different manufacturers are similar and their installation methods are common. SIP systems for floors, walls, and roofs can be used together, but are commonly used independently with standard framing for the other systems. The following installation steps give general directions for installing SIP walls. Walls are the most common use of SIPs and the installation of roofs and floors is similar. These steps can help organize the process.
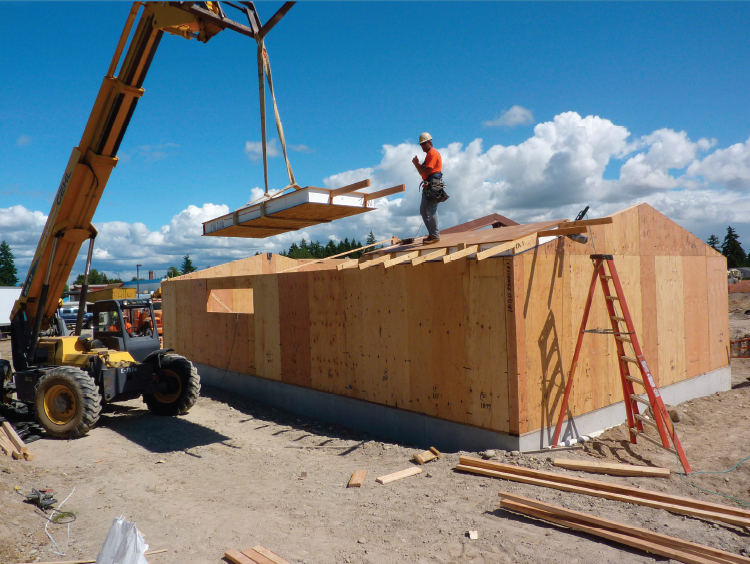
1. Organize your SIPs. The most labor involved in erecting SIPs is moving of the panels. It is important that when the panels arrive on site that they are organized properly. If the SIPs are being set with a boom from the delivery truck then you need to coordinate with the SIP’s manufacturer so that the panels are loaded in the sequence that you plan to use them. If the panels are unloaded from the delivery truck then you want to have your erection sequence developed and handy so you can unload and store the panels in a location that will make the first ones you need the easiest to access (see “SIPs Organized” photo).
2. Check the foundation or platform for level, square and dimensions. When starting out it is important the walls have a level surface to sit on and the building is square. Where necessary, shim your bottom plates or use a power plane to make sure they are level, and when you are chalking lines for setting your bottom plates, adjust the lines so they are square and dimensioned per plan.
3. Install sill plate. If you are using sill insulation you will need to apply it before installing the sill plate. It is usually a piece of foam about 1/8” thick and the width of your sill plate. To install it just hold it in position over the anchor bolts and press down to punch a hole in the insulation (see “Sill Insulation” photo).
The sill plate will probably need to be ripped to the dimension of the full width of the panel. For installation follow the same process used in standard wall framing. Mark and drill for your anchor bolts using your chalk lines for location and then align with the anchor bolts and drop into place.
4. Install bottom plate. The bottom plate needs to be the same width as the foam area of the panel, commonly 5−1/2”. It will be bolted to the center of the sill plate so that the faces of the SIP will fit on either side. Both sides of the face will be nailed into the bottom plate. Place a bead of seal between the sill plate and the bottom plate. Secure the bottom plate and sill plate in place with a washer and nut on top of the bottom plate.
5. Install splines where needed. Sometimes the SIPs come with the splines attached on one side. If this is not the case you will need to insert the spline into the panel before you erect it. Check the panel to make sure that the area to receive the spline is free from debris, then apply continuous seal on the surfaces, insert the spline, and nail it in place (see “Attaching Spline” photo). Three common types of splines are shown in the SIP Assembly illustration later in this chapter.
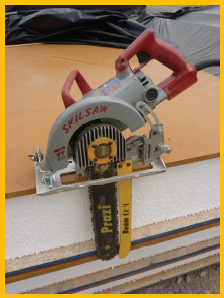
6. Check panel connection areas and electric chases. Before standing the panel up, check the one it will be connecting to. If the panel ends with an opening or a corner, check the location and trim if necessary. Circular saws and chain saws are commonly used for trimming panels and foam scoops can be used on the foam.
Where factory-supplied electrical chases are in the SIPs you will need to make sure that any splines you install have corresponding holes to allow for running electric wire. Mark and drill the splines if necessary before you install them.
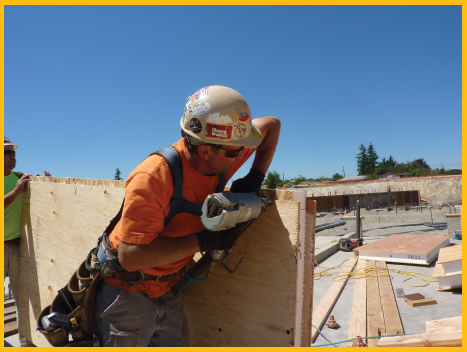
7. Seal panel to be installed. Because SIPs are meant to be energy efficient it is particularly important to continuously seal all adjoining surfaces (see “Sealing” photo). The spline details in the SIP Details illustration later in this chapter show the locations of the seal.
8. Set panel in place. Tip the panel into place hinging on the far corner of the bottom of the wall (see “Installing SIP Panel” photo).
9. Plumb and brace panel. After the panel is standing check for proper placement, plumb both directions, and then nail in place and brace if needed. Sledge hammers, crow bars, long bar clamps, and come-alongs can be used to pull the panels together when needed. Allow a 1/8″ space between panel faces.
10. Nail and screw panel. Panel screws come with the panels and you need to follow the manufacturer’s suggested location for their installation. Also follow the manufacturer’s instructions for size and spacing of the nailing. You will be using your standard framing nails. See the SIP Details illustration later in this chapter.
11. Install top and double plates. Top plates and double plates are installed to provide overlapping at intersections, corners, and splines. The top plate needs to be made of 2x wood, recessed into the panel, and nailed between the faces. The double plate needs to overlap the top plate a minimum of 2 feet and be the width of the SIP including the faces.
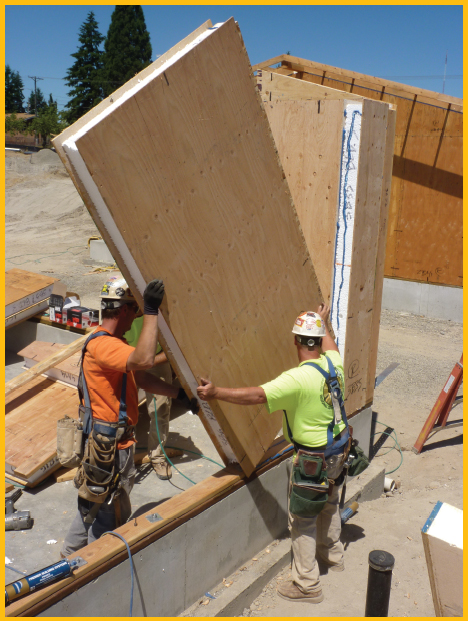
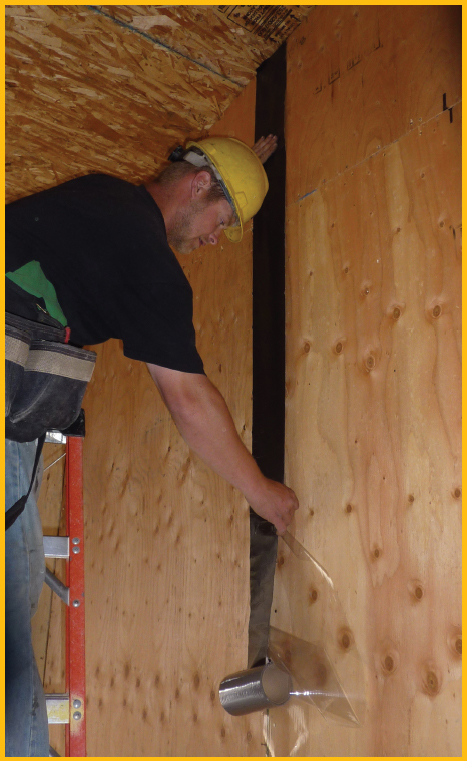
12. Apply SIP tape. As a last step, apply the SIP tape to the inside seams of all SIPs (see “Applying SIP Tape” photo).
SIPs Organized, Transit for Leveling, Sill Plate and Bottom Plate Attached

Sill Insulation

Attaching Spline
Sealing

Installing SIP Panel
Applying SIP Tape
The following SIP Assembly SIP Details illustrations are from a SIP manufacturer and give you an idea of what you can expect for instructions from SIP manufacturers.
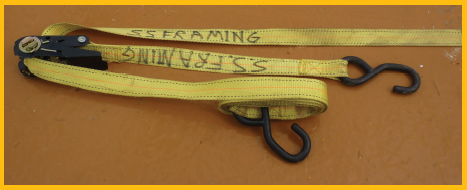
See “SIP Tools” photos for examples of tools that are commonly used for SIP installation, but not often used in standard framing. Standard framing tools are also used in installing SIPs.
Most important to SIP installations is organization. If you want to have a successful and productive job, do your homework and make sure you have all the tools you will need, your foundation is level and square, and you have a good understanding of where each and every piece of the puzzle will fit.
SIP Details

SIP Tools

SIP Tools
12“ Blade Beam Cutter
Foam Scoop

Lifting Eyebolts and Plates

Foam Gun

Ratchet Straps
Power Planer

Come-along

Bar Clamp
