
Chapter Three

Contents
· Step 1–Crown & Place Joists
· Steps 2 & 3–Nail Rim Joists in Place & Cut Joists to Length
· Step 4–Nail Joists in Place
· Step 5–Frame Openings in Joists
· Steps 6 & 7–Block Bearing Walls & Nail Joists to Walls
· Step 8–Drywall Backing
· Step 9–Subfloor Sheathing
This chapter illustrates the basic sequence for floor framing. Straight cuts and tight nailing make for a neat and professional job. Pay particular attention to the corners. It is important that they stay square and plumb up from the walls below, so the building does not gain or lose in size. Also pay close attention to laying the first sheet of subfloor sheathing. If it is laid straight and square, the entire subfloor will go down easily and you can avoid making extra cuts. If you make a sloppy start on the first sheet, you’ll struggle to make each sheet fit, you’ll waste valuable time, and you won’t be proud of the results.
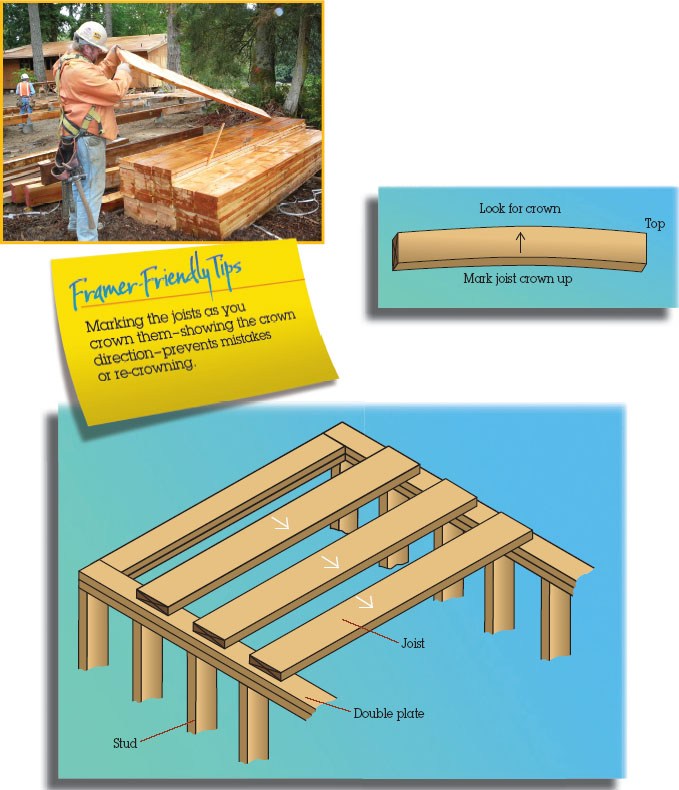
Step 1–Crown & Place Joists
Spread joists so crowns are in the same direction. The crown is the highest point of a curved piece of lumber.
If the joists are resting on a foundation instead of a stud wall, then a sill plate, or mudsill, would be attached to the foundation, and the joists would rest on the plate or sill.
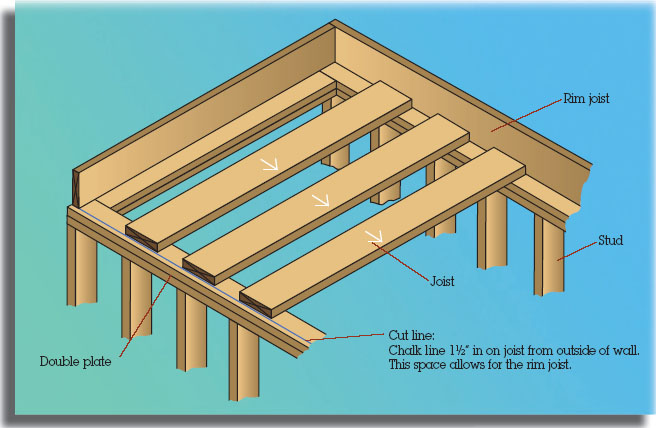
Steps 2 & 3–Nail Rim Joists in Place & Cut Joists to Length
Joist spread and marked, ready to cut
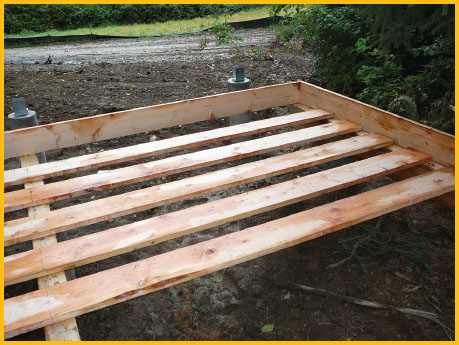
If joists lap over an interior wall, they can be rough-cut approximately two inches beyond the wall. Do not let lapped joists go more than six inches beyond the wall.
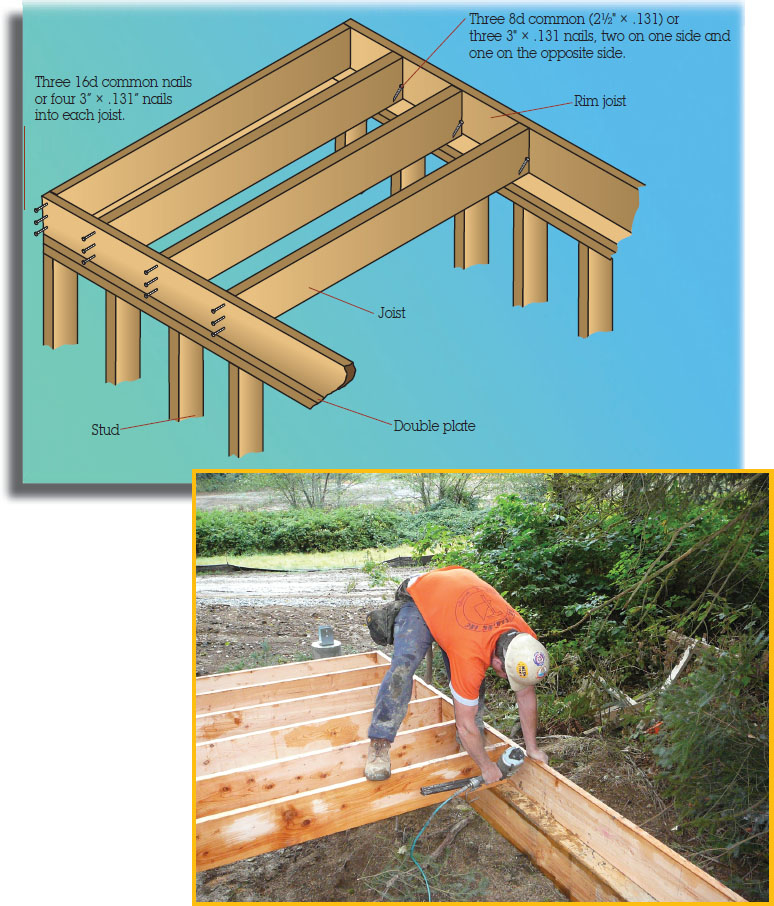
Step 4–Nail Joists in Place
Turn joists crown up and nail into place.
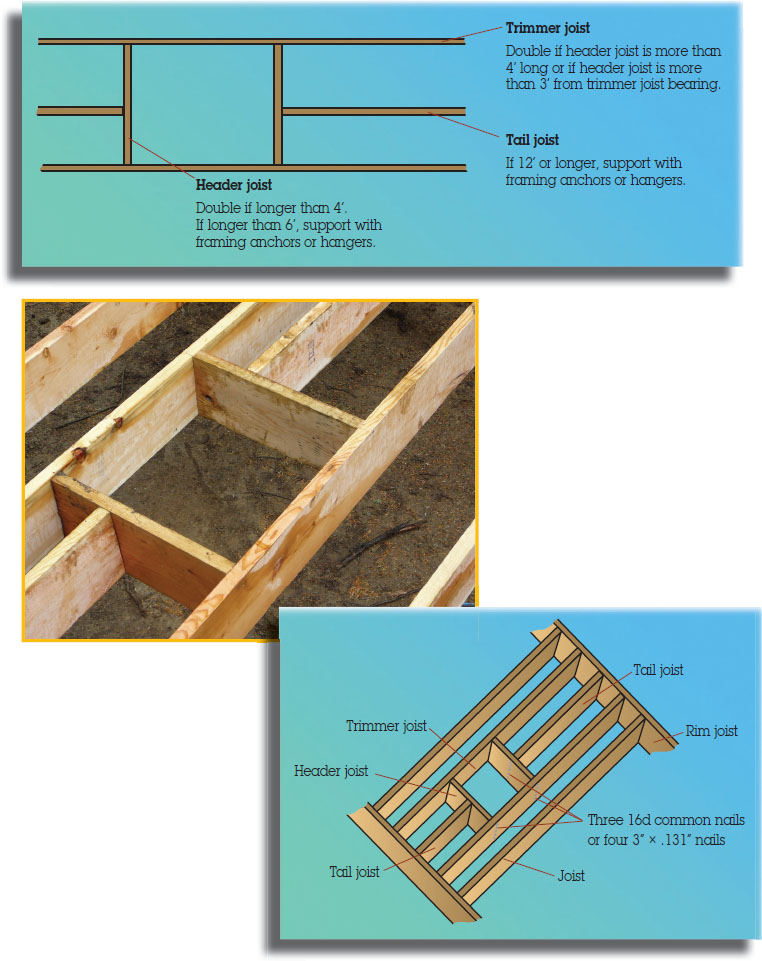
Step 5–Frame Openings in Joists
This is a crawl space access typically found in a closet or some other out-of-the-way location. Mark the floor sheathing as you install it so you don’t cover the crawl space access.
Steps 6 & 7–Block Bearing Walls & Nail Joists to Walls
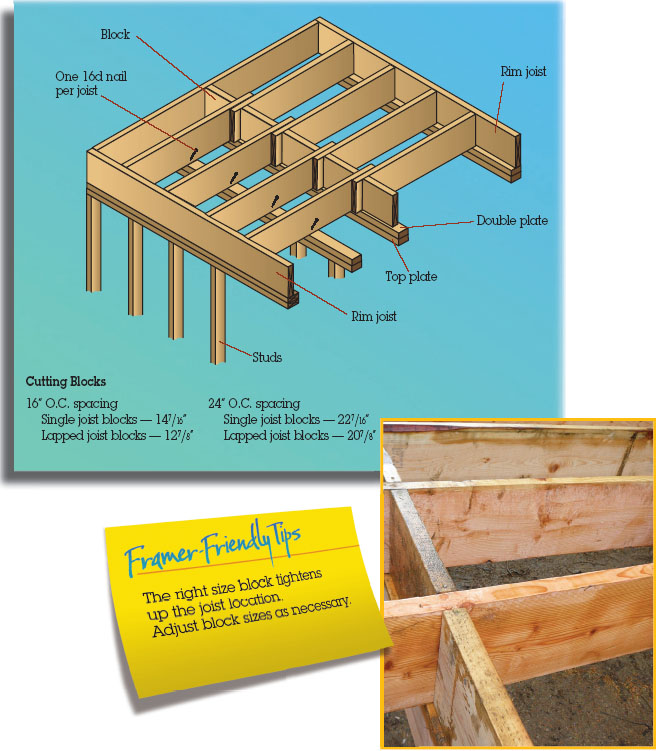
Bearing wall blocks
Step 8–Drywall Backing
Whenever the distance from the edge of the wall to the joist is greater than 6″, place drywall backing on top of the wall.
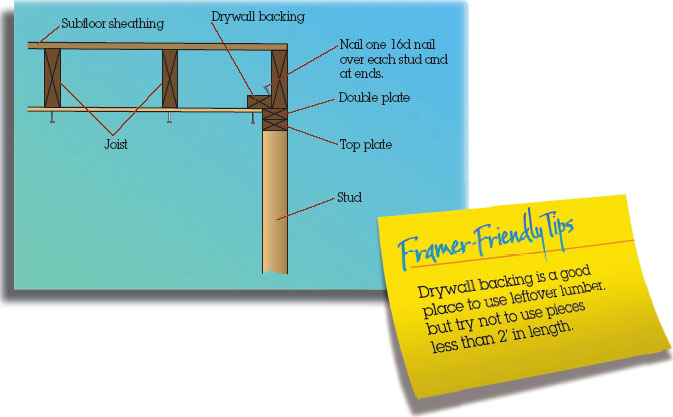
The width of the 2 × 6 provides for 1″ of nailing surface on either side of the 2 × 4 wall.

Step 9–Subfloor Sheathing

Six Steps for Setting First Sheet of Sheathing
1. Snap a chalk line 4′-¼″ in from one rim to its opposite, perpendicular to the joists.
2. Apply glue to joists, if called for. Be sure to nail sheathing before glue dries.
3. Center first piece of sheathing to last joist and on the chalk line and nail each end at last joist.
4. Pull joist layout from corner of sheathing and mark sheathing.
5. Nail sheathing to joist next to rim joist along chalk line and layout mark.
6. Set remaining joists to layout marks and nail.
Setting Second Sheet
1. Set to chalk line and layout mark.
Setting Second Row and Remaining Sheets
1. Set to existing sheets, allowing 1/8″ gaps.
2. Stagger sheet ends on joists..
3. Make sure rim joists are straight before they are nailed.
Each sheet must be supported by at least 3 joists.