
Image processing is a function which is an absolute necessity to reveal hidden details captured in an image and it is astounding how much detail image processing reveals. Image processing can greatly enhance photos, but only if the original capture is of high quality. Initially, you cannot always tell whether you have captured a quality image until you start processing, as enhancing the picture will also enhance noise and other image defects. Processing cannot fix a poorly captured image!
There are many different software options available for image processing; I will be using Photoshop for the examples shown in this section. Photoshop is a popular postprocessing software program which is used by many terrestrial and Astro photographers for enhancing images.
Initially load up the previously stacked TIFF image into Photoshop; preferably process the image in 16-bit format mode to maintain excellent resolution throughout the processing stages.
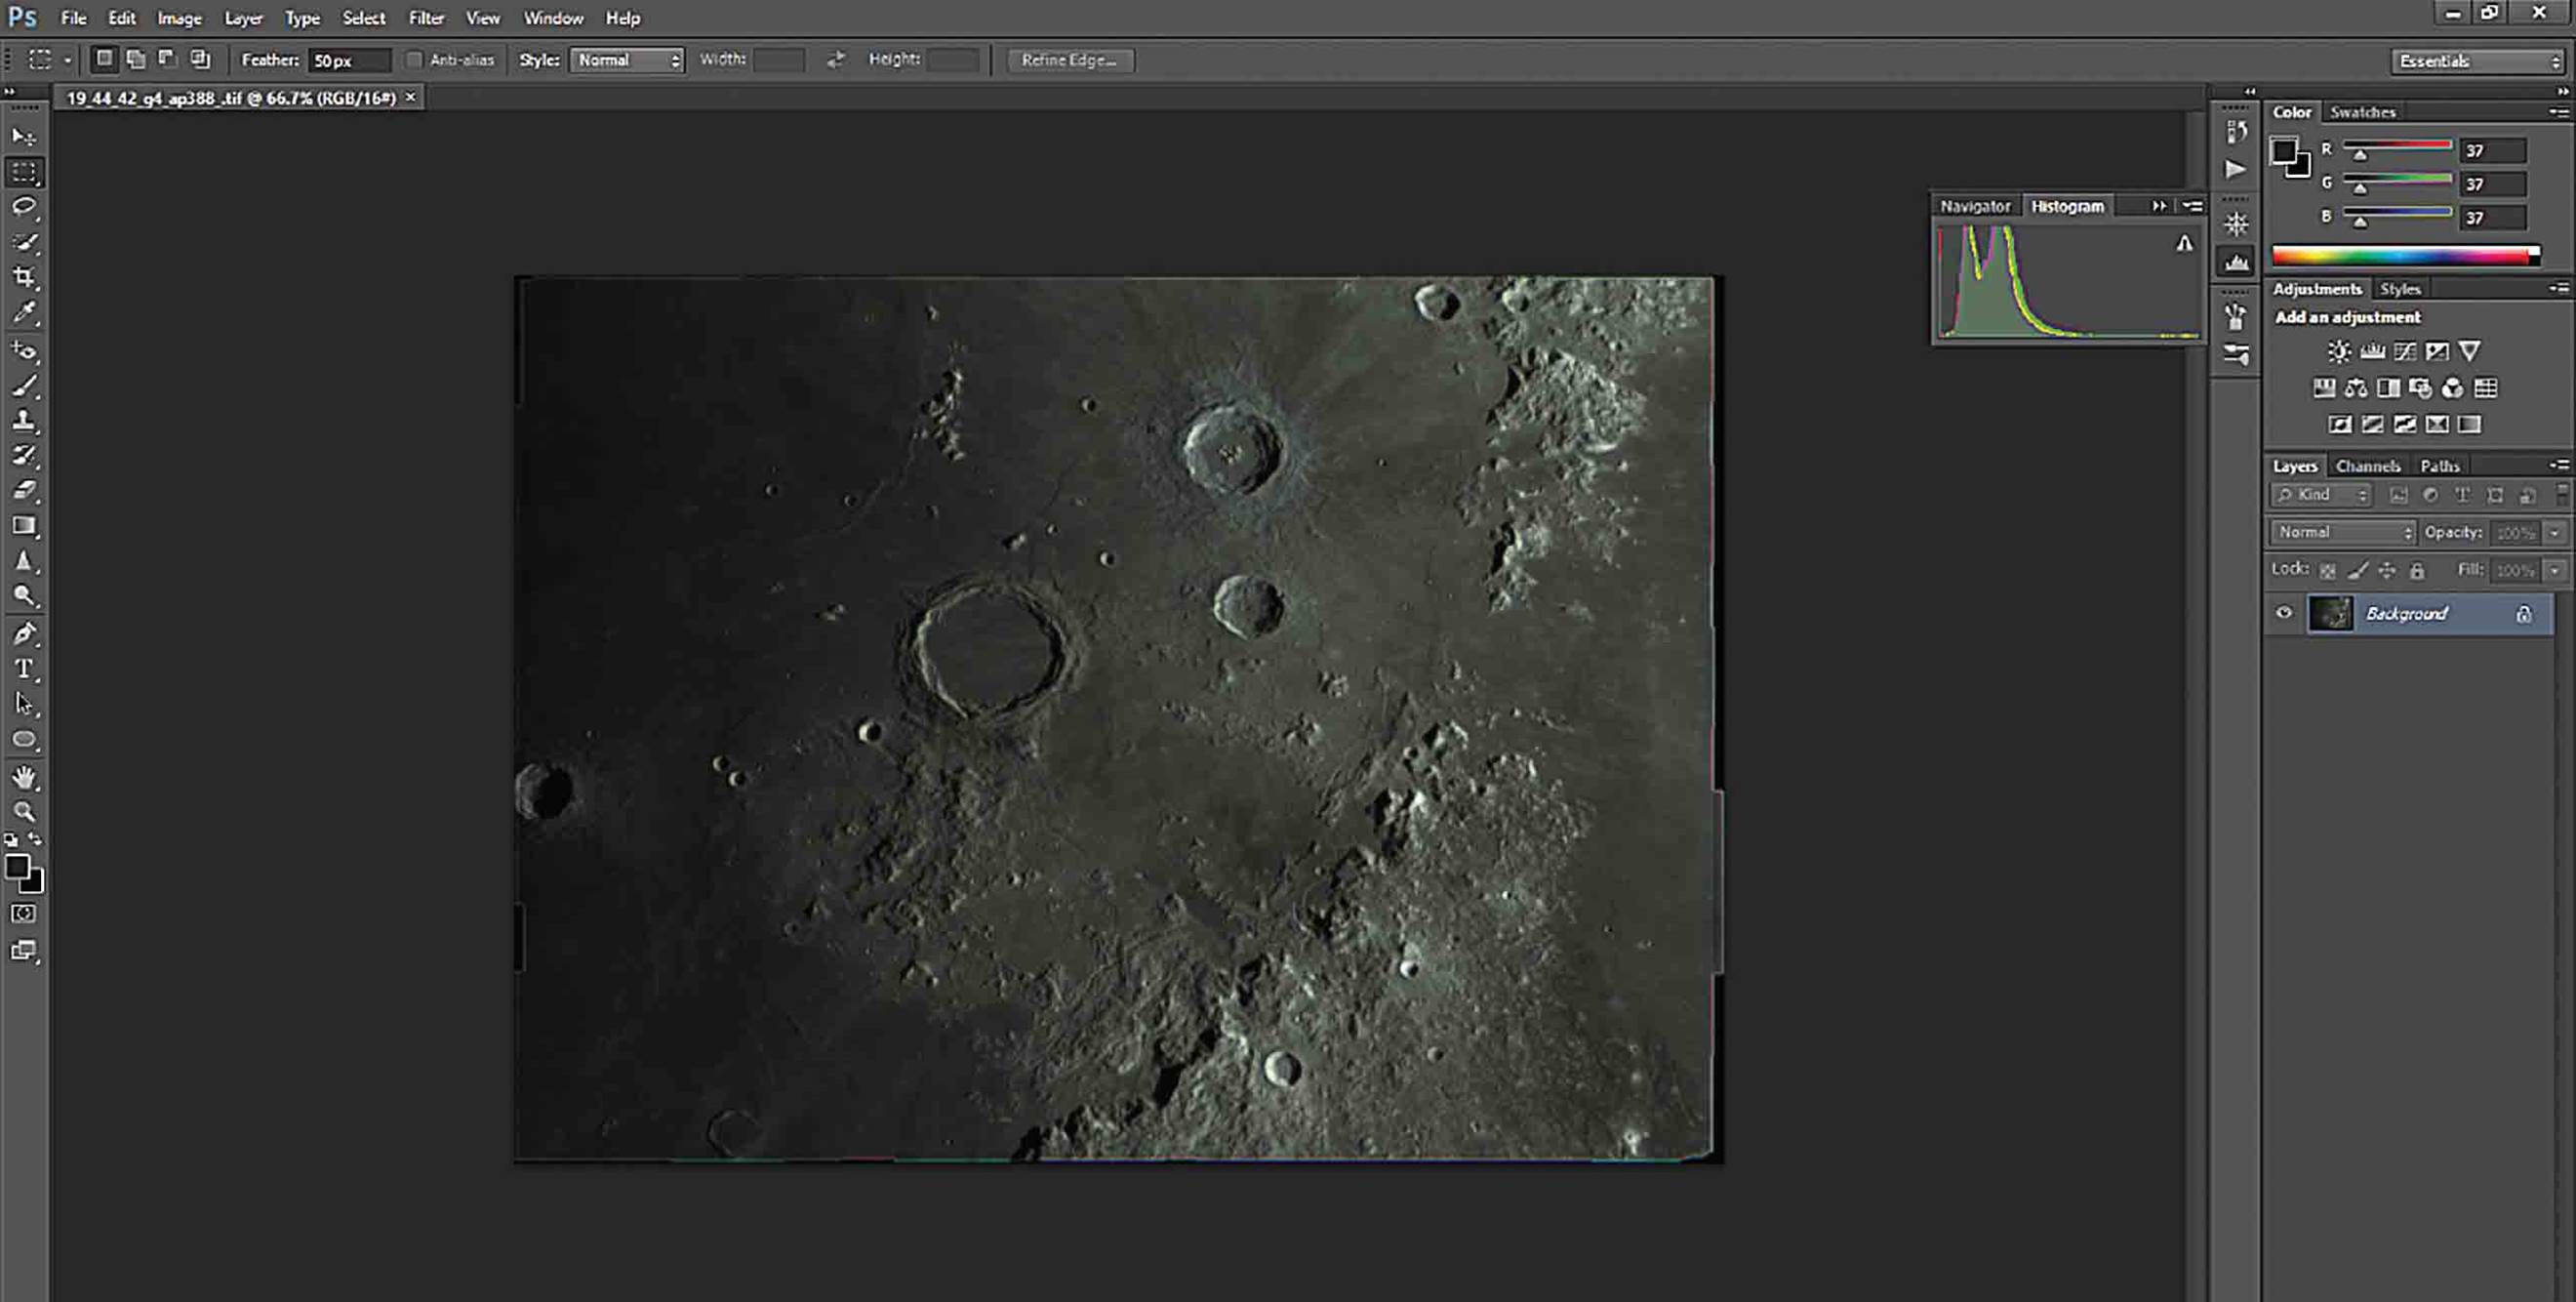
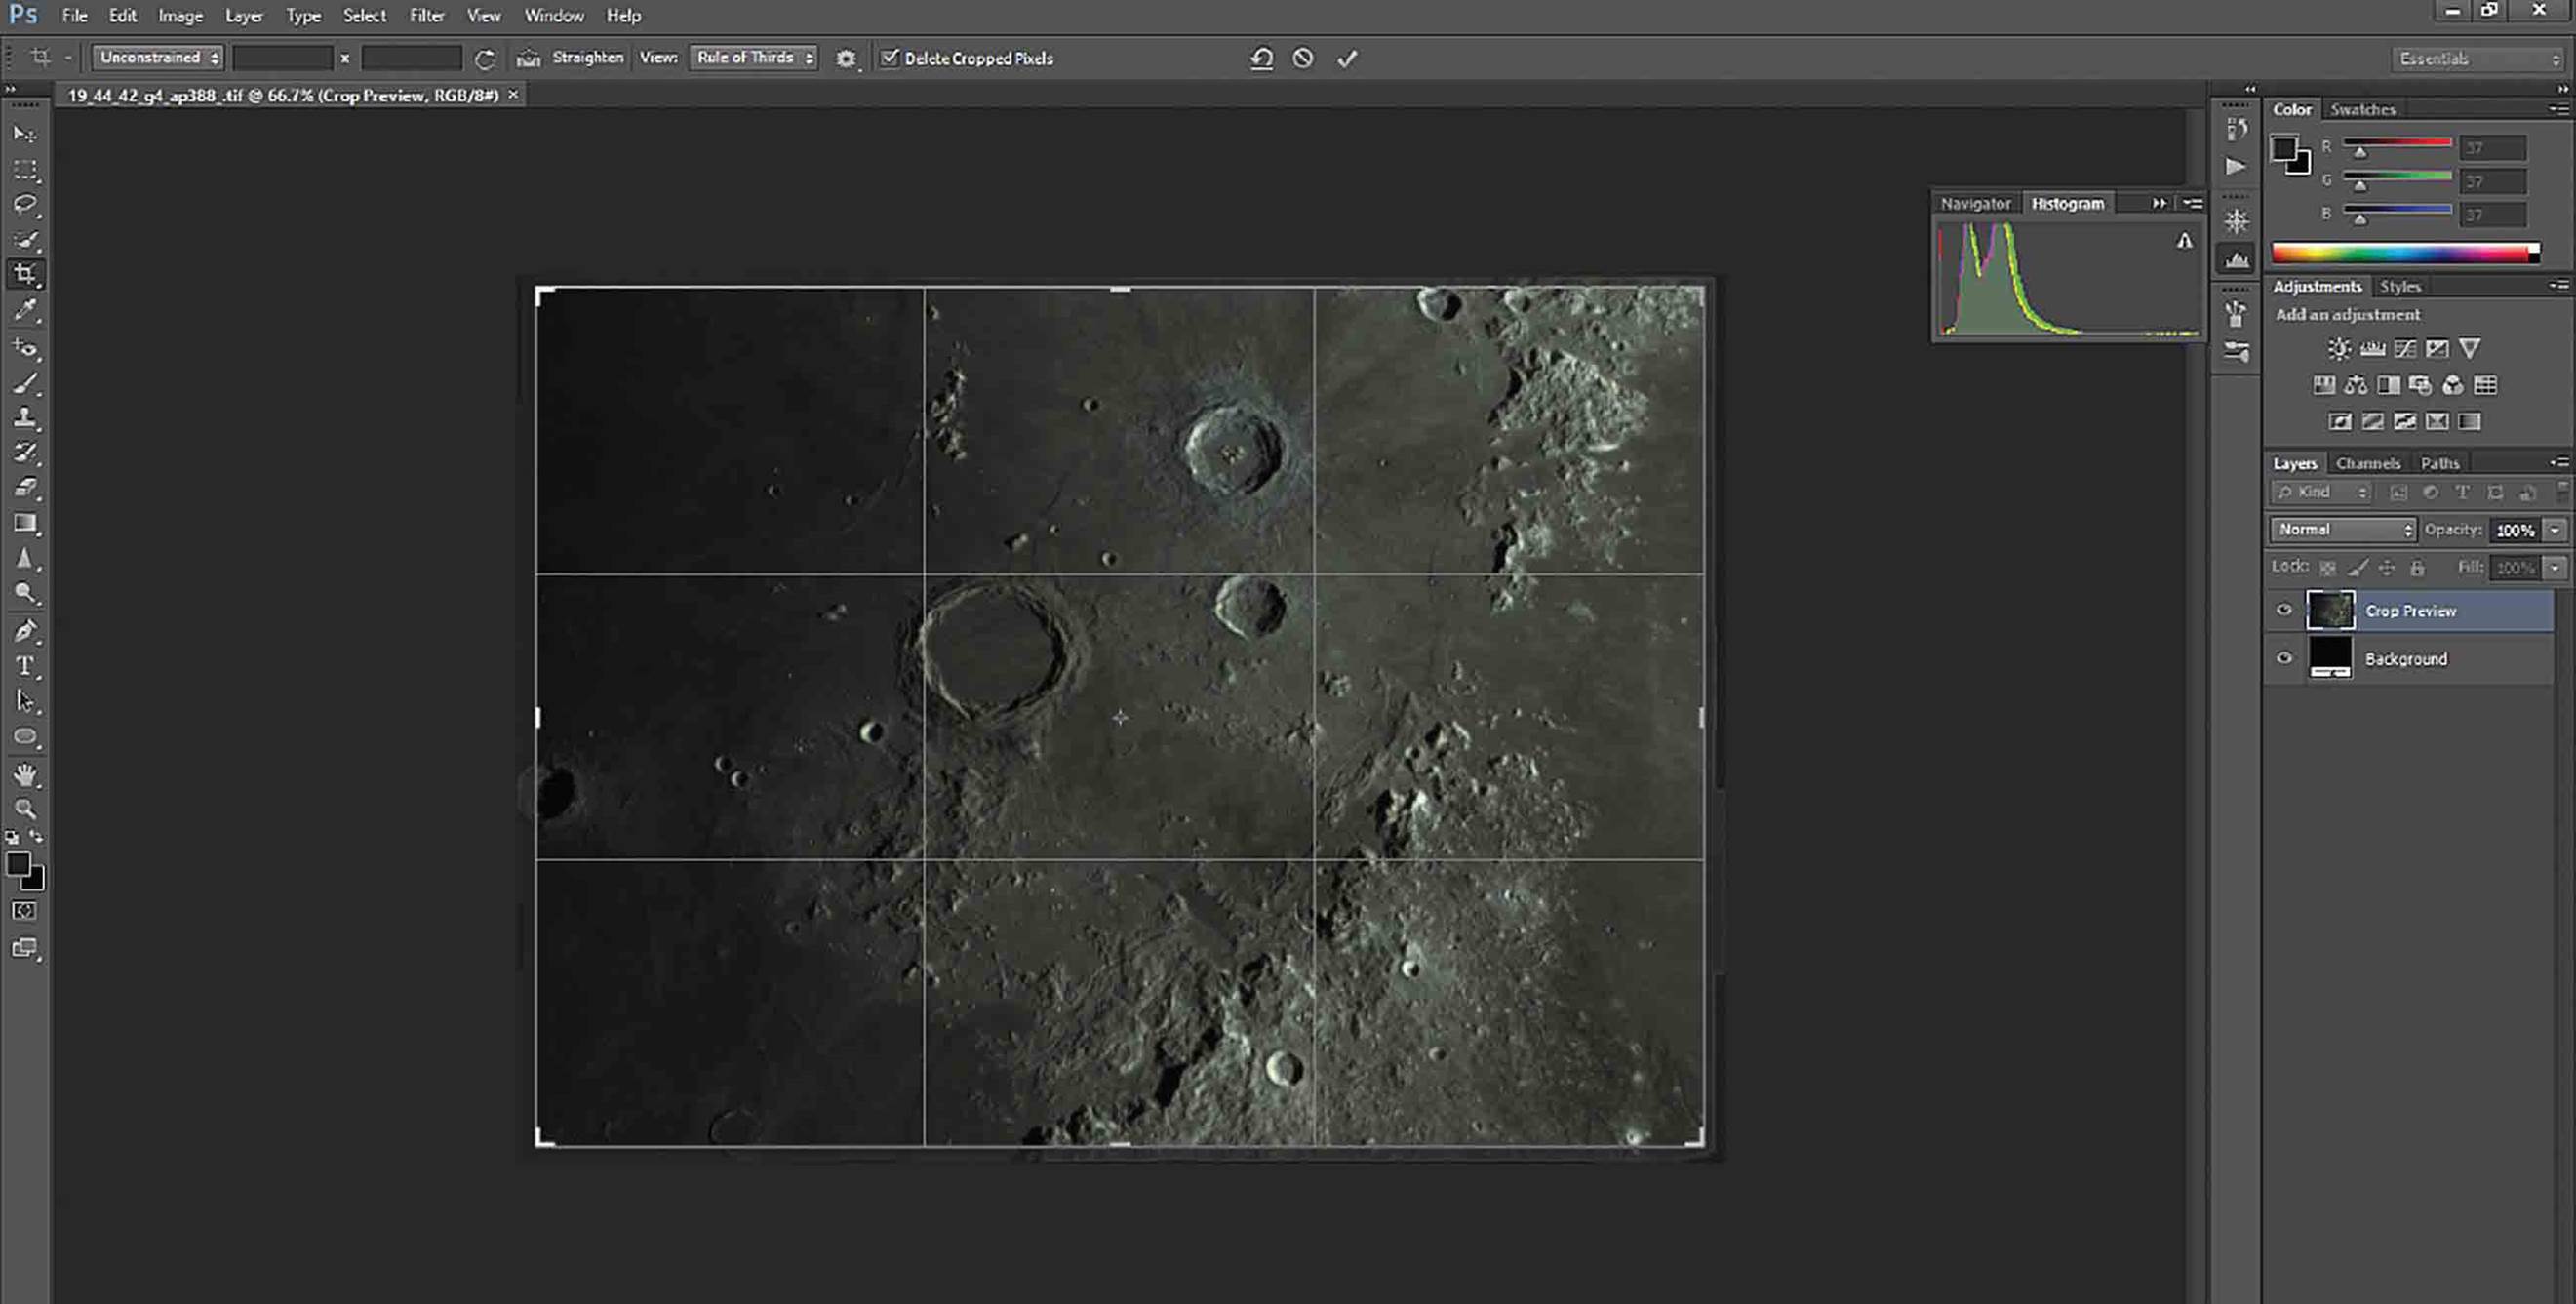
Before you carry out any other operation, you need to crop the edges to remove the stacking artefacts. Click the Crop icon and drag in the sides of the crop box until the uneven edges and any discolouration are no longer visible. The reason to do this first is that this unwanted data adds to the histogram and may skew the real data. Removal of these unwanted edges will frame the image correctly from the start and will ensure that we only process the data which we are interested in.
Crop the image.
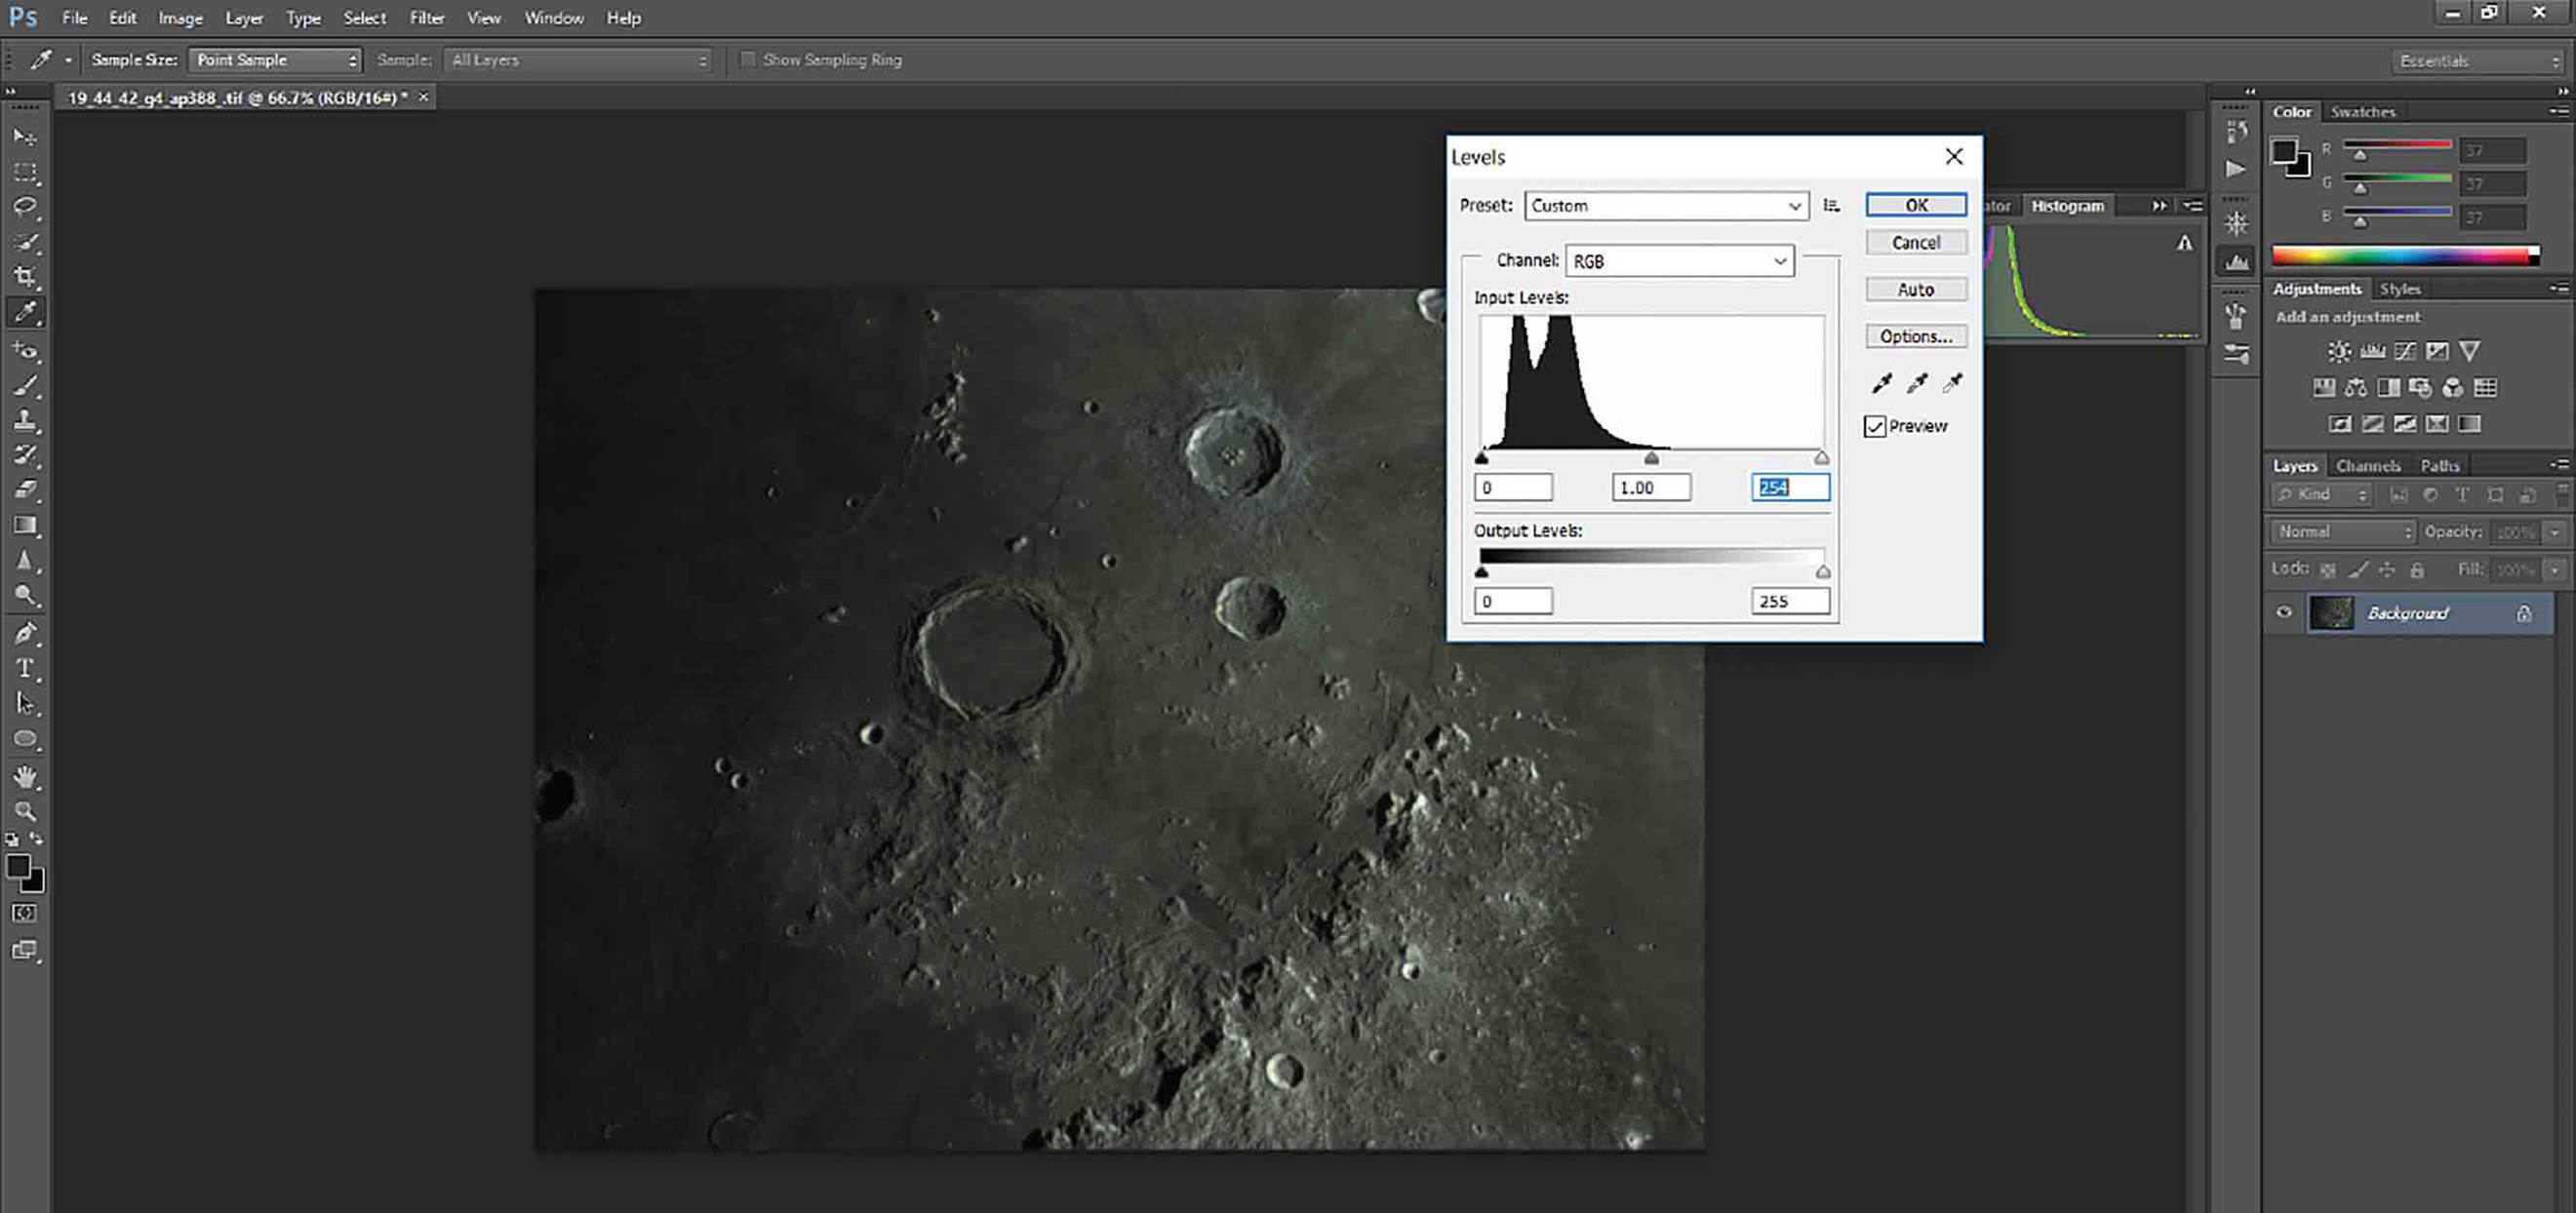
Now that the image is in the correct frame, you need to assess the histogram and ensure that the image data fills the full histogram range. You will frequently find that histogram from the raw image has space at both the dark and light ends of the graph and it is best to correct this as one of the first steps. The histogram shows a graphical representation of the tonal values of the image with black to the left and white to the right with the colour peaks in between. There is a histogram icon on the right which extends and retracts the histogram when it is selected. To adjust and remove the space at either edge of the histogram, select Image – Adjustments – Levels and pull in the white slider on the right and the black slider on the left until the slider meets the histogram line. The tone of the image may change and this is normal. Do not slide the markers towards the peak but to the point where the baseline starts and ends.
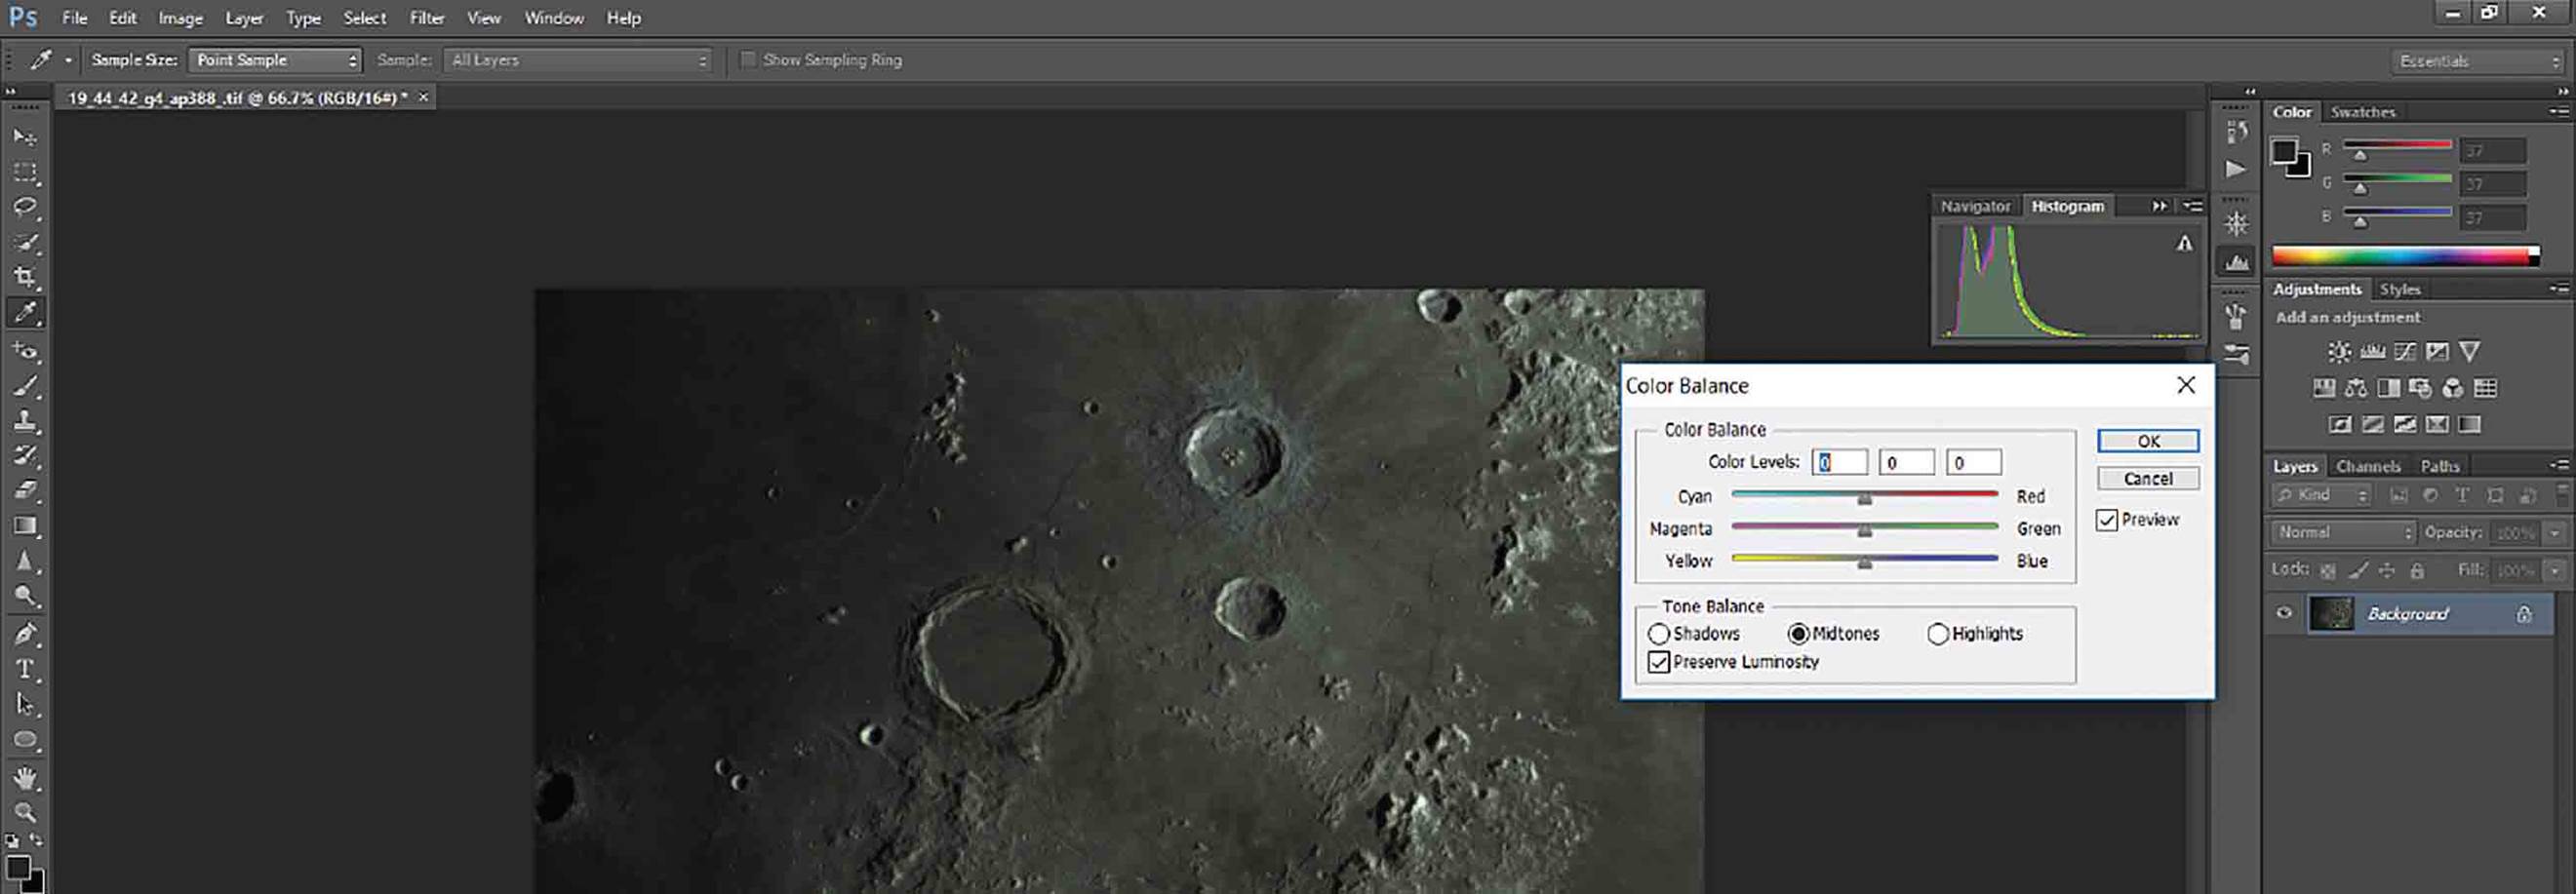
When the baseline adjustment of the histogram is complete, the next step will be to align the colours of the histogram; this step requires that you have a colour camera; if you have a mono camera, move onto the next stage. Click on Image – Adjustments – Colour Balance and adjust the sliders until all the colours overlap and are aligned. This step will prevent any unwanted colour hues affecting the image. If a single colour is dominant, it will cause the image to have a distinctive tinge and an unnatural look. You can see the green peak on the image below. This would cause a green hue if left unaligned. It is essential to align the colours as this will give the image a natural colour.
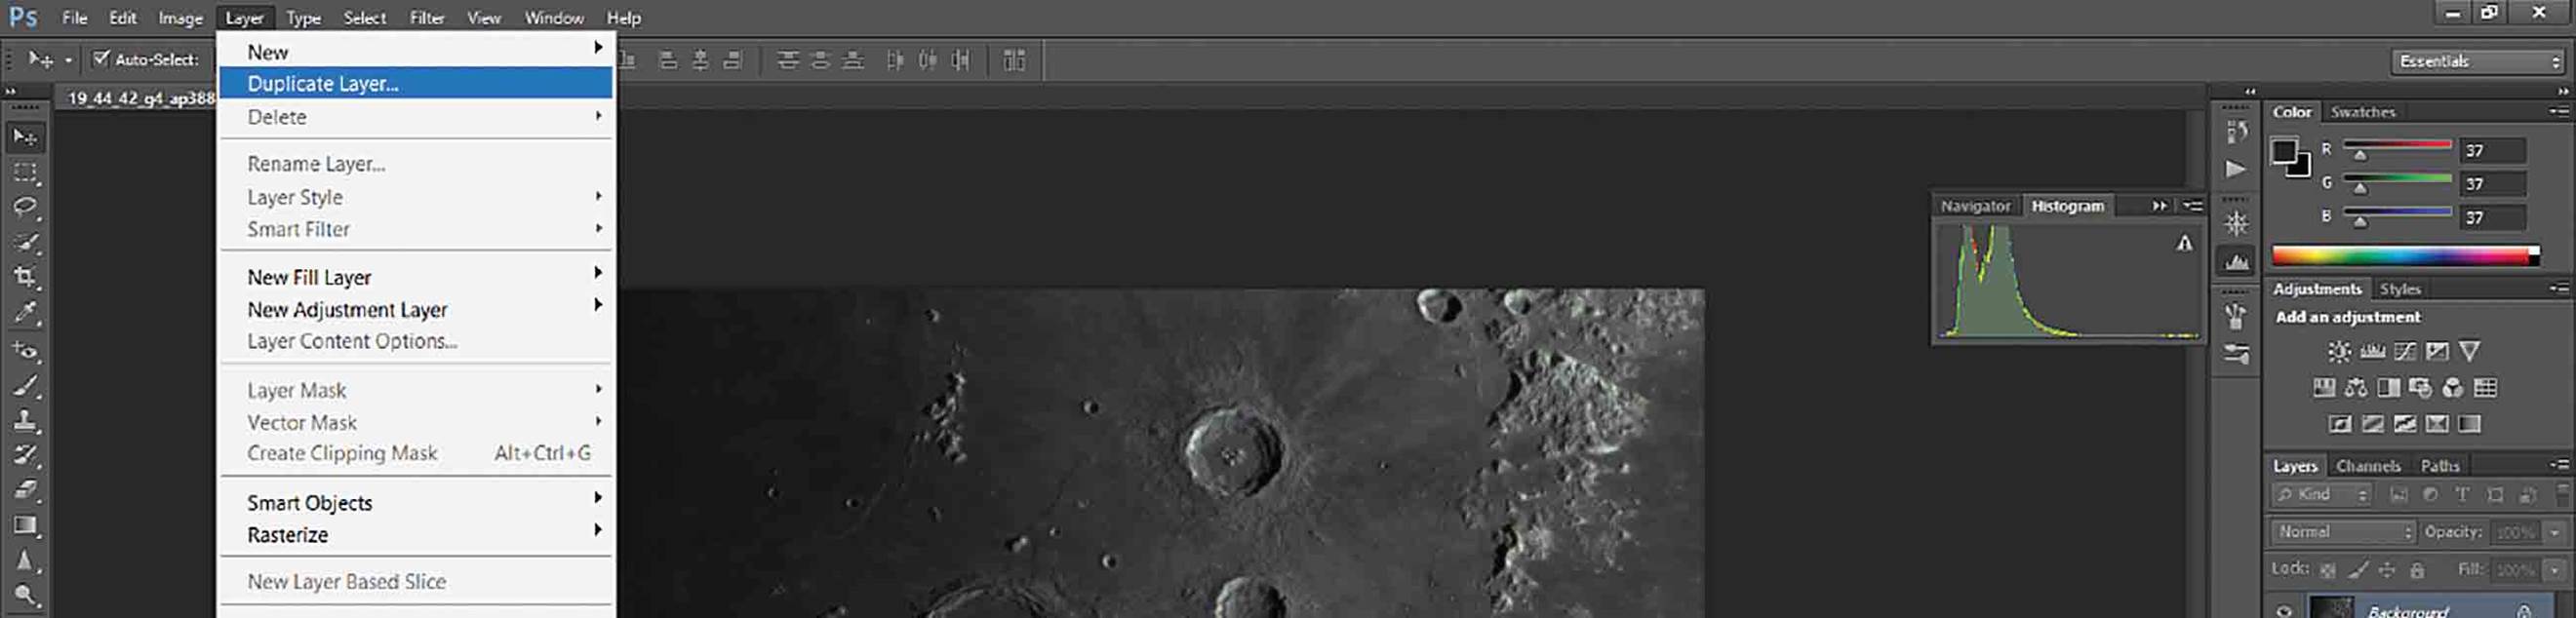
Now that the histogram colours are aligned, we can proceed with the processing. An efficient way to edit images and keep control over any adjustments is to work in layers so that you can compare changes and monitor progress easily. One way to do this is to duplicate the image and create an identical layer by clicking Layer – Duplicate layer. The layer will create an identical copy of the image which you can work on without affecting the original image below; the additional layer will appear on the right above the background layer. The addition of a duplicate layer after each adjustment will give you a historical trail of each change which allows you to review the sequence of changes easily. You can quickly revert to a previous stage, if necessary, by deleting layers or clicking undo.
The next step is to expand the histogram; the purpose of this is to set the correct luminosity of the image and to bring out some of the detail which is hiding in the shadows. Click Image – Adjustments – Curves and drag the line upwards into a curve. This will brighten the image and increase the luminosity of the picture; you will see how the histogram becomes broader and is stretched.
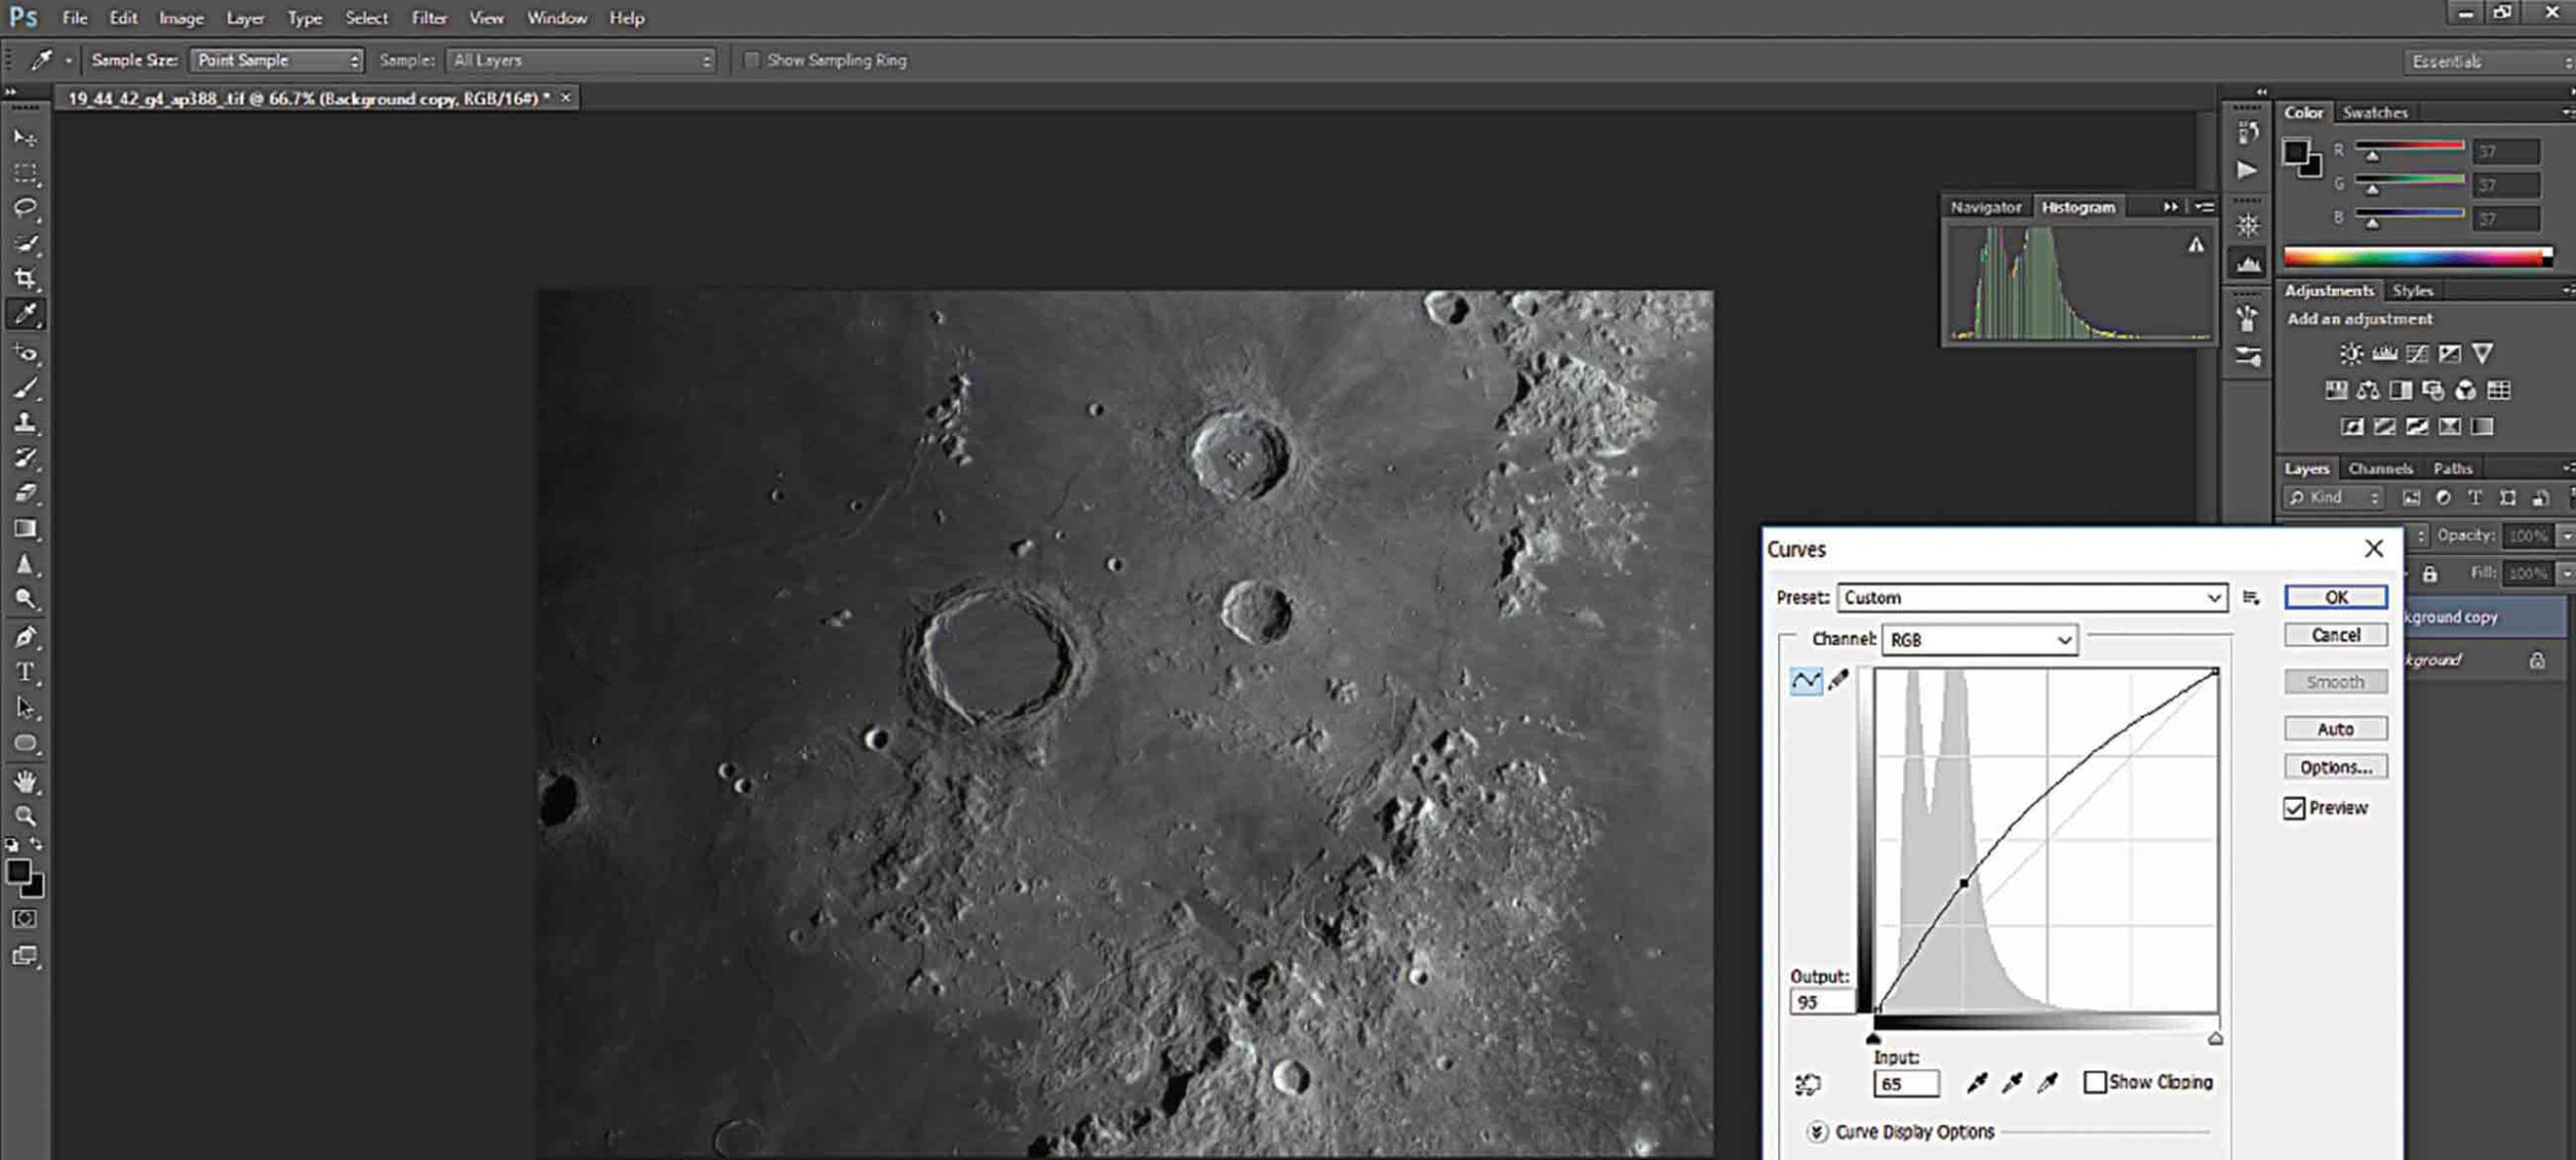
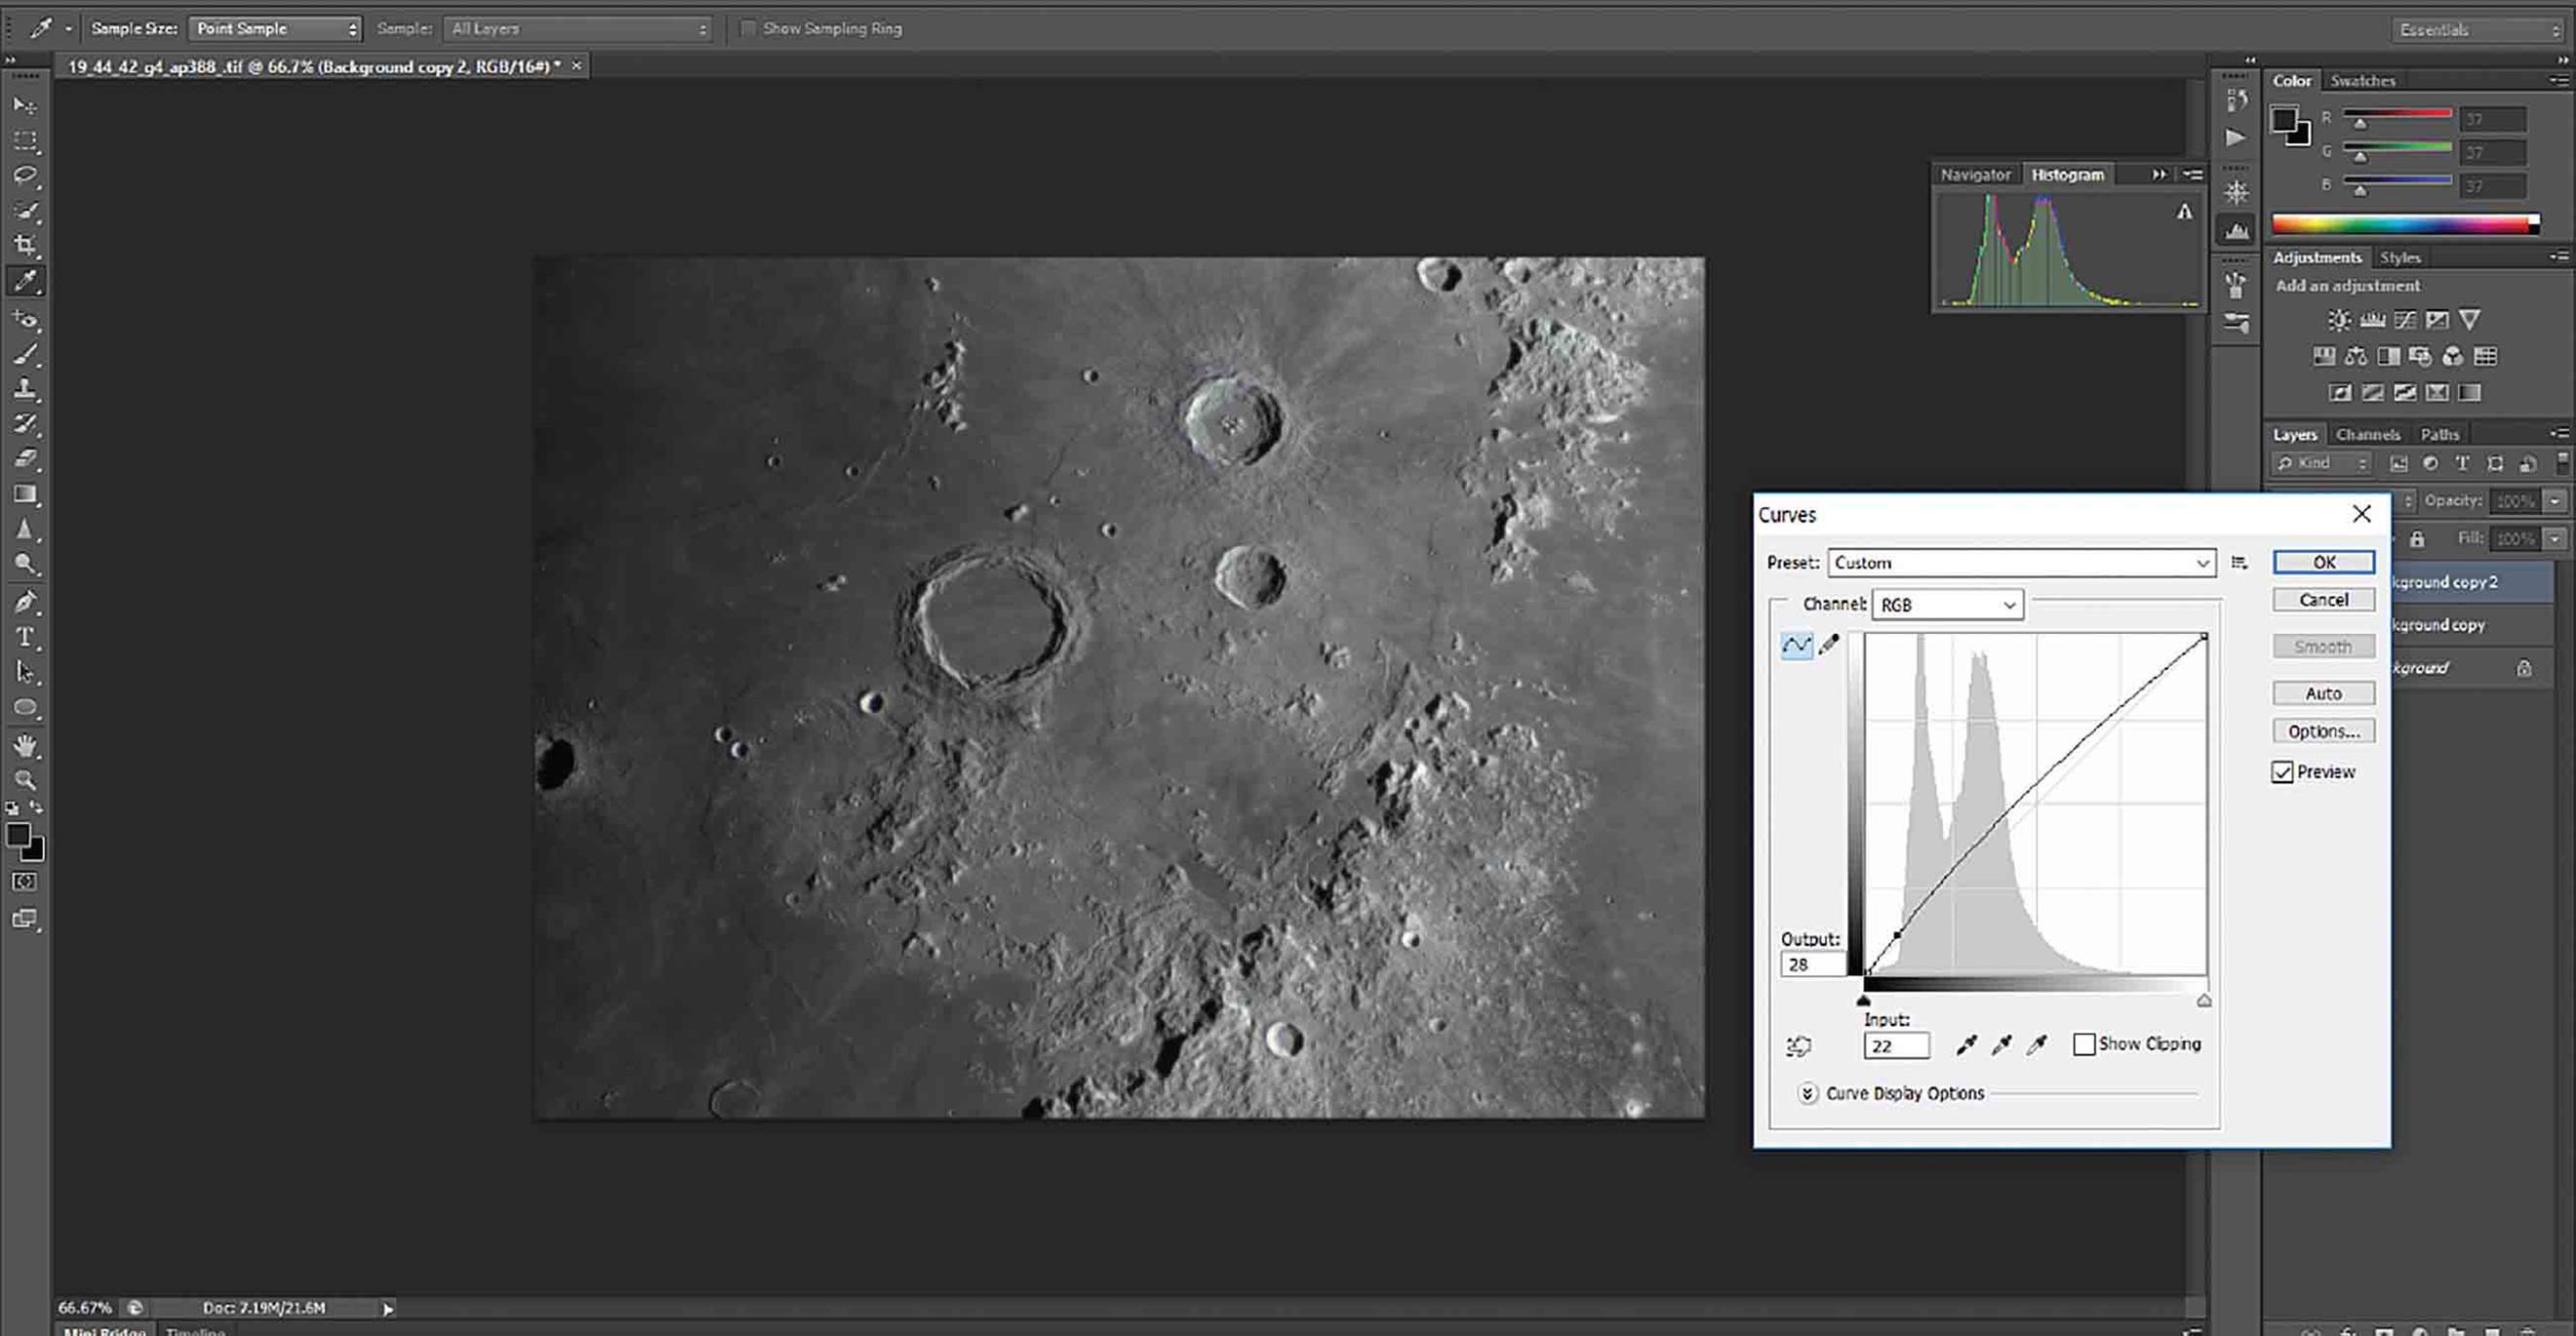
Create a duplicate layer and stretch the histogram again. I find it is best to do this in small steps rather than in one single adjustment, mainly to keep control over the processing steps. You can see how the histogram widens with each adjustment each time. Keep stretching until you get the luminosity you want but be careful not to overexpose the bright sections and remember to create a duplicate layer for each adjustment. A guide for creating the correct exposure would be to keep the histogram peaks towards the centre of the scale rather than towards the edges; towards the left would be underexposed and too far to the right would be overexposed.
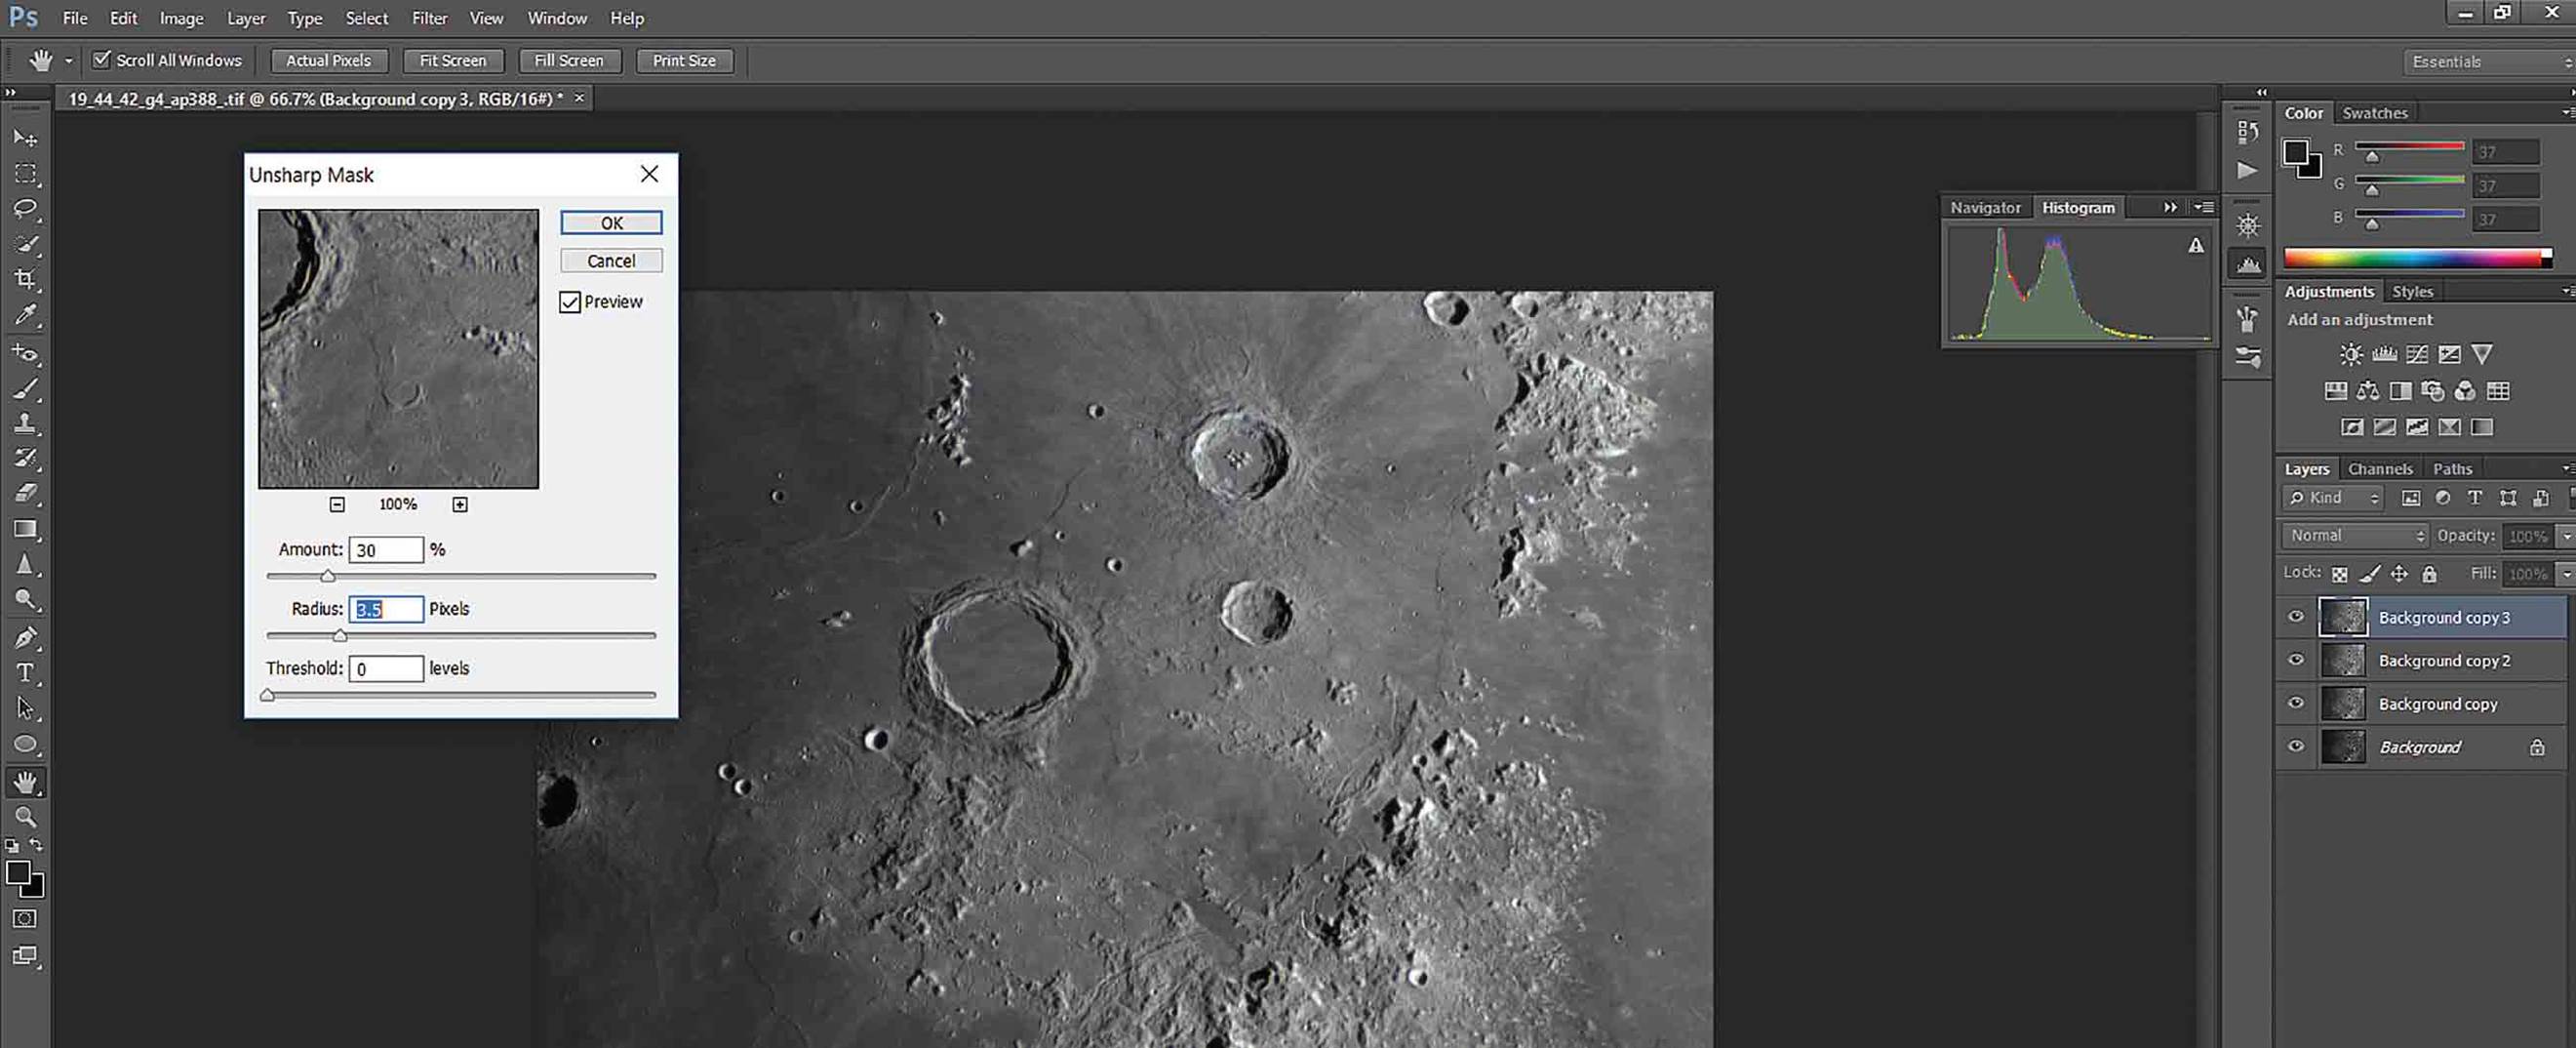
When you are satisfied with the luminance, you can add some sharpening by clicking Filter – Sharpen – Unsharp Mask. It is best to sharpen in small stages rather than in one single step as it is essential to do the sharpening correctly to ensure a good image. The reason that small sharpening steps are more effective is down to how you apply the unsharp mask; each step should be added using a different radius size as the variation will sharpen different size objects within the image to give it perspective. Otherwise, you will introduce too much sharpening noise which will create defects and abnormal highlights forming on the edges of structures. Preferably limit each step to less than thirty per cent.
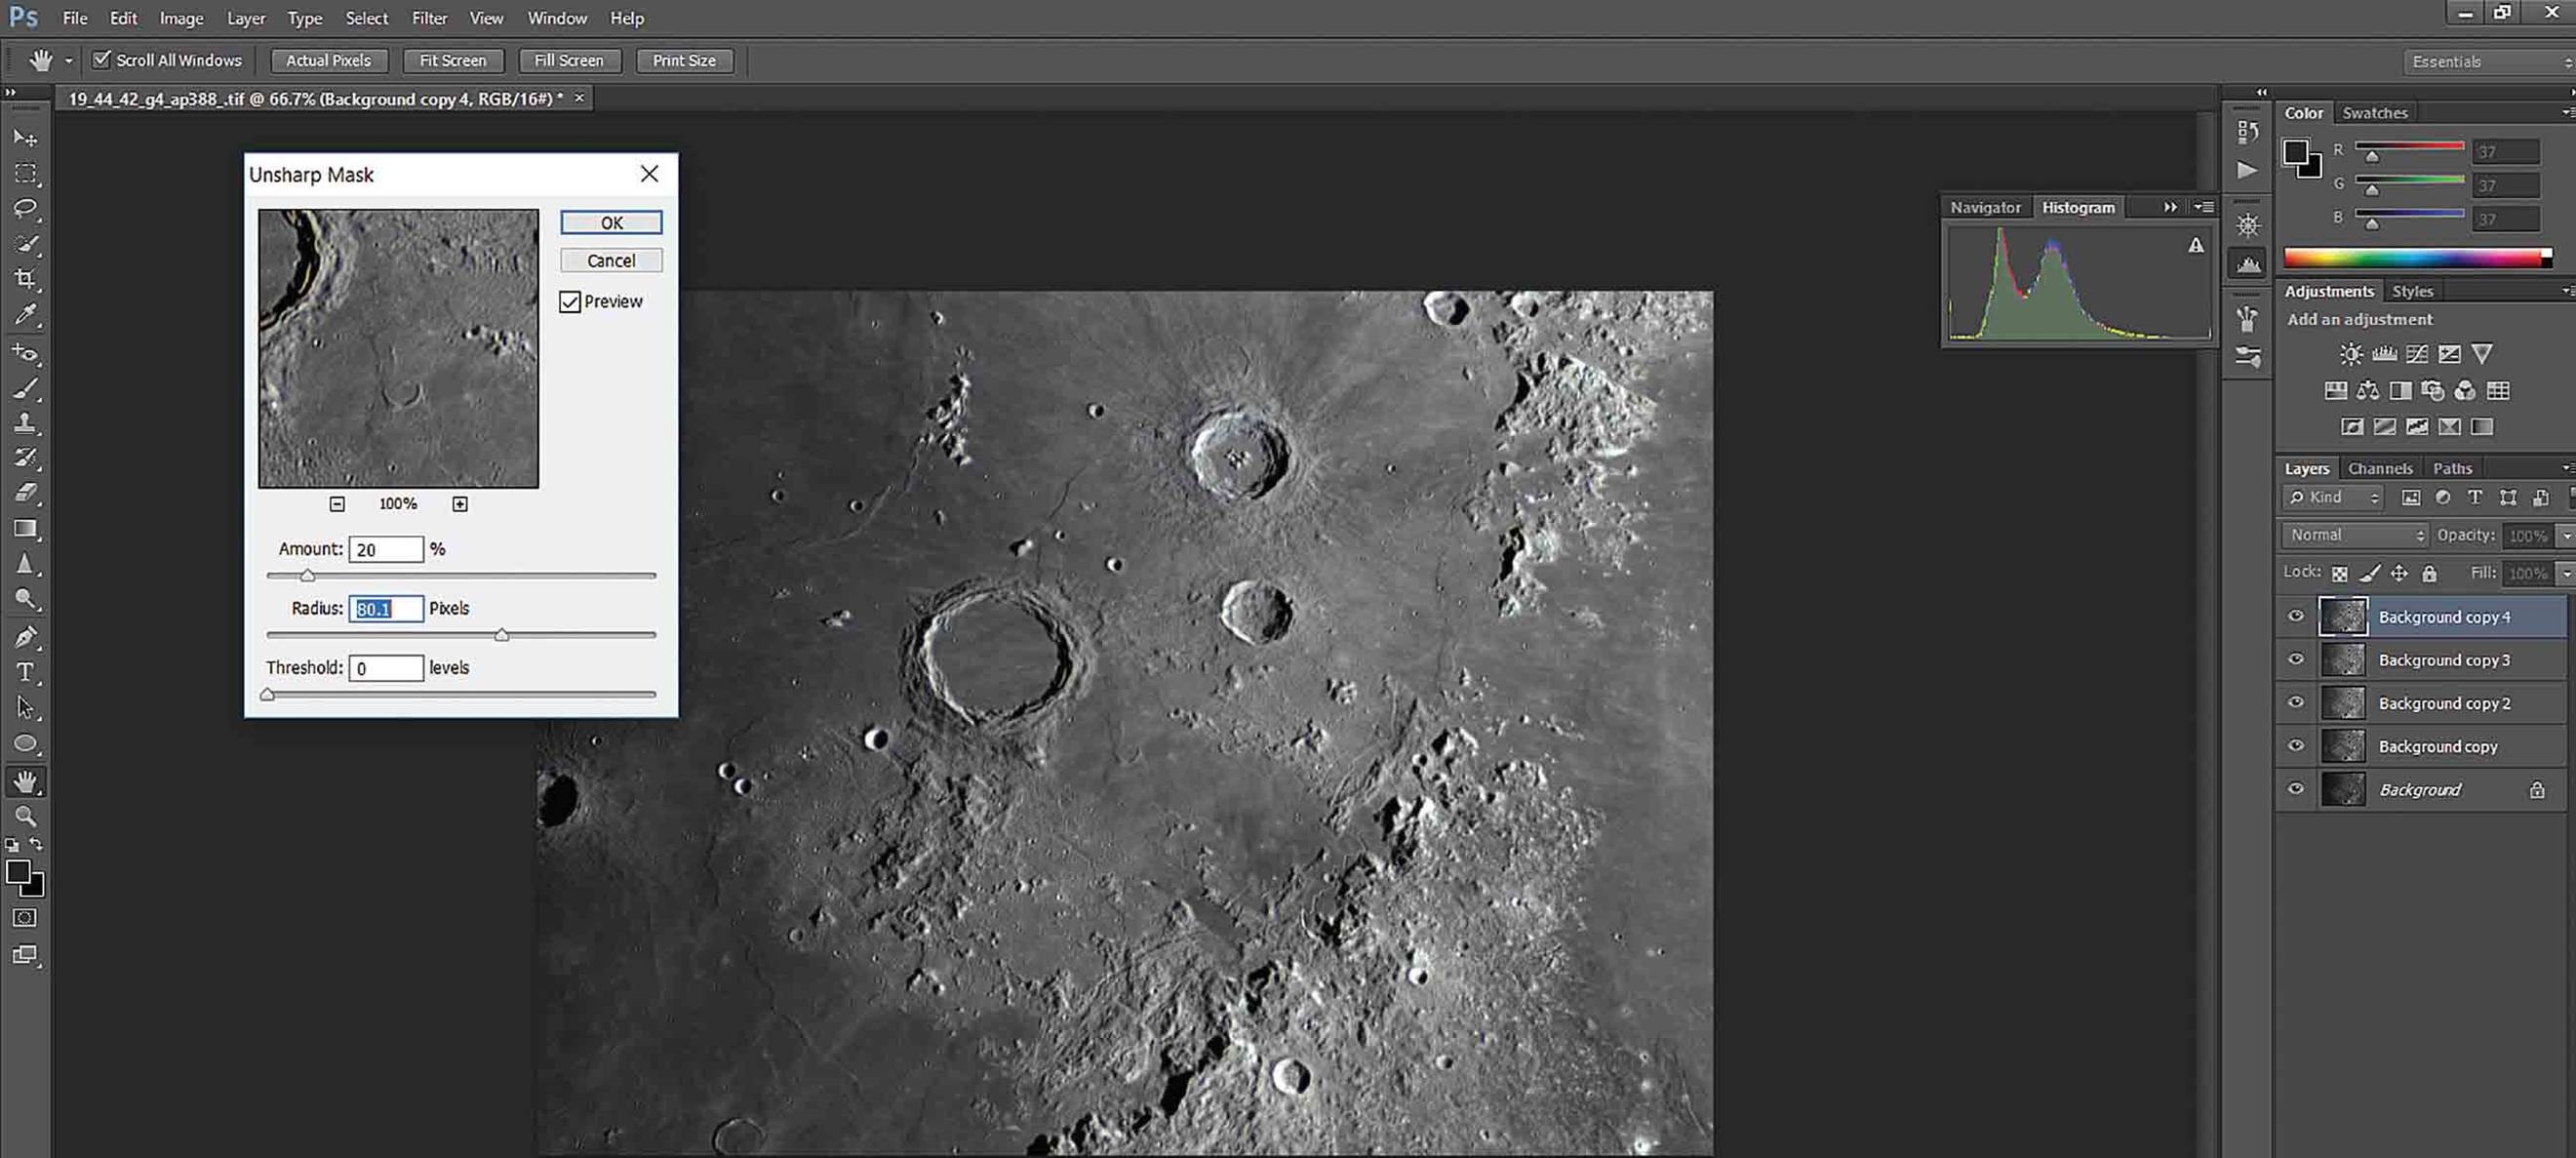
The larger radius setting enhances the details of larger structures such as rays and craters.
When you finish sharpening, the next step is to bring out the colour. This is not always desirable and not possible with a mono camera. If you want to bring out the colour, click Image – Adjustment – Hue/Saturation and initially increase the saturation by +50. You will start to see some natural colour emerge and, like the sharpening, it is preferable to do this in small steps. The saturation enhances the colour of different mineral compositions and increases the contrast of features to uncover details usually hidden in mono images.
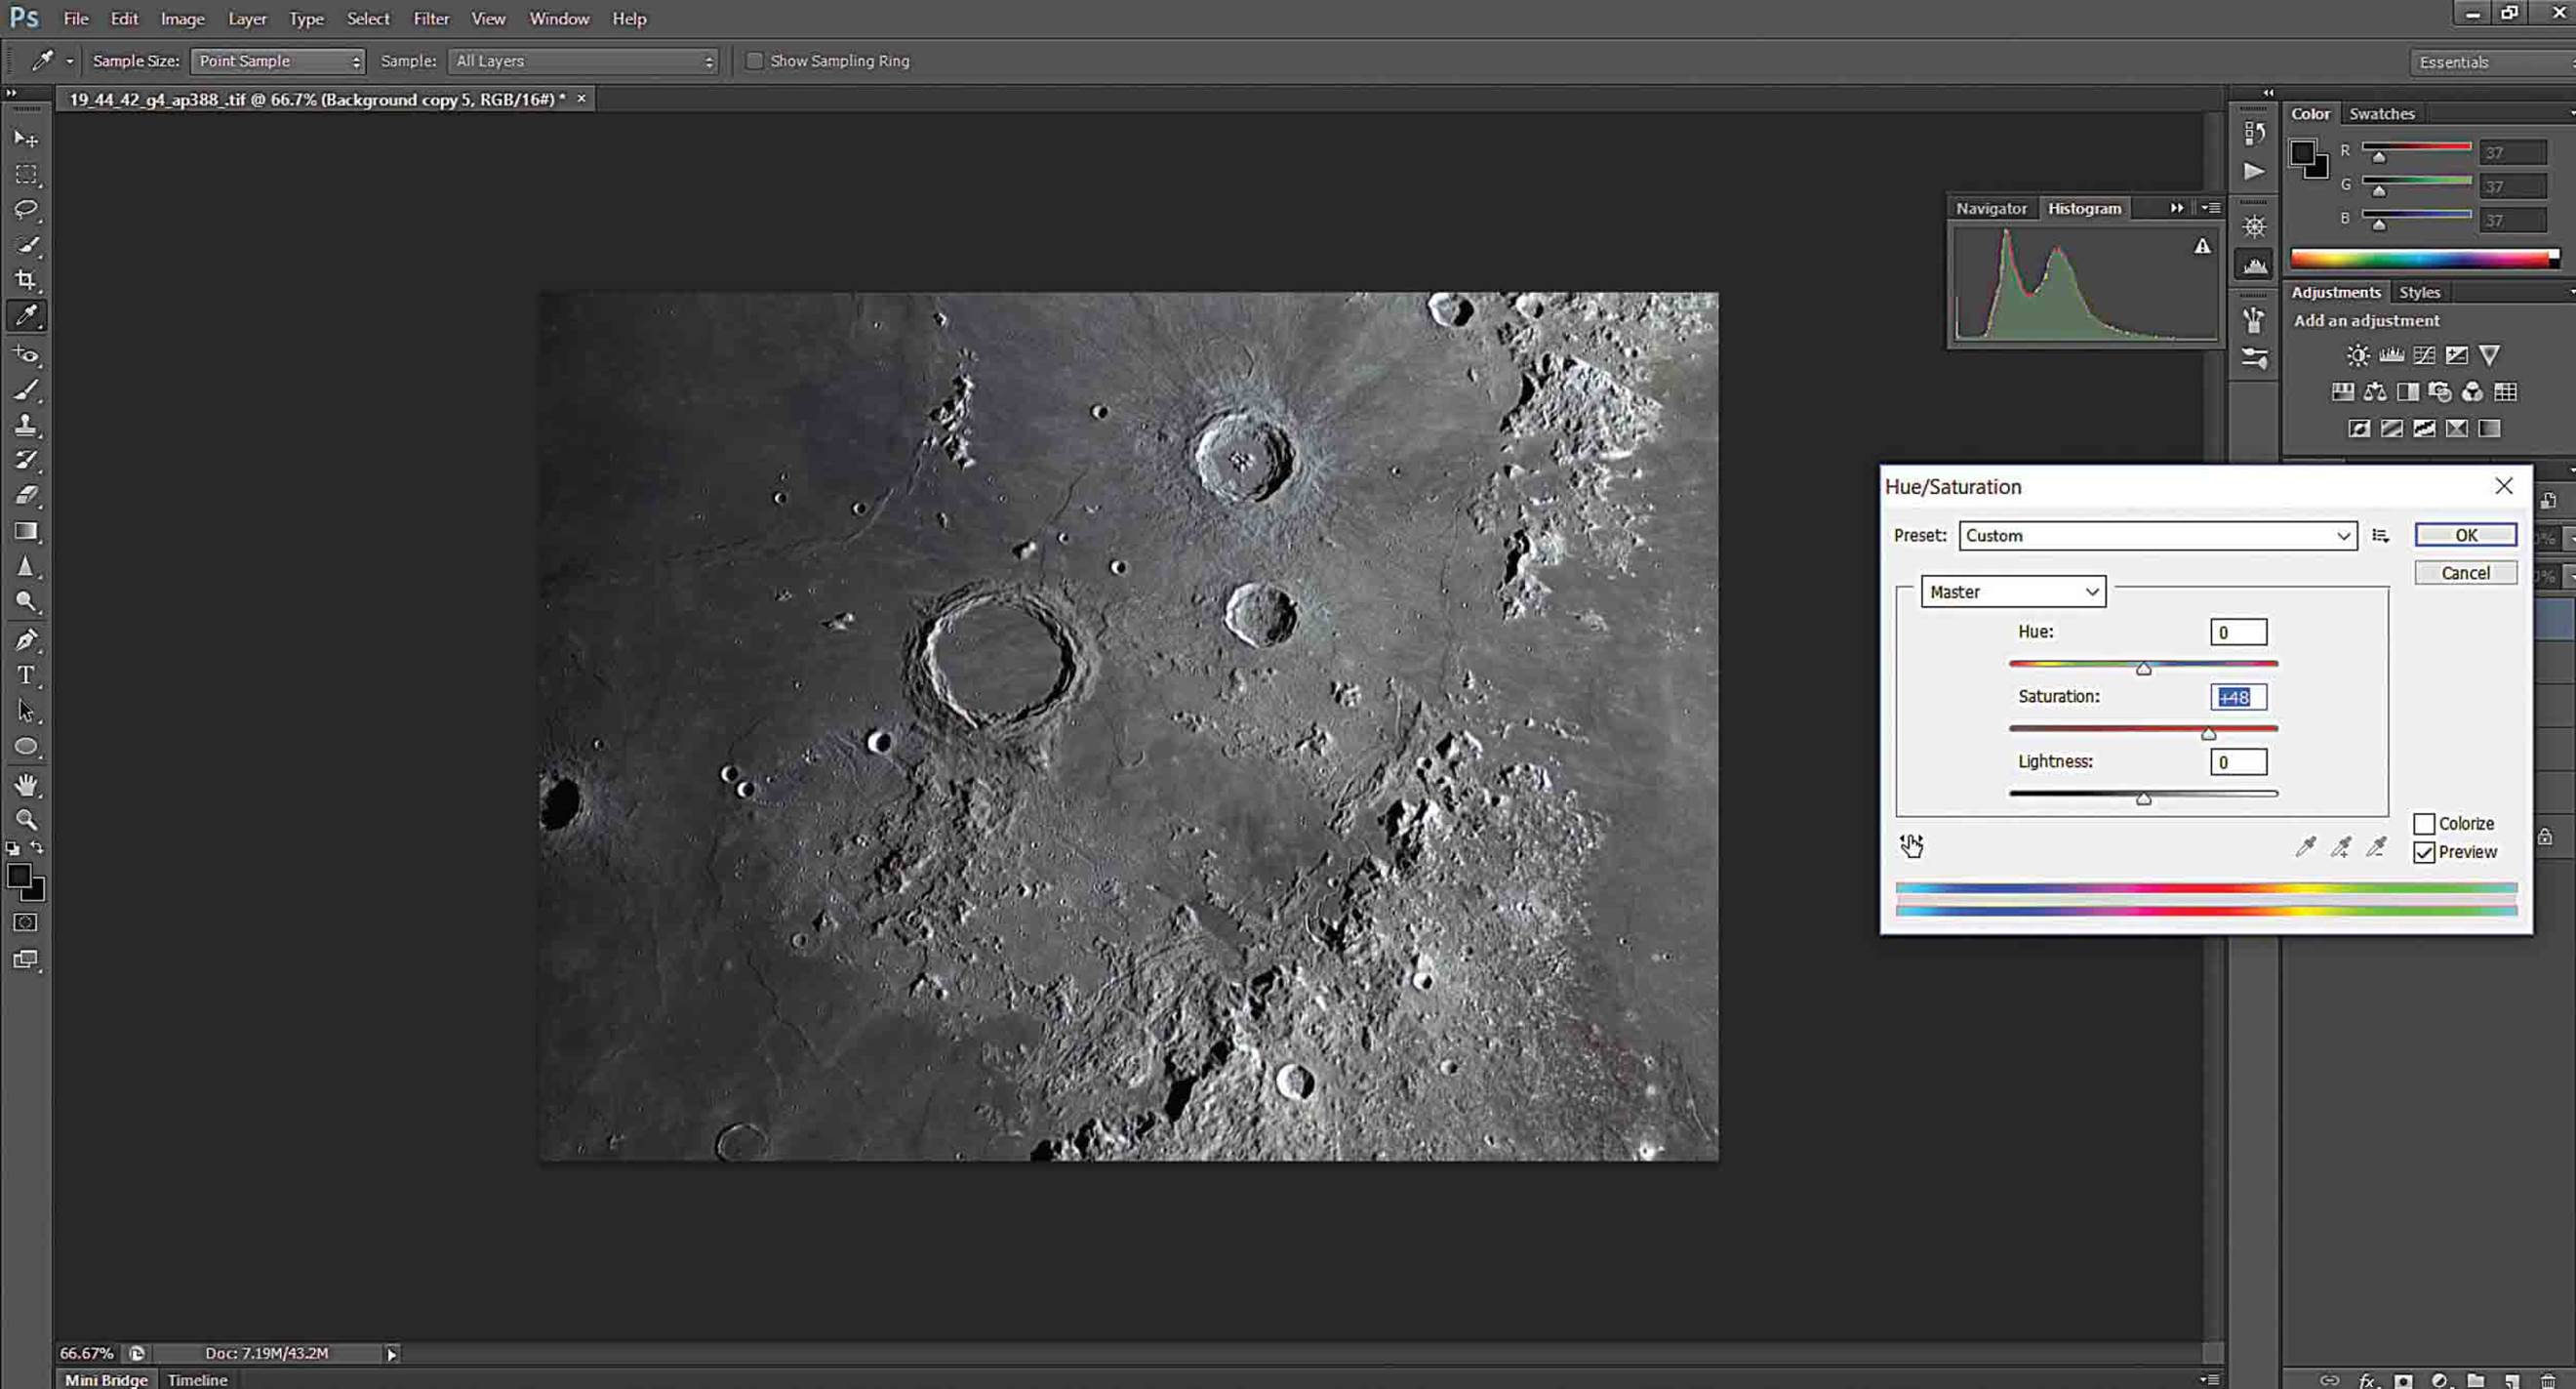
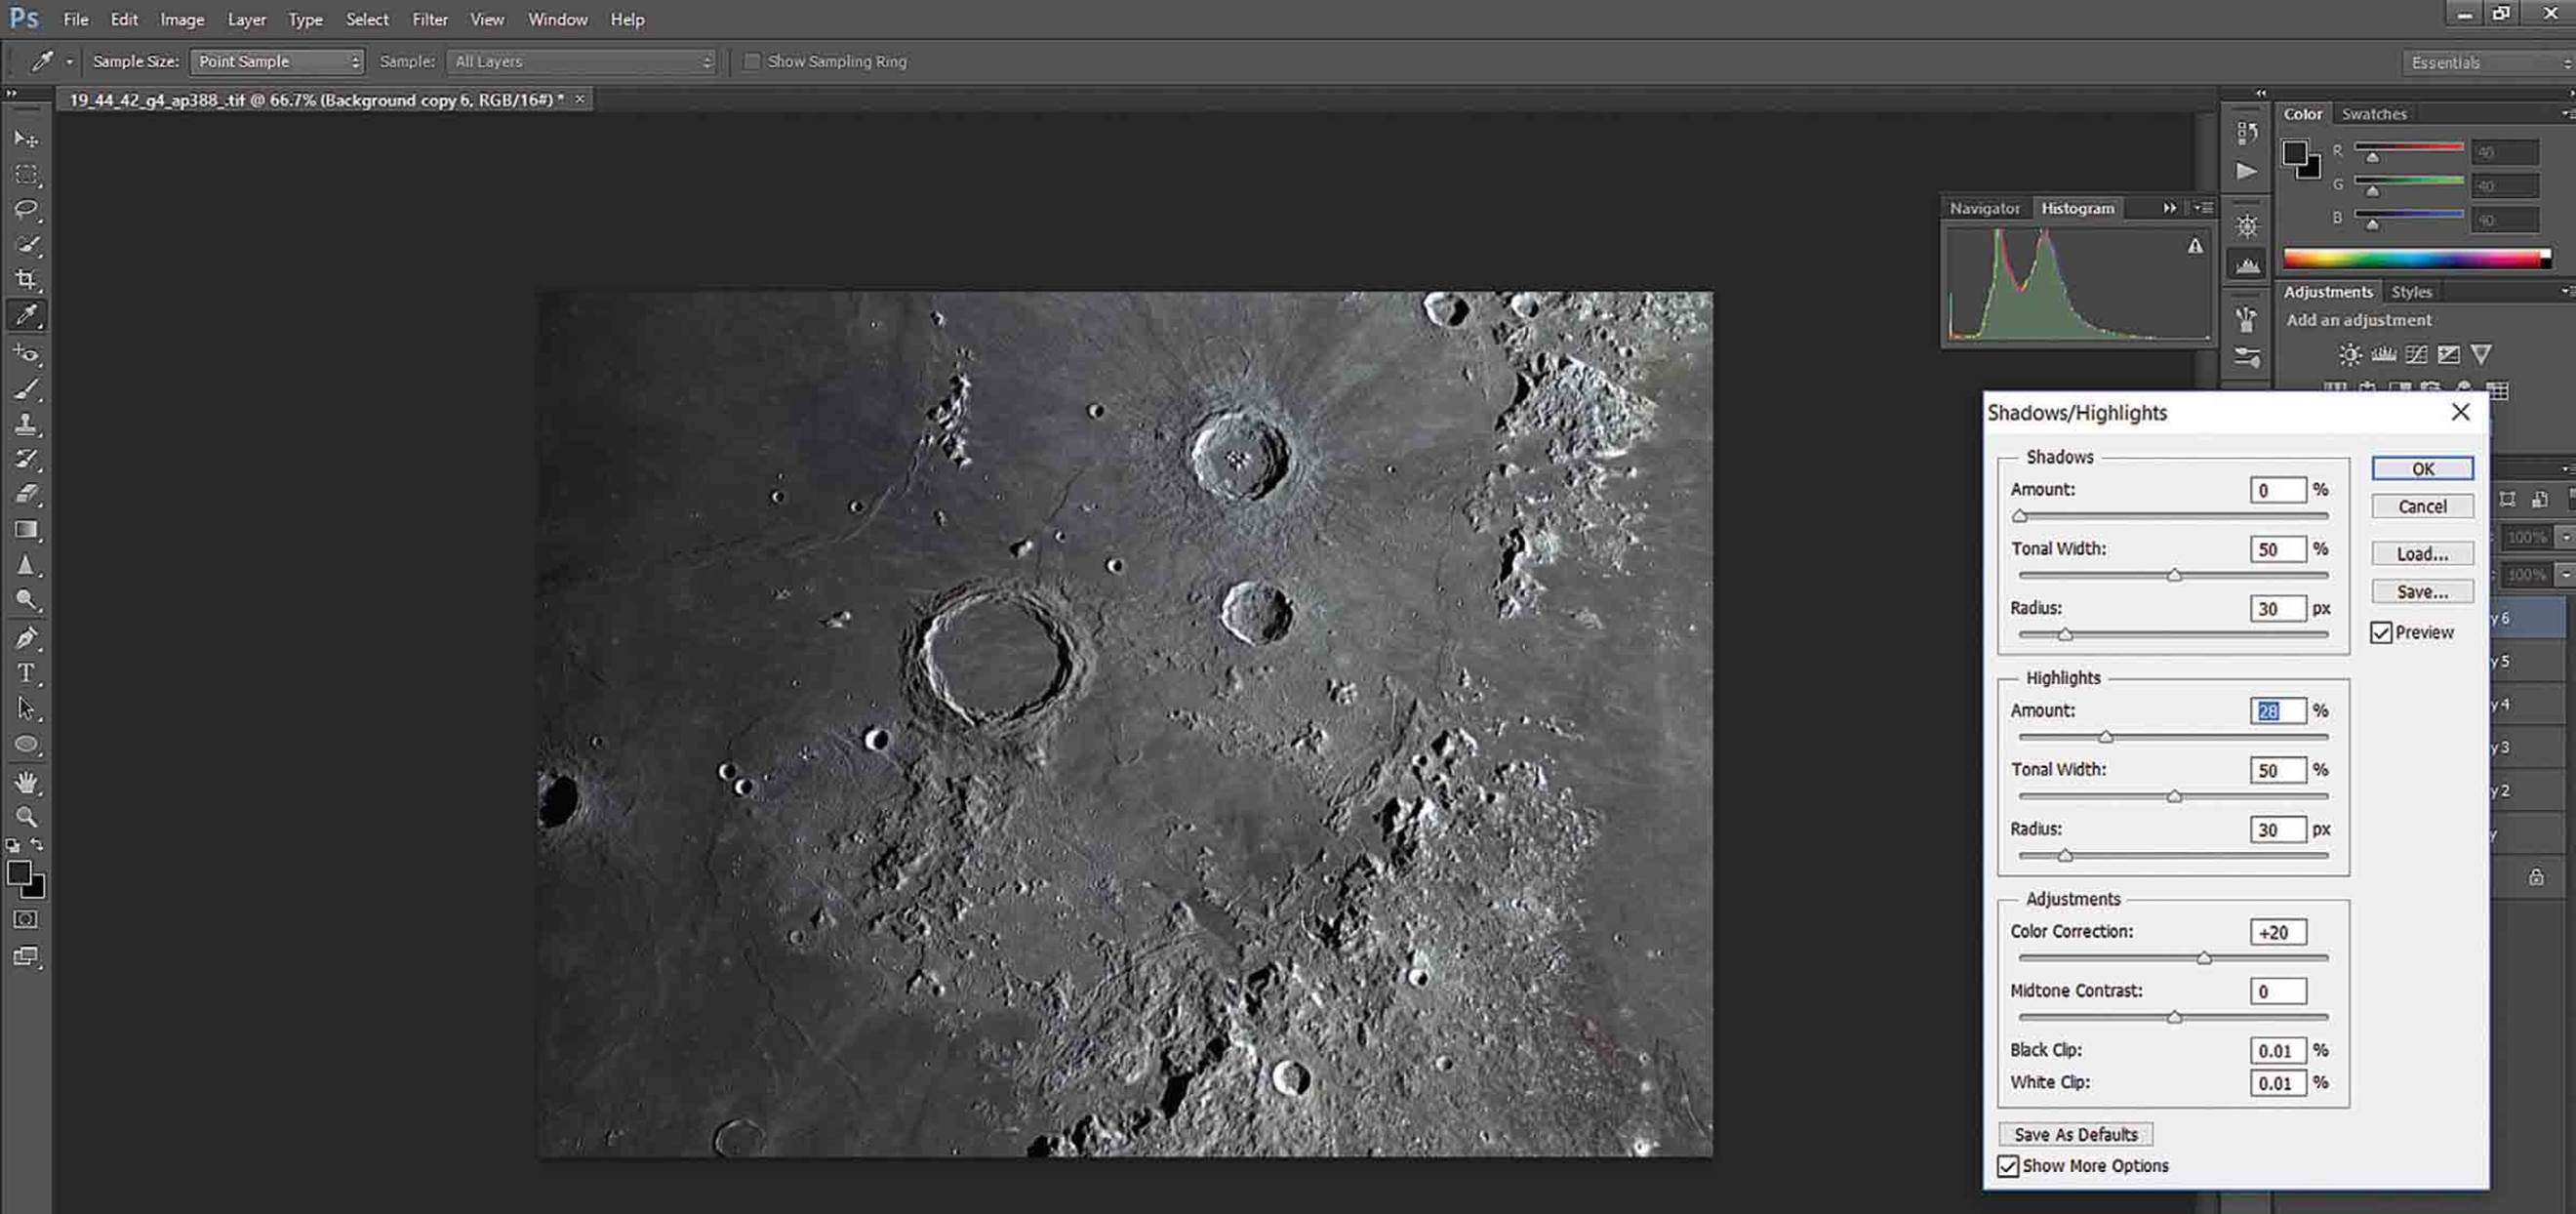
You may find that your image has a broad dynamic range and, even with all the careful stretching and sharpening, the picture may look overexposed in some sections. Reduce some of these bright highlights to regain the balance of the image, click Image – Adjustments – Shadows/Highlights and move the highlights slider to reduce the brightness of the overexposed areas until you obtain a favourable dynamic range. In some instances, the brighter areas of the image are not overexposed and you may need to lighten the darker areas. If this is the case, move the shadows slider to lighten the shadows and equalise the dynamic range. If your image shows the dark shadow of the terminator and you try to reduce this dark shadow, you will add unnecessary noise. Anyhow, the terminator adds distinctive character to the photo.
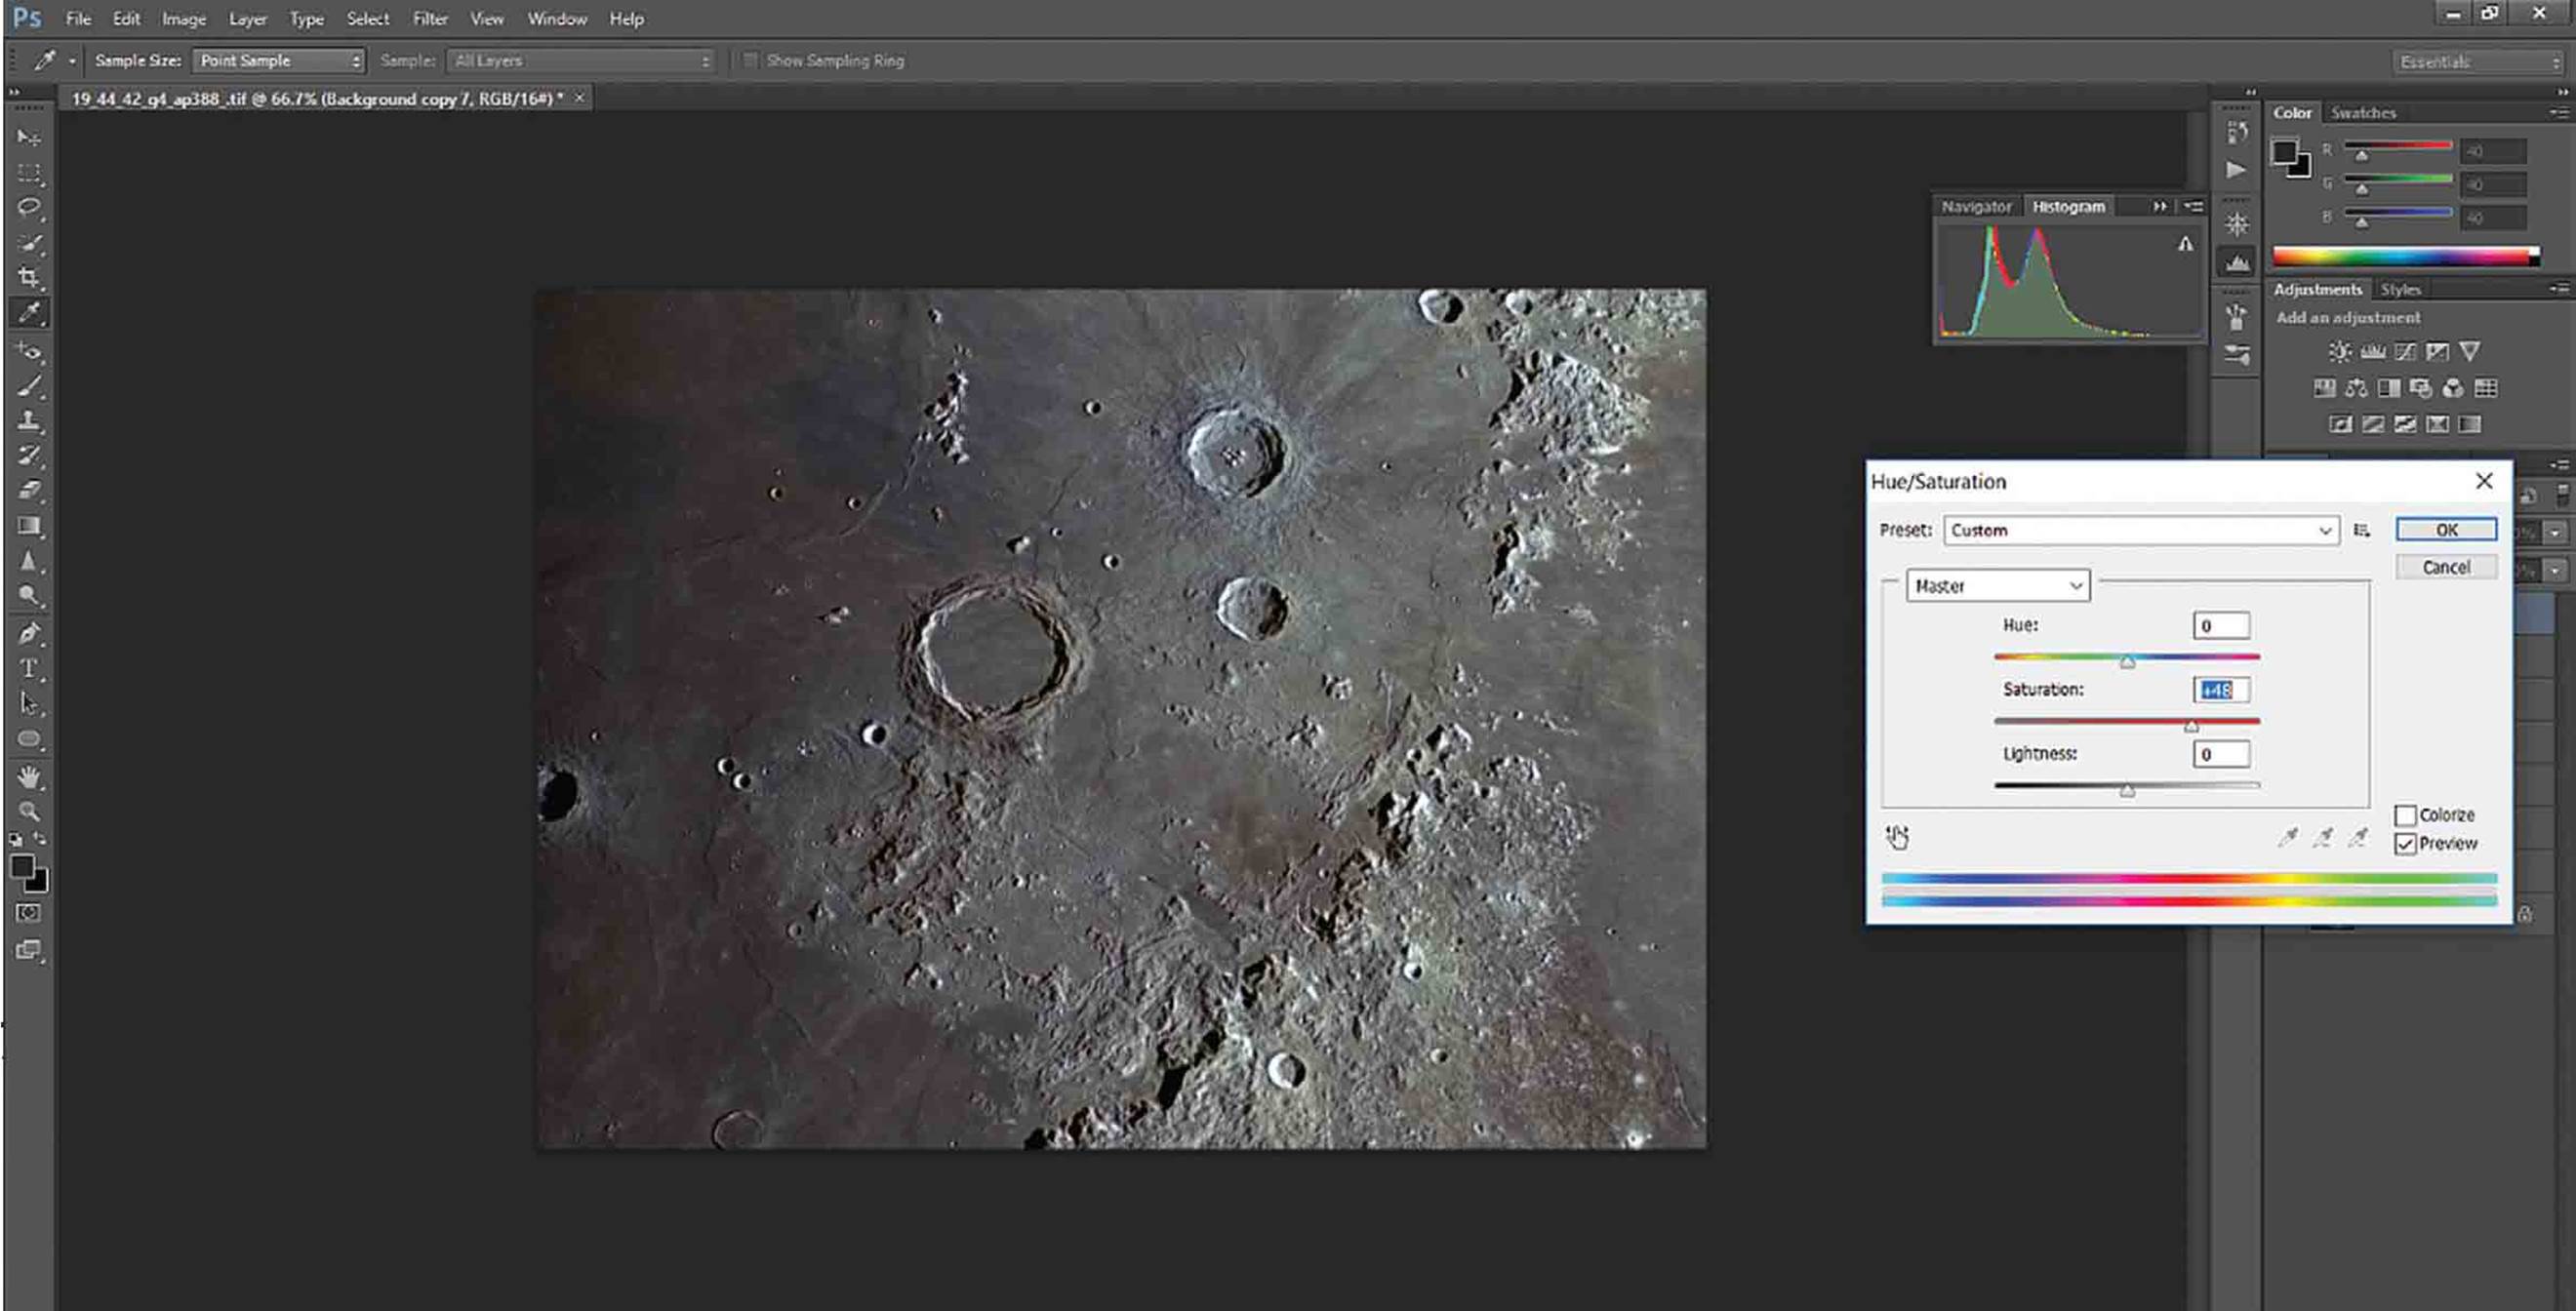
Carry out a final saturation by clicking Image – Adjustments – Hue/Saturation and move the slider until the colour saturation is adequate. There is no set colour value as it depends on how you would like the image to look.
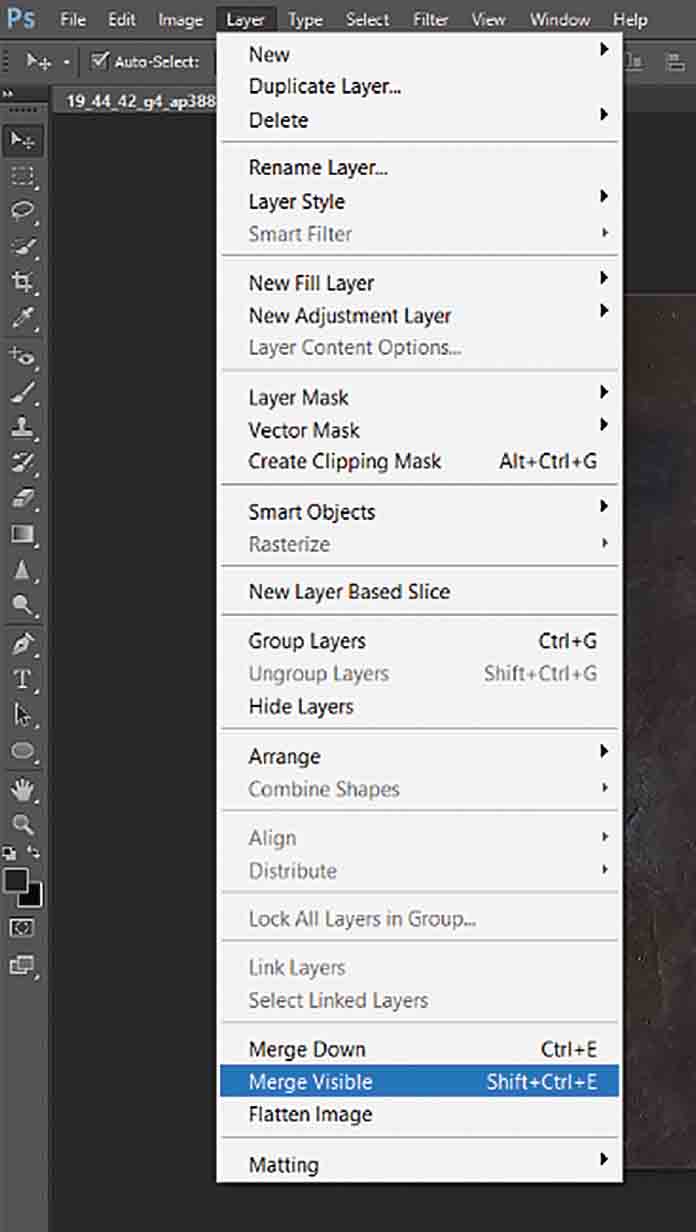
When you are satisfied with the picture and you have finished processing, it is time to produce the final image. You need to merge the layers and your last processed layer will become the final image. Click Layer – Merge – Visible and the final image will be saved as a TIFF file.
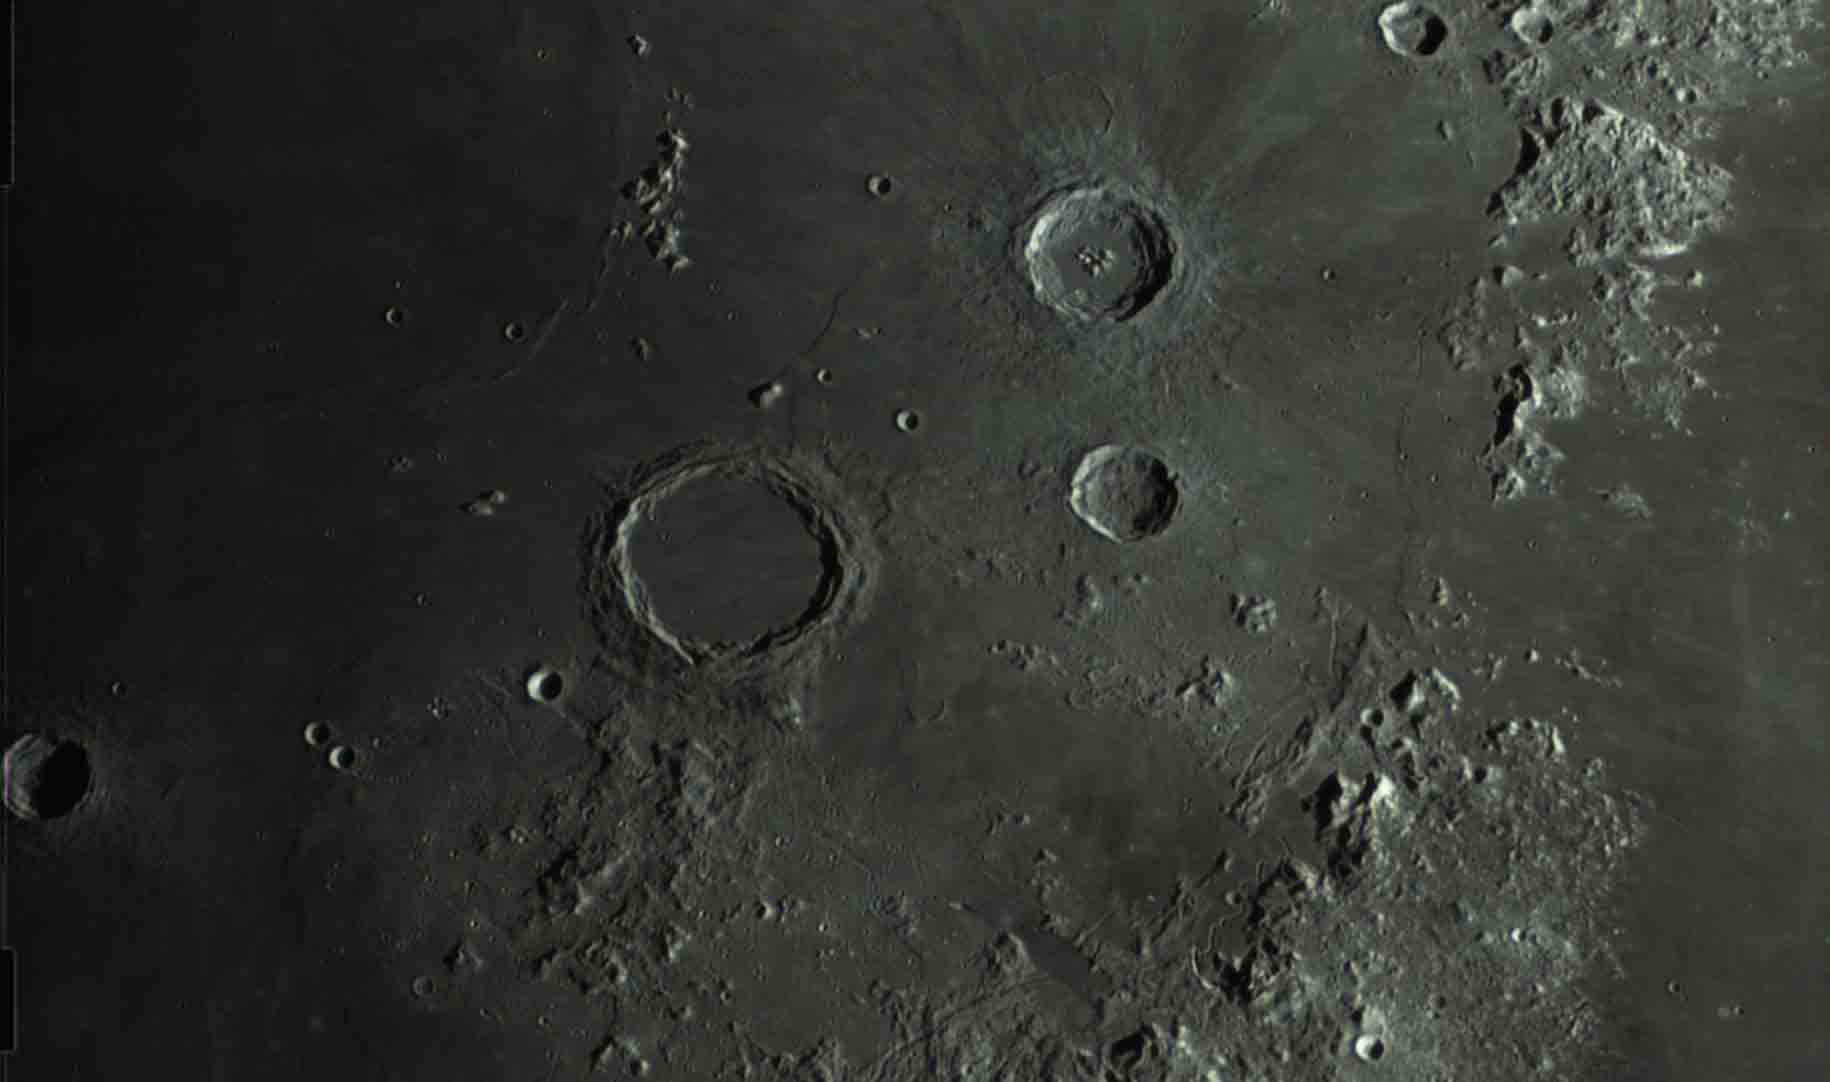
Before processing.
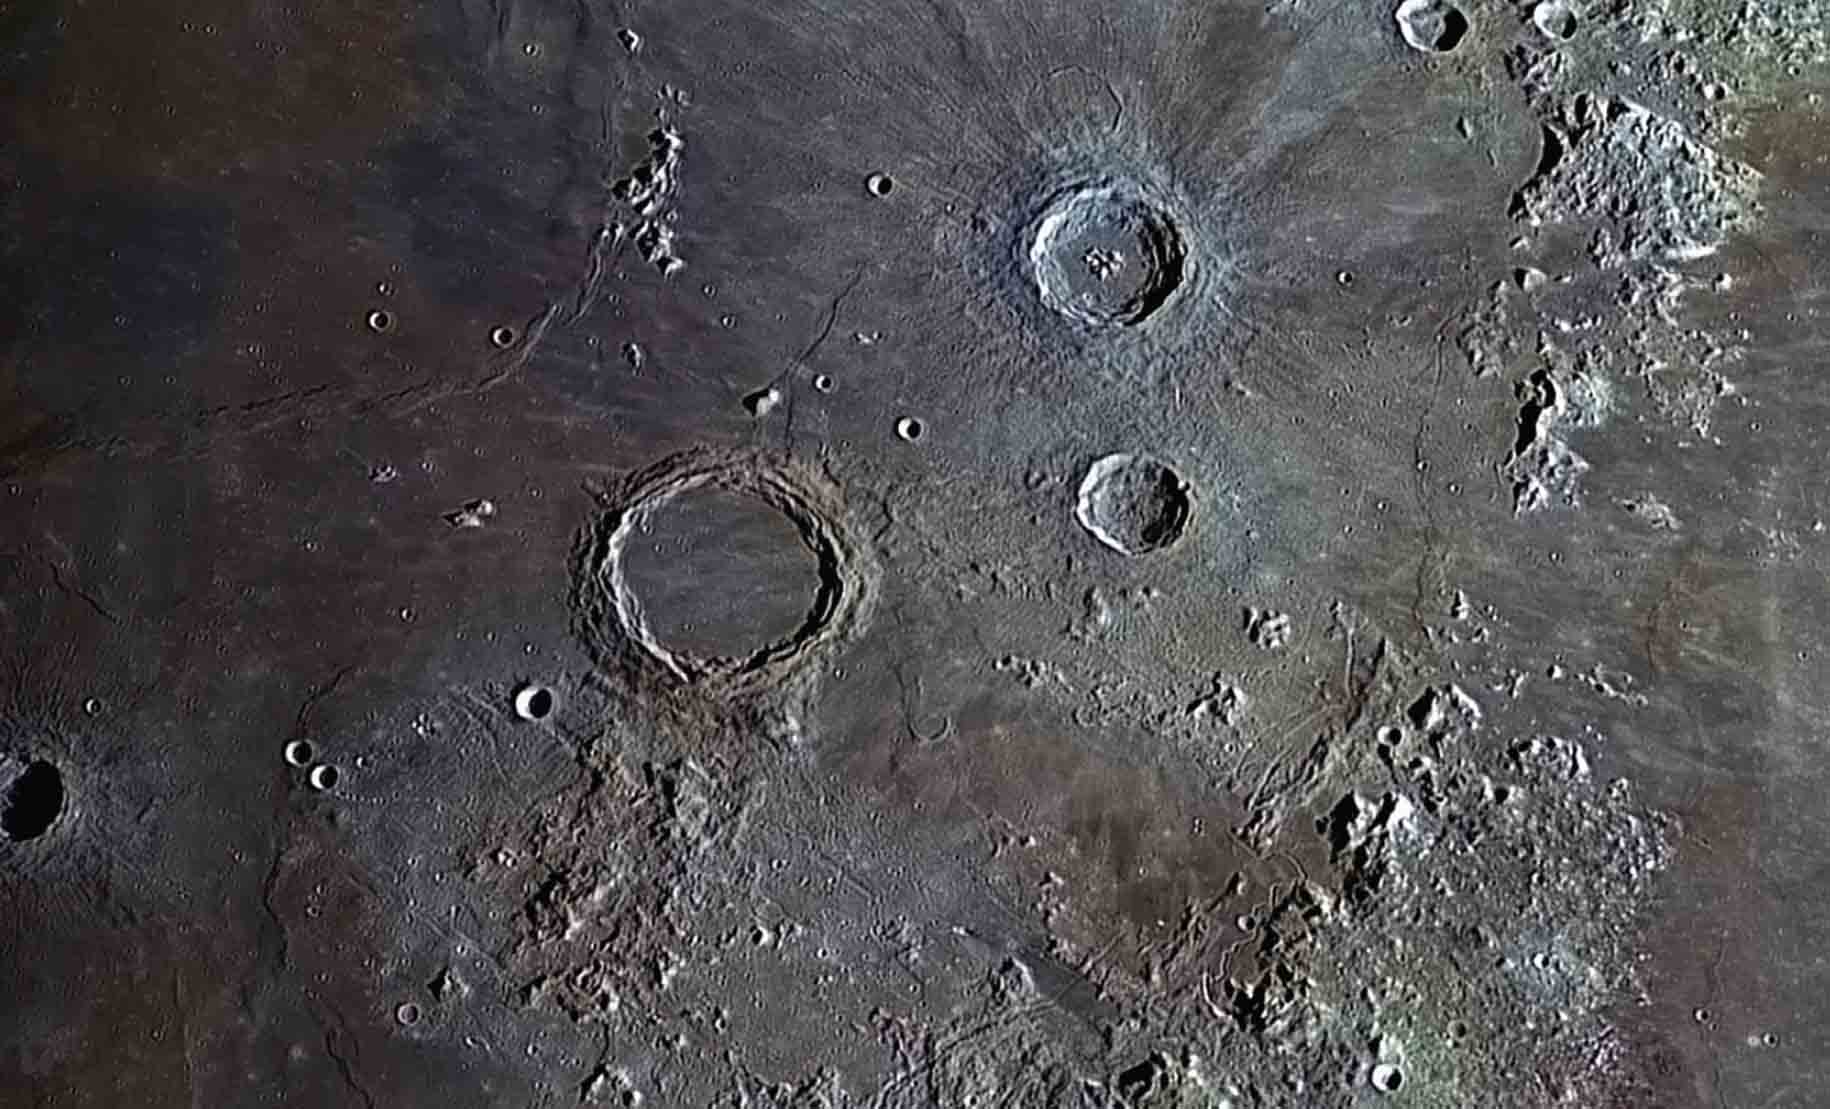
After processing.