
The year 1402 dawned ominously for King Henry. In an age when much weight was placed on signs and portents, the sight of a fiery comet sweeping across the night skies of Western Europe was widely regarded as extremely menacing. In England, a chronicler wrote:
in the third year of King Henry’s reign, there was a star seen in the firmament, which showed itself throughout all the world for diverse tokenings that should befall soon after. The star was named and called by the clergy Stella Comata.
But Henry had more earthly problems to consider. Most of the high hopes with which his reign had commenced had been dashed.
In nearly every area problems were mounting rapidly. As well as complaining of the burden of high taxation, his subjects were also still suffering from the effects of increasing shortage of food caused by rises in the price of corn. There was once again evidence of renewed plotting by Ricardian supporters. There were rumours of plots to kill Henry and his sons. Meanwhile, conspirators (particularly numerous among the friars and other clergy) fomented discontent in King Richard’s name. Several were questioned personally by Henry, and continued to proclaim their loyalty to Richard and their belief that he was still alive, even as they were taken away to execution.
In Wales, Glyn Dwr’s rebels remained defiant. With the failure of the tentative peace talks of the autumn, the actions of both sides were becoming increasingly savage. In the late summer of 1401 Glyn Dwr’s followers had stormed the castle at New Radnor. Some threescore of the captured garrison were lined up in the courtyard and beheaded. This may have been intended as a deliberate act of ‘terror’ to intimidate other enemies in the Welsh Marches. By now, raids by ‘Owain’s Children’ were thrusting ever deeper into England. Western Shropshire, and even the suburbs of Hereford, were subject to attack by Welsh raiders. The great Edwardian castles of Aberystwyth and Harlech, virtually impossible to relieve by land, were beginning to come under pressure and could only be supplied by sea. And Glyn Dwr’s cause was about to receive a major boost.
In April, Owain captured his greatest enemy, Lord Grey of Ruthin. Details of how this was accomplished are unclear. However, it appears that the Welsh launched a minor attack on Ruthin, which provoked Grey, with a detachment of the garrison, to make an incautious sally. The English force ran into an ambush in nearby woods. Grey was surrounded and captured and taken away to imprisonment near Glyn Dwr’s estate at Glyndyfrdwy, then to Snowdonia, while negotiations for his ransom began. King Henry proved much more ready to find means for the release of his friend than he had seemingly been willing to exert himself in the cause of providing Hotspur with adequate funds. A commission was set up to negotiate with the Welsh on the terms for Grey’s release. Welsh demands were high. Eventually, a ransom of 10,000 marks was agreed, of which 6,000 were to be paid within a month. Grey’s eldest son would replace his father as a hostage until the remainder of the ransom was paid. The demands were met with the assistance of the king but Lord Grey would be financially embarrassed for many years to come.
With their principal enemy in their hands, the Welsh rebels were able to range freely across much of North Wales. The cathedral town of St Asaph was their first target. Here, the cathedral itself and a number of clergymen’s houses were set alight and destroyed. Glyn Dwr’s men also struck at Harlech. A major expedition, consisting of 400 archers and 100 men-at-arms, had to be despatched from Chester to relieve the beleaguered outpost. There were also unfounded rumours of a Scottish fleet operating off the Welsh coast. The hard-pressed citizens of Chester were ordered to finance several ships to counter this threat.
From the beginning of the year, the English government began to reorganize its defences in Wales. Hotspur returned from the north to resume command in North Wales, and Thomas Percy, Earl of Worcester, took over in South Wales. Although the south had hitherto been unaffected by the rebellion, orders were given for the strengthening of a number of garrisons in that area. The castles at Kidwelly and Monmouth were to be repaired and the number of men in several garrisons increased.
Hotspur evidently returned briefly from the north of England to organize renewed measures to suppress the rebellion. Percy was able to resupply the castles of Denbigh and Ruthin, but was able to achieve little more. It should have been clear that only a major military expedition, striking at several points simultaneously, was likely to put an end to the rebellion. But lack of resources made this impracticable. Only one expedition was actually launched in the spring of 1402 and that would meet with a major disaster.
Pilleth
With the Earl of March still underage and effectively in royal custody, management of his estates was vested in his uncle, 26-year-old Sir Edmund Mortimer. There is no evidence that Mortimer had any significant previous military experience but he was the natural choice to command a force raised largely from among the Mortimer tenants. By this time, Welsh forces, possibly commanded by Glyn Dwr himself (although this is not certain), had moved down from Snowdonia and, no doubt reinforced by local sympathizers, were operating in Central Wales, especially in the area known as Maelienydd, which was Mortimer territory. Here they continued their customary tactics of burning and destroying churches, minor strongholds and villages, looting them and killing or driving away their inhabitants. It was a challenge to his authority that Sir Edmund Mortimer could not ignore.
The final spur, which forced him to take action, may have been when the Welsh sacked the town of Knighton, only a few miles from the major Mortimer strongholds of Ludlow and Wigmore. Mortimer’s response was to call out ‘almost all the militia of Herefordshire’. These were reinforced by his own household troops and various minor local gentry and their followers. The size of Mortimer’s force has often been exaggerated – certainly by contemporary chroniclers – but Edmund probably had no more than 2,000 men, possibly considerably fewer. With him were at least four knights: Sir Walter Devereux of Weobley and Lyonshall, Sir Robert Whitney of Whitney on Wye, a former Sheriff of Herefordshire, Sir Kinnard de la Bere of Kinnerseley Castle, near Weobley and Sir Thomas Clanvowe of Pychard Cusop and Hergest. Each of these men will have brought their own retainers and tenants. One potential problem that faced Mortimer was how far he could depend upon his men. Some were Welsh and it was unclear if they could be relied upon to fight against their fellow countrymen. In previous centuries, Welsh troops had been employed in large numbers in English campaigns in Wales. But these had generally been directed against unpopular Welsh leaders such as Llywellyn ap Gruffydd in 1282, or against opponents already clearly doomed to defeat. Whether they would be willing to fight against an enemy who seemed to be riding the high tide of success was much less certain.
It is unclear whether Glyn Dwr himself was in command of the Welsh forces in the area. Some accounts suggest that Rhys Gethin (‘the Fierce’) of Crom Llanarch in the Conwy valley, one of Glyn Dwr’s senior lieutenants, was actually in charge. Given that Welsh forces tended to be widely dispersed, it is quite possible that Glyn Dwr himself was elsewhere. In any event, the Welsh rebels who would encounter Mortimer were probably fewer in number than their opponents.
Welsh scouts and sympathizers were almost certainly reporting Mortimer’s movements to the rebel leader from the moment the English left Ludlow. It is equally likely, the deeper Mortimer and his men penetrated Welsh territory, that a hostile local population gave them little or no information regarding the activities of the enemy.
It must have been with increasing unease that Mortimer and his men advanced into difficult terrain, ideally suiting the guerrilla tactics favoured by ‘Owain’s Children’. It was an area of steep-sided valleys covered with oak woods. The narrow valley bottoms were frequently swampy and the roads and tracks few and usually in poor condition.
Contemporary accounts vary regarding the exact location of the Welsh forces when Mortimer began his march. According to one version the Welsh initially went to Knighton. In another account, they took position on high ground above the village of Pilleth, immediately upon learning Mortimer had quit Ludlow. The route Mortimer followed is also unclear, there being several possibilities. Sir Edmund may initially have gone to his stronghold at Wigmore, in order to pick up reinforcements. From there he may have marched over the hills to Lingen and from thence via Kinsham to Stapleton Norton. Alternatively, he may have marched directly from Ludlow by way of Richards Castle to Shobdon, and then via Rodd to Presteigne. Here he would have had to ford the River Lugg, and the dangers of having to cross the river – possibly in the face of an enemy attack – may have inclined him to take the route by Wigmore. There is a third possibility that the English troops may have entered Wales at Knighton and Brampton Bryan, as there is a local tradition of skirmishing in that area.
Mortimer and his men probably spent the night of 21 June near Whitton, and it would have been sometime the following morning when they came in sight of the enemy awaiting them on Bryn Glas Hill, just to the west of Pilleth. The Welsh position was naturally strong. Bryn Glas Hill has steep eastern slopes, which Mortimer would have had no alternative but to scale in order to get to grips with the enemy in the face of concentrated archery. Much of the hillside was apparently open ground, although there appears to have been some woods at its edge, with a narrow valley to the left of the hill, also thickly wooded.
The strength of the Welsh army is uncertain. Although Glyn Dwr or Rhys Gethin had probably brought a small contingent from Snowdonia, they had probably been joined by other rebels from the immediate area where they were now operating. Perhaps there were around 1,500 Welsh facing Mortimer. Some of the best – mainly men-at-arms and spearmen – seem to have been placed in ambush in the valley to the left of Bryn Glas Hill. The remainder of the opposing forces were probably arrayed in orthodox fashion, with the archers formed up across the front of the men-at-arms and levies.
The battle may have opened with an archery exchange, but this probably did not continue for long because Mortimer, with only half the enemy forces visible to him, almost certainly believed he had superiority in numbers. In any case, with his less-than-enthusiastic levies galled by an archery barrage from the enemy, he had little choice but to take the offensive.
Most likely pulling back his own archers onto either flank, Mortimer and his army advanced up the hill towards the enemy. They continued to suffer from the effects of the Welsh archers, and the steep ascent of Bryn Glas doubtless disordered and fatigued them. Even as the English closed with Glyn Dwr’s main body, the Welsh sprang their ambush, the concealed men-at-arms in the valley striking the English left flank. It appears that a considerable number of Mortimer’s Welsh archers now switched sides, and, most probably throwing down their bows, attacked their erstwhile comrades in both flank and rear.
The effect on Mortimer’s raw and poorly motivated troops was catastrophic. Although Mortimer and his knights fought desperately, the bulk of his levies broke ranks and routed down the hill towards the valley of the River Lugg below. Hotly pursued by the victorious Welsh, they were cut down and massacred in large numbers. Up to 1,100 of Mortimer’s men may have died in the brief encounter on Bryn Glas. Among the dead were Robert Whitney, Kinnard de la Bere and Walter Devereux. Sir Edmund Mortimer himself was taken captive.
English chroniclers were horrified, not only by the defeat, but by the alleged atrocities performed on the dead and wounded by Welshwomen – presumably Glyn Dwr’s camp followers. The description by one chronicler, John Capgrave, was particularly graphic. He wrote that ‘After the battle full shamefully, the Welshwomen cut off men’s members and put them in their mouths.’ Another chronicler, Hollinshead, writing some forty years after the battle, gave more details:
the shameful villainy used by the Welshwomen towards the dead carcasses were such as honest ears would be ashamed to hear and continent tongues to speak thereof. The dead bodies might not be buried without great sums of money being given for liberty to convey them away.
Modern historians have cast doubt on these allegations, saying there was no tradition of such atrocities being carried out in Welsh warfare. On the other hand, the fighting in the Welsh Marches was becoming steadily bitterer, and the possibility that some of the English dead may have been so treated cannot be ruled out. Many of the dead were buried in the river valley and others in grave pits near Pilleth Church.
A number of prisoners were taken, among them Thomas Clanvow, best known as the author of the poem, ‘The Cuckoo and the Nightingale’. He was apparently well treated and ransomed four months later. But Sir Edmund Mortimer was a much more valuable prize, not to be surrendered lightly. His capture left the Mortimer lands on the Welsh border effectively leaderless. Furthermore, as uncle to one of the claimants to the English throne, Mortimer was an important political prize.
King Henry’s response was both prompt and furious. In his beleaguered situation, the king was becoming increasingly suspicious of those around him. He already had some grounds to suspect the loyalty of the Mortimers. It was significant that ever since the negotiations between Glyn Dwr and Hotspur, the Mortimer lands in North Wales, centred on Denbigh, had largely been spared from Welsh attack. Rumours quickly grew that Mortimer was a not-entirely-unwilling prisoner – even that he had betrayed his own army.
It may be doubted Mortimer would in fact have sacrificed so many of his own followers for less than clear political ends. In any case, in some ways his capture suited King Henry rather well. For as long as Mortimer remained in Welsh hands, the potential opposition to the king from the Mortimer family was largely neutralized.
Whether the king actively opposed Mortimer being ransomed is also unclear. His first response to the news of the disaster at Pilleth was to order immediate preparations for a massive punitive expedition into Wales, designed to end the threat from Glyn Dwr once and for all.
This time, three large armies, provisioned for fifteen days, were to strike simultaneously into Wales: one advancing from Hereford, one from Shrewsbury (led by the king in person), while the third army, advancing into North Wales from Chester, was to be under the nominal command of the 15-year-old Prince Henry.
The king was at Berkhamstead Castle in Berkshire when he learnt of Mortimer’s defeat. On 25 June, he sent orders to his council that
the Welsh rebels have captured Edmund Mortimer and several other knights, and the king wishes to proceed against the rebels himself. Warrant for orders under the privy seal to all the lords, knights and squires of his retinue, and to all those who have annuities from him, to be at Lichfield on 7 July armed and ready to make war in Wales.
In fact, it was not until 2 September that the three English armies at last began their advance.
By then the English position in Wales had deteriorated further. Glyn Dwr’s men followed up their success at Pilleth by driving deep into Herefordshire and burning the town of Leominster. News of their victory – the most significant yet of the rebellion – spread rapidly across Wales and led to an upsurge in support for Glyn Dwr. The men of the Mortimer estates on the Welsh border flocked to the rebel cause. Other areas, such as Flintshire, previously unaffected by the uprising, also turned to Glyn Dwr. Some bands of ‘Owain’s Children’ may have penetrated South Wales, threatening English garrisons such as Newport, Usk and Cardiff.
In mid and South Wales, absent Marcher lords were ordered to return to their estates to co-ordinate their defences. But in North Wales, the situation had deteriorated too far for this to have any effect. Large areas were now effectively out of English control. That said, English officials were still able to collect taxes until the end of the year in some areas, such as Anglesey. Thus the king and his advisers could still cling to the hope that a massive demonstration of military strength might dampen the flames of rebellion.
However, the triple-pronged invasion of Wales proved a major disaster. The king’s own expedition marched from Shrewsbury up the valley of the River Severn and then across the Berwyn Mountains north-west into the Conwy valley. Here the English burnt the small town of Llanrwst, but seem to have made no actual contact with the rebel forces at any point. But then Glyn Dwr’s great ally, the Welsh climate, came to his aid. Contemporary accounts stressed just how horrendous conditions were that autumn. All three of the English expeditions were lashed by torrential rain. Men, horses and supply wagons were swept away as they attempted to ford streams and rivers swollen into raging torrents by the ceaseless rain. Men succumbed to the effects of cold and exposure. To the pouring rain were added gales. King Henry himself narrowly escaped death when his tent collapsed in high winds, and its main pole struck him across the chest. He was only saved by the armour he was wearing at the time.
By 22 September, the bedraggled and beaten English armies were back at their starting points. The king’s great expedition had been a total failure. John Hardynge, a squire to Hotspur, is scathing about King Henry’s expeditions to Wales:
The King Henry thrice to Wales went
In the haytime and the harvest, divers years
In every time were mists and tempests sent
Of weather foul that he had never power
Glendower to know, but o’er his carriage clear
Owen had at certain straits and passages
And to our hosts did full great damage
The king had never but tempest foul and rain
As long as he was aye in Wales’ ground
Rocks and mists, winds and storms certain
All men trowed that witches made that stound
The commons, all of them on England’s ground,
Cursed his going to Wales every year
For hay and corn were lost both in fire.
Back in London, still smarting from his reverses, Henry received word of a great military triumph by the Percys in the north.
From the start of the year, England’s enemies in Scotland had been eyeing the opportunities presented by Henry’s setbacks in Wales. From the spring onwards, reports had emanated from Scotland that King Richard was there, alive and well, and that a Scottish invasion of England would be launched in his support. There was indeed an individual in Scotland with a strong physical resemblance to the former king, although the person concerned apparently denied he was Richard and was kept carefully out of sight. Henry believed him to be an Englishman named Thomas Ward of Trumpington. But, imposter though the man might be, reports of Richard’s existence caused a great deal of excitement among the former king’s English supporters. From the spring of 1402, the pace of their plotting increased. Once again, many were Franciscan friars. One of those apprehended was brought before Henry, who asked him what he would do if Richard were to appear in person: ‘I would fight for him, though I had nothing but a stick in my hand!’ the prisoner replied defiantly. The shaken king exclaimed: ‘You are not my friend and by my head, your head shall fall!’ The summer saw more reports of supernatural portents – one of which claimed a sighting of the Devil, apparently dressed as a Franciscan!
Homildon Hill
On the Scottish border at the start of 1402 an uneasy and fragile calm still reigned. Indeed, while Hotspur had been absent in Wales, his father had patched up a temporary truce with the Scots. But the problem remained that, with the confused political situation in Scotland and rival magnates jockeying for power, any such agreement could be broken at any time.
The Scottish ‘peace party’, headed by the Duke of Rothesay, had hoped to convert the temporary truce into a more permanent peace. However, the dominant force on the Scottish side of the border remained the powerful Douglas family, implacably opposed both to peace with England and to reconciliation with the Percy family. The current head of the Douglas family was Archibald, the 4th Earl. Despite a minor success against Hotspur in a skirmish at Cocksburnspath, Douglas was generally an unsuccessful commander, whose ill fortune in war earned him the soubriquet of ‘Tyneman’ [‘Tin Man’]. Indeed, right up until the date of his death at the Battle of Verneuil in 1424, Douglas lost almost every encounter in which he was engaged. However, few doubted Douglas’s personal courage, and his current determination to pursue a warlike policy against England was heightened by the recent defection to King Henry of his chief rival, George Dunbar.
During the spring of 1402 Douglas’s position in Scotland was strengthened by the death of the Duke of Rothesay, almost certainly disposed of by Douglas and his current ally, the Duke of Albany.
Following from this, there were an increasing number of Scottish raids into England. These met with some initial success; however, one party of raiders, led by Sir Patrick Hepburn of Hailes, was intercepted by an English force led by Hotspur and George Dunbar, who was apparently acting as Percy’s military adviser. In a brief engagement at Nesbitt Moor on 22 June, the Scots were decisively beaten, Hepburn himself among the dead. This minor English victory served only to inflame the situation. There was already a Scottish army, reportedly 12,000 strong, operating near Carlisle, and Douglas was determined to seek recompense for the recent Scottish reverse.
The Scottish army that had been operating in the vicinity of Carlisle was transferred to the East March and began raids deep into Northumberland. Expecting such a move, the Percys had already mustered their own retainers, plus those of their immediate followers. In September, a Scottish army, believed to be between 10,000 and 12,000 strong, launched a major expedition, which penetrated as far as the River Tyne. The objective of the Percys, with Dunbar, was to intercept this invading force before it could regain the safety of Scotland.
George Dunbar was still with Hotspur and it has been suggested that his advice was heeded in the operations that followed.
Douglas had been joined by men from Galloway, Clydesdale and Lothian, and, in an indication of the divisions wracking Scotland, by George Dunbar’s brother and a number of his tenants. The Duke of Albany had reinforced Douglas with a force of knights under Murdoch Stewart, Earl of Fife. A number of other members of the Scottish nobility, including the Earls of Moray, Angus and Orkney, were also present, with a contingent of thirty French knights.
Many of the Scots had been drawn to Douglas’s banner from the mixed motives of seeking vengeance on George Dunbar and for the usual attractions of plunder. Douglas had probably entered England by crossing the River Tweed in the vicinity of Coldstream, and after ravaging the countryside as far as Newcastle, was planning to return the same way. The Scottish chronicler, Walter Bower, described the opening moves in his Scotichronicon:
The new Earl of Douglas, who had custody then of the castles of Edinburgh and Dunbar and who was the king’s son-in-law, wished to seek revenge upon the English for the slaughter of the Scots at Nesbit [sic]. He approached the governor of Scotland, the Duke of Albany, for his help in strengthening his army, because he said it was [only] with the duke’s advice that he would be willing to go to England. The duke gave him his eldest son, Sir Murdoch, with an augmented force of knights and brave men. He therefore assembled a large army in the same year to the number of 10,000 fighting men, including the Earls of Angus and Moray as well as the Master of Fife, and entering England they plundered it as far as Newcastle. As they returned, Sir Henry the younger (otherwise Hotspur) with Sir George Dunbar Earl of March and a large army reached Milfield before them. The Master of Fife and the Earl of Douglas climbed to some rising ground called Homildon, where they waited for the arrival of the English. As they stood on the plain facing the Scots, the English were impatient to attack them on Percy’s order, but the Earl of March reined Percy, saying that he should not move, but should send archers who could easily penetrate the Scots as targets for their arrows and defeat and capture them.
The Percys and Dunbar will have expected this, and were aware that the Scots army would be slowed down as a result of the large quantities of booty it was bringing back with it.
The Percys mustered their forces at Milfield-on-Till, around 6 miles from Wooler. Here they lay squarely across the Scots’ road to Coldstream and home. Douglas’s reaction was to take up a defensive position on Homildon (sometimes referred to as ‘Humbledon’) Hill, a 1,000-foot high outcrop of the Cheviots. A short distance to the northwest is Harehope Hill, of similar height, separated from Homildon Hill by a steep-sided glen. To the north is a plain where the Rivers Till and Glen meet. Much of the valley floor was probably under cultivation, with some boggy ground on the north-eastern part of what would be the battlefield. The higher ground of the two hills was probably rough pasture.
The English force was drawn partly from the border garrisons, with a number of knights and their retainers, mainly archers. Among those present were the Lord of Greystoke, Sir Henry Fitzhugh, Sir Ralph de Yver, the Lieutenant of Roxburgh, and the Constable of Dunstanburgh Castle. The Percys brought with them a number of their own retainers, including Sir Robert Umfraville and John Hardynge, with a contingent of irate Newcastle townsmen, eager to avenge the losses they had suffered in the Scottish raid. Ralph Neville, Earl of Westmoreland, though not present in person, had sent a contingent of troops to reinforce the Percys. Doubts have been expressed as to whether the Earl of Northumberland was present. Most probably he was, though he may have left operational command to Hotspur and Dunbar. The bulk of the English force probably consisted of archers, with a total strength of perhaps 7,000 men in all.
Douglas’s army was in a strong defensive position, although their commander must have realized his men were potentially vulnerable to English archery. The English forces took position on the plain below Homildon Hill. Some versions suggest Hotspur wanted to launch an immediate frontal attack up the slope, and had to be dissuaded by Dunbar. This seems unlikely. Although Hotspur might, on occasion, have had a tendency to rashness, he would hardly have committed such obvious military suicide, especially with so few men-at-arms.
Instead, a force of archers (of unknown numbers) was detached and probably sent up Harehope Hill to open fire on the Scots, with the aim of damaging them sufficiently to force them out of their strong position and on to the attack. There are some doubts regarding the exact location of the English archers, as the contemporary account by Walsingham suggests they were deployed in the dale: that is the ravine between the two hills, and somewhat closer to the Scottish position. In this scenario, the remainder of the English force would have been deployed on Harehope Hill. Thomas Walsingham, in his Historia Anglicana, tells the story from the English viewpoint:
At that time the Scots, made restless by their usual arrogance, entered England in hostile fashion; for they thought that all the northern lords had been kept in Wales by the royal command; but the Earl of Northumberland the lord Henry Percy, and Henry his son, and the Earl of Dunbar who had lately left the Scots and sworn fealty to the King of England, with an armed band and a force of archers, suddenly flung themselves across the path of the Scots who, after burning and plundering, wanted to return to their own country, so the Scots had no choice but to stop and choose a place of battle. They chose therefore a hill near the town of Wooler, called Homildon Hill, where they assembled with their men-at-arms and archers. When our men saw this, they left the road in which they had opposed the Scots and climbed a hill facing the Scots. Without delay, our archers, drawn up in the dale, shot arrows at the Scottish schiltron, to provoke them to come down. In reply the Scottish archers directed all their fire at our archers, but they felt the weight of our arrows, which fell like a storm of rain, and so they fled.
Walter Bower describes the later stages of the battle in Scottish eyes:
[Sir John Swinton] shouted out in a harsh voice as if he were a crier, saying, ‘Illustrious comrades! Who has bewitched you today that you do not behave in your usual worthy manner? Why do you not join in with their flying arrows as if you were little fallow deer or young mules in pens? Those who are willing should go down with me and we shall move among our enemies in the Lord’s name, either to save our lives in so doing or at least to fall as knights with honour.’
On hearing this the most famous and valiant Adam de Gordon of that ilk, who, indeed for a long time had cultivated mortal enmity against the said lord of Swinton following the death of stalwart men-at-arms from both sides in various fights, knelt down before him to ask pardon from him in particular (as the most worthy knight in arms in the whole of Britain, as he claimed) so that he might be girded as a knight by the hands of the same Sir John. This was done, and a band of a hundred respected knights followed these leaders who had thus been reconciled. They contended intrepidly with a thousand Englishmen; and that whole Scottish group fell dead, though not without a great slaughter of English. It was assuredly believed and it was sworn on oath by some Englishmen, as I have heard, that if the other Scots who had stood on Homildon Hill had fallen on them with like vigour, either the English would have fled, or the Scots would have achieved victory over them.
The dense ranks of the Scottish schiltrons made easy targets for the English bowmen, whose arrows reportedly ‘fell like a storm of rain’. In response, the Scottish archers attempted a counter-barrage, but were outshot, in some cases taking flight through the massed troops behind them, causing confusion and gaps in their ranks. According to Walsingham:
The English bowmen, advancing towards the Scots, smothered them with arrows and made them bristly like a hedgehog, transfixing the hands and arms of the Scots to their own lances. By means of this very harsh rain of arrows they made some duck, they wounded others, and killed many.
This is an excellent description of the disruption and confusion, rather than serious casualties, which the ‘arrow storm’ was intended to inflict. It also led, probably within a few minutes, to the other desired Scottish reaction. While many of the poorly protected foot soldiers seem to have attempted to escape, at least two attacks against the English were made by parties of mounted knights and nobles. One group was led by Archibald Douglas, who, as Walsingham observes, soon ran into trouble:
[Douglas] seized a lance and rode down the hill with a troop of his horse, trusting too much to his equipment and that of his men, Archers in Battle:who had been improving their armour for three years, and strove to rush on the archers. When the archers saw this, they retreated, but still firing, so vigorously, so resolutely, so effectively, that they pierced the armour, perforated the helmets, pitted the swords, split the lances, and pierced all the equipment with ease. The Earl of Douglas was pierced with five wounds, notwithstanding his elaborate armour. The rest of the Scots who had not descended the hill turned tail, and fled from the flight of arrows. But flight did not avail them, for the archers followed them, so that the Scots were forced to give themselves up, for fear of the death-dealing arrows. The Earl of Douglas was captured; many of those who fled were captured, but many were drowned in the river Tweed, so that the waters devoured, it was said, 500 men. In this flight no lord or knight received a blow from the enemy; but God Almighty gave the victory miraculously to the English archers alone, and the magnates and men-at-arms remained idle spectators of the battle.
A second attack, by about 100 mounted Scots, was led by Sir John Swinton, who had played a distinguished role in Hotspur’s defeat at Otterburn, fourteen years previously. Taunting his comrades into a headlong charge, Swinton met with no better fortune than Douglas. The Scottish horse were halted in confusion, making easy targets as they attempted to struggle back up the hill to their starting point.
Not a single Scottish man-at-arms seems to have reached the English position. They and their mounts, dead or wounded, were strewn in front of the English position as Hotspur’s men began a ruthless pursuit of the fugitives, Thomas Walsingham noting that: ‘flight did not avail them, for the archers followed them, so that the Scots were forced to give themselves up, for fear of the death-dealing arrows’.
Large numbers of Scottish foot soldiers were drowned as they attempted to cross the River Till. The Percys were able to count a rich haul in prisoners – chief among them the wounded Archibald Douglas. Also taken were the Earls of Moray, Angus and Orkney, and over 1,000 others, including many knights. English losses were claimed to total no more than five dead. The Percys had won a major victory but one that was to have far-reaching and fatal consequences.
Archers in Battle: the ‘Arrow Storm’
One of the most popular misconceptions is the name of the archer and his principal weapon. Neither the terms ‘long-bowman’ or ‘longbow’ were in contemporary use. Employment of the latter term has led to the erroneous belief that the bow used by English archers in the period of the Hundred Years’ War was some revolutionary new weapon. Although some details are obscure, it is clear that the war bow, in basically the same form as employed at Shrewsbury, had been in use in England from at least the Norman Conquest and possibly earlier.
One of the greatest strengths of the bow was the rapidity with which it could be shot. It was claimed that a well-trained archer could loose off as many as twenty shots in the space of a minute, and although such a rate was, in all probability, rarely achieved or indeed desired, ten aimed shots a minute was the expected standard.
This made it possible for archers to mount an extremely heavy barrage. For example, 5,000 archers could discharge 50,000 arrows in the space of a minute, creating the famed ‘arrow storm’. Contemporary writers give an idea of the terrifying impression this had. At Crécy (1346), it was said that the English archers ‘stepped forth one pace and let fly their arrows so wholly together and so thick and fast it seemed like snow’. At Edward Ill’s victory over the Scots at Halidon Hill (1331) arrows were ‘as thick as motes on the sunbeam’.
In estimating the likely duration of such a barrage, it is worth looking at the supply of arrows generally available to an individual archer.
Most bowmen seem to have started a battle with an immediate supply of two ‘sheaves’, totalling forty-eight arrows, with perhaps a further one or two dozen arrows carried in their belts for speedy access. In combat, all of these would normally be stuck in front of the archer, point down in the ground. In a continuous barrage, such a supply could be shot off in five or six minutes, after which the archer would have to rely on any additional supplies brought up from the baggage train by the servant, often employed by groups of two or three archers.
In reality most barrages did not continue long enough for an archer to exhaust his ready supply of arrows. Unless, as may have occurred at Shrewsbury, archers were attempting to provoke an enemy attack, they generally did not begin to shoot until the enemy advance had actually begun. Assuming he did not break in flight, an attacker would instinctively quicken his pace in order to minimize time under enemy fire, which would, in any case, generally only commence when the attacker was within 300 yards of the archers’ position. If a dismounted attacking force took as long as three minutes to cover this distance, an archer was unlikely to have discharged more than around thirty arrows.
When news of the victory reached King Henry, his immediate reaction was to order that none of the notable Scottish prisoners should be ransomed without his permission and that all should be brought to him at Westminster ‘for urgent causes now moving the king’. This did not, as sometimes suggested, represent a distrust of the Percys, but rather the desperate financial position in which the king now found himself. Any ransom paid for the Scots, was, he felt, much more urgently required by the government than by the Percys. Furthermore, Henry was perfectly within his rights according to the accepted rules of war, where it was stated:
And if any man take any prisoner, at once as he is taken in the host that he bring his prisoner to his captain of muster, and that upon pain of losing his part to his said captain or marshal who shall bring him within eight days to the king, constable or marshal, as soon as he goodly may, upon pain to lose his part of him to be given to him that shall give to the constable and marshal first warning thereof.
We do not know how the Percys reacted to these orders, although, given their existing discontent regarding their financial treatment by Henry, they can hardly have been happy. However, the Earl of Northumberland himself was apparently willing to obey Henry’s instructions. Hotspur was not.
On 20 October the Earl of Northumberland came before the king at Westminster, bringing with him Murdoch, Earl of Fife, Lord Montgomery, Sir William Graham and Sir Adam Forster, with three French knights. Very obvious by their absence were the Earl of Douglas and Hotspur. The prisoners were received sternly but graciously by King Henry, and invited to dine at his table. But before eating the king evidently had a much less digestible encounter with the Earl of Northumberland. The disagreement probably began regarding the absence of the Earl of Douglas, but the argument soon turned to the Percys’ financial grievances. The earl apparently reminded the king that payment was still awaited for their services in Wales and on the Scottish border: ‘My son and I have spent our all in your service,’ he stated with some exaggeration. Henry’s response was uncompromising: ‘I have no money, and money you shall not have.’ To which Northumberland retorted angrily:
When you entered the kingdom you promised to rule according to your council; you have year by year received large sums from the country, and yet you say that you have nothing, and pay nothing, which angers your commons. God grant you better counsel!
It was probably Hotspur’s failure to produce Douglas that had triggered the king’s ill-temper. It may be that the earl pleaded Douglas’s wounds as the reason for his non-arrival, but the king suspected – rightly – that other factors were involved.
At some point that autumn, Henry is said to have had a personal encounter with Hotspur. Once again, he demanded where Douglas was, and Hotspur retorted that Sir Edmund Mortimer should be allowed to ransom himself. The king refused, saying that he would not allow Glyn Dwr to finance his rebellion by these means. Hotspur was evidently furious: ‘Shall a man expose himself to danger for your sake, and you refuse to help him in his captivity?’ Henry may have been more aware of what was happening in Wales than Hotspur was, and retorted that Mortimer had deliberately led his army into a trap at Pilleth and was a traitor. ‘And you are a traitor!’ he added, no doubt in reference to Hotspur’s retention of the Earl of Douglas and his failure to capture Glyn Dwr in the course of their negotiations in the previous year. Indeed, one account suggests that the king went so far as to strike Hotspur in the face and begin to draw his dagger. Hotspur replied: ‘by my faith, this shall be the dearest-bought buffet that ever was in England. Not here, but in the Field!’
Surgery
As evidenced by traces of older wounds found on the bodies discovered at Towton, men often recovered from quite serious wounds suffered in battle. Provided no major organ had been damaged, a flesh wound could be sewn up by a surgeon and would heal provided it did not become infected. Infection, resulting in complications such as gangrene, was both widespread and imperfectly understood. Weapons were frequently dirty, particularly arrowheads that had usually been planted in the ground prior to being shot. The main problem, following a major engagement such as Shrewsbury, was that the small numbers of professional surgeons who were available were overwhelmed by the number of casualties requiring treatment. ‘Common’ soldiers would often have to depend on rough-and-ready ‘first aid’ from their comrades.
The more prominent casualties, of course, received much speedier attention and in consequence had a better prospect of recovery. The best known of the Shrewsbury casualties was Prince Henry (the future King Henry V). The arrow, most probably with a bodkin-type head, which pierced his face, entered from the left and penetrated his cheekbone as far as the bone behind his nose. It was certainly sufficiently incapacitating that, despite the claims of pro-Lancastrian commentators, he is unlikely to have played any further part in the battle. Dealing with the injury presented the royal physicians with a major problem. For five days the prince was sedated with herb and plant extracts while the king’s surgeon, John Bradmore, who had a notable reputation, designed and had made the instrument with which he would attempt to extract the arrowhead. The head of the instrument was inserted into the wound and into the socket of the arrowhead, and a screw mechanism gradually tightened, slowly withdrawing the arrowhead from Henry’s face. The prince would have been left with a major scar for the rest of his life, regarded probably as a ‘badge’ of honour. Most of the common soldiers who received similar wounds almost certainly died excruciating deaths.
As Hotspur stormed back to the north of England, Henry received proof of his suspicions regarding Mortimer. Whatever may have been the case at Pilleth, where there was in fact no reason to suspect Sir Edmund of disloyalty, the months of captivity, waiting in vain for assistance from the king, had changed his mind. At some point that autumn he married Glyn Dwr’s daughter, Katerin, and on 13 December the alliance with Glyn Dwr was formalized when Sir Edmund wrote to the Mortimer tenants from Owain’s quarters at Machynlleth:
To Sir John Grendor, Howell Vaughan and all the gentles and commons of Radnor and Presteigne.
I greet you much and make known to you that Oweyn Glyndwr has raised a war of which the object is, if King Richard be alive, to restore him to his crown, and if not that, my honoured nephew, who is the right heir to the said crown shall be king of England, and seeing that the said Oweyn will assert his right in Wales. And I, seeing and considering that the said quarrel is good and reasonable, have consented to join in it, and to aid and maintain it, and by the grace of God to a good end, amen. I ardently hope and from my heart that you will support and enable me to bring this struggle of mine to a successful issue.
The clouds of rebellion were thickening fast.

Richard II: a maligned ruler, Richard was erratic and untrustworthy; a lover of the Arts who alienated many of his more warlike magnates, but who could also inspire intense personal loyalty among his supporters. Even after death, Richard remained a serious threat to the survival of the Lancastrian dynasty.
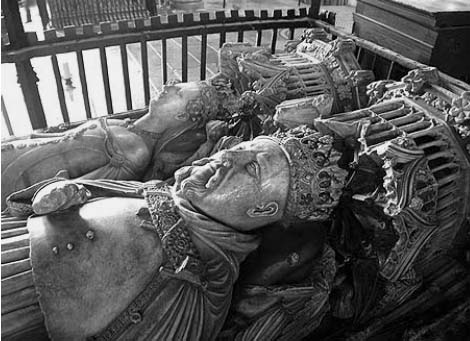
Henry IV and his wife, Queen Joanna: a young and vigorous man in 1399, Henry was worn down by the threats and difficulties he faced throughout his reign and died in 1413, sick and prematurely aged.

Prince Henry: this portrait – a copy of a reputedly contemporary painting – is unusual for the period, being in profile. However, it is noticeable that the left side of Henry’s face shows no sign of the scar that would have been very prominent from his injury at Shrewsbury.

The motte at Glyndyfrdwy: Glyn Dwr’s residence was probably close by. Here, his supporters mustered prior to the start of his rebellion in September 1400.
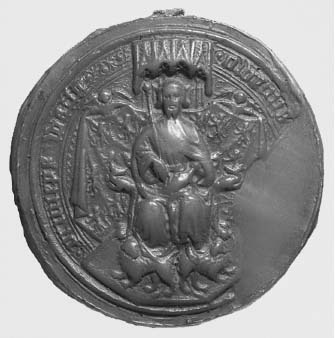
The Great Seal of Owain Glyn Dwr as Prince of Wales: this is the only known contemporary depiction of Glyn Dwr and was probably taken from life.
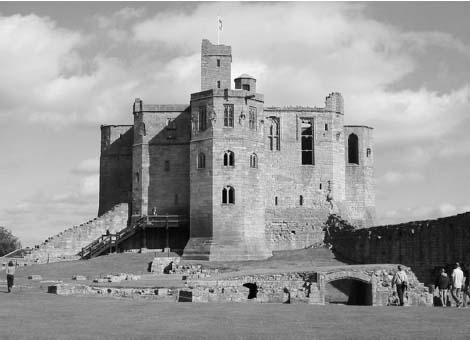
Warkworth Castle, Northumberland: as well as being a fortress, Warkworth was the Earl of Northumberland’s favourite residence.

Alnwick Castle, Northumberland: the main military stronghold of the Percys.
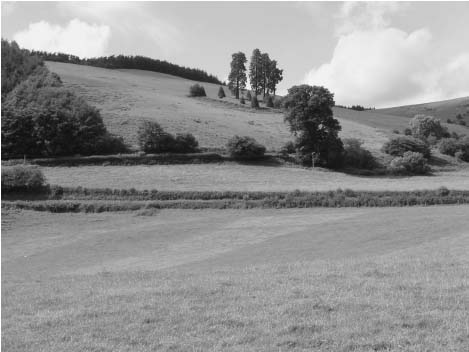
Pilleth: a view looking west towards Bryn Glas, showing the steep slope up which Mortimer’s army advanced. The row of poplars is said to mark the site of a grave pit.
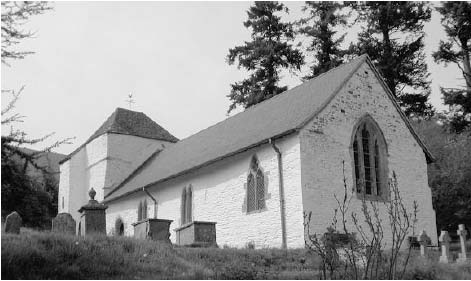
Pilleth: St Mary’s Church, near which many of the dead were buried.

Eighteenth–century map showing the site of the Battle of Homildon Hill.
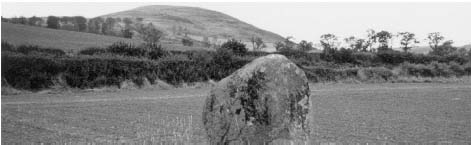
View of Homildon Hill: in the foreground is the ‘Battle Stone’, said to commemorate the battle.
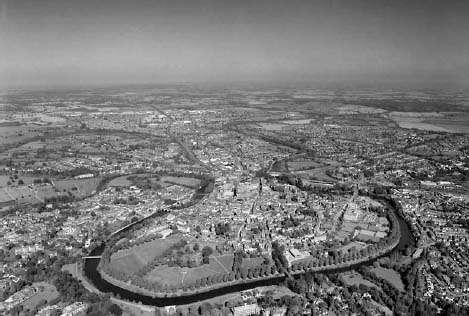
This aerial view of Shrewsbury makes clear how the old town was protected on three sides by the River Severn. The narrow neck of land on the northern side of the town was protected by the town walls and castle.
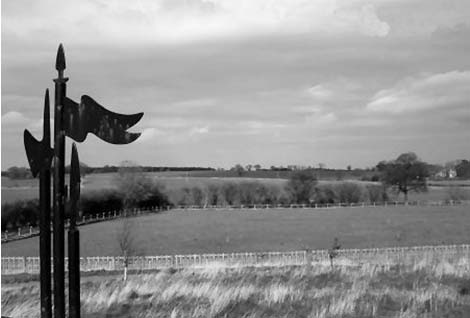
View of battlefield: a view looking north from the battlefield park observation mound towards the ridge east of Albright Hussey – probable location of the initial rebel position.
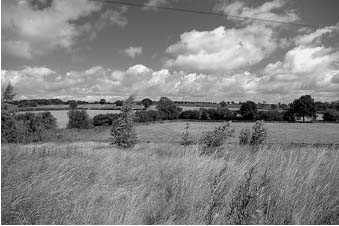
View of battlefield:a view of the battlefield looking northwards towards the ridge west from battlefield church.
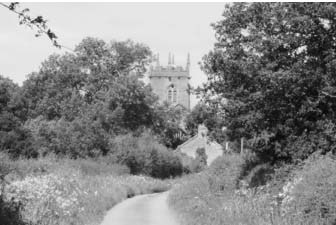
Church of St Mary Magdalen (Battlefield Church): built on the orders of Henry IV to commemorate the fallen at the Battle of Shrewsbury. It is said that a mass grave lies under or near the church but no trace has yet been found.

Harlech Castle: another of Edward I’s great fortresses, Harlech fell to Glyn Dwr in 1404 and was his headquarters for the next four years. it was regained by english forces in February 1409.
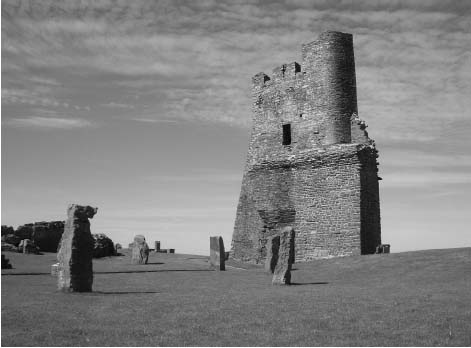
The remains of Aberystwyth Castle: besieged several times during the Glyn Dwr revolt, its eventual recapture by the English in 1408 was a major blow to Glyn Dwr.
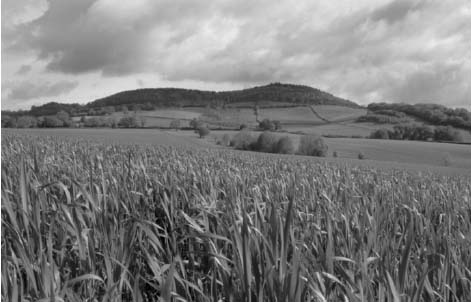
Woodbury Hill, Worcestershire: in August 1405 the Franco–Welsh army took position here in the deepest penetration into England by Glyn Dwr.